LCD-160 Manual — P/N 51850:D2 10/07/2016 11
Installation Overview System Overview
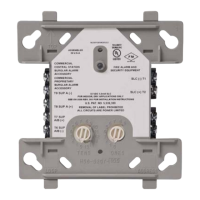
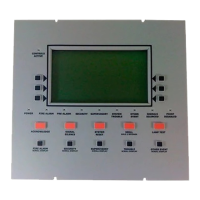
Diagnostic LED Indicators
LED indicators 11 through 14 aid in troubleshooting the LCD-160 and are visible to the installer
only. Figure 3.1 shows the locations of the diagnostic LED indicators. Table 3.1 lists and describes
the function of each of these diagnostic LED indicators. LED Indicators 1 through 10 indicate
system status and are visible to the user. See “Status LED Indicators” on page 24 for information on
LED indicators 1 – 10.
3.4 Installation Overview
1. Mount and ground the cabinet or backbox (Section 5.1).
2. Pull wiring into backbox (Figure 5.1).
3. Configure RDP bus ELR DIP switch (Figure 6.4).
4. Connect Earth Ground to a mounting screw on the backbox or cabinet (Section 6.3).
5. Mount the optional Annunciator Key Switch (Section 6.5).
If mounting into a CAB-4 series backbox: (Section 4)
1. Mount the LCD-160 to the dress panel (Figure 5.2).
2. Mount the dress panel to the backbox.
3. Make all electrical connections:
• RDP bus & shielding if necessary. (Figures 6.2 & 6.3)
• Power circuit (Figure 6.6)
4. Attach doors to backboxes (Section 5.2).
5. Power up system according to instructions in the control panel manual.
6. Configure the LCD-160 (Section 9.1).
If mounting into an ABS-2D/4D or ABF-2B/4B backbox: (Section 4)
1. Make all electrical connections:
• RDP bus & shielding if necessary. (Figures 6.2 & 6.3)
• Power circuit (Figure 6.6)
2. Mount the LCD-160 in the backbox.
3. Attach doors to backboxes (Section 5.2).
4. Power up system according to instructions in the control panel manual.
5. Configure the LCD-160 (Section 9.1).
Reference LED Name Color Description
LED11 STATUS Green Blinks when the LCD-160 is on.
• Installer/Troubleshooting only.
LED12 RECEIVE Green Blinks when data is received from the panel.
• Installer/Troubleshooting only.
LED13 TRANSMIT Green Blinks when data is transmitted to the panel.
• Installer/Troubleshooting only.
LED14 MICROFAIL Yellow Illuminates if the microcontroller fails.
• Installer/Troubleshooting only.
Table 3.1 Diagnostic LED Indicators
 Loading...