48
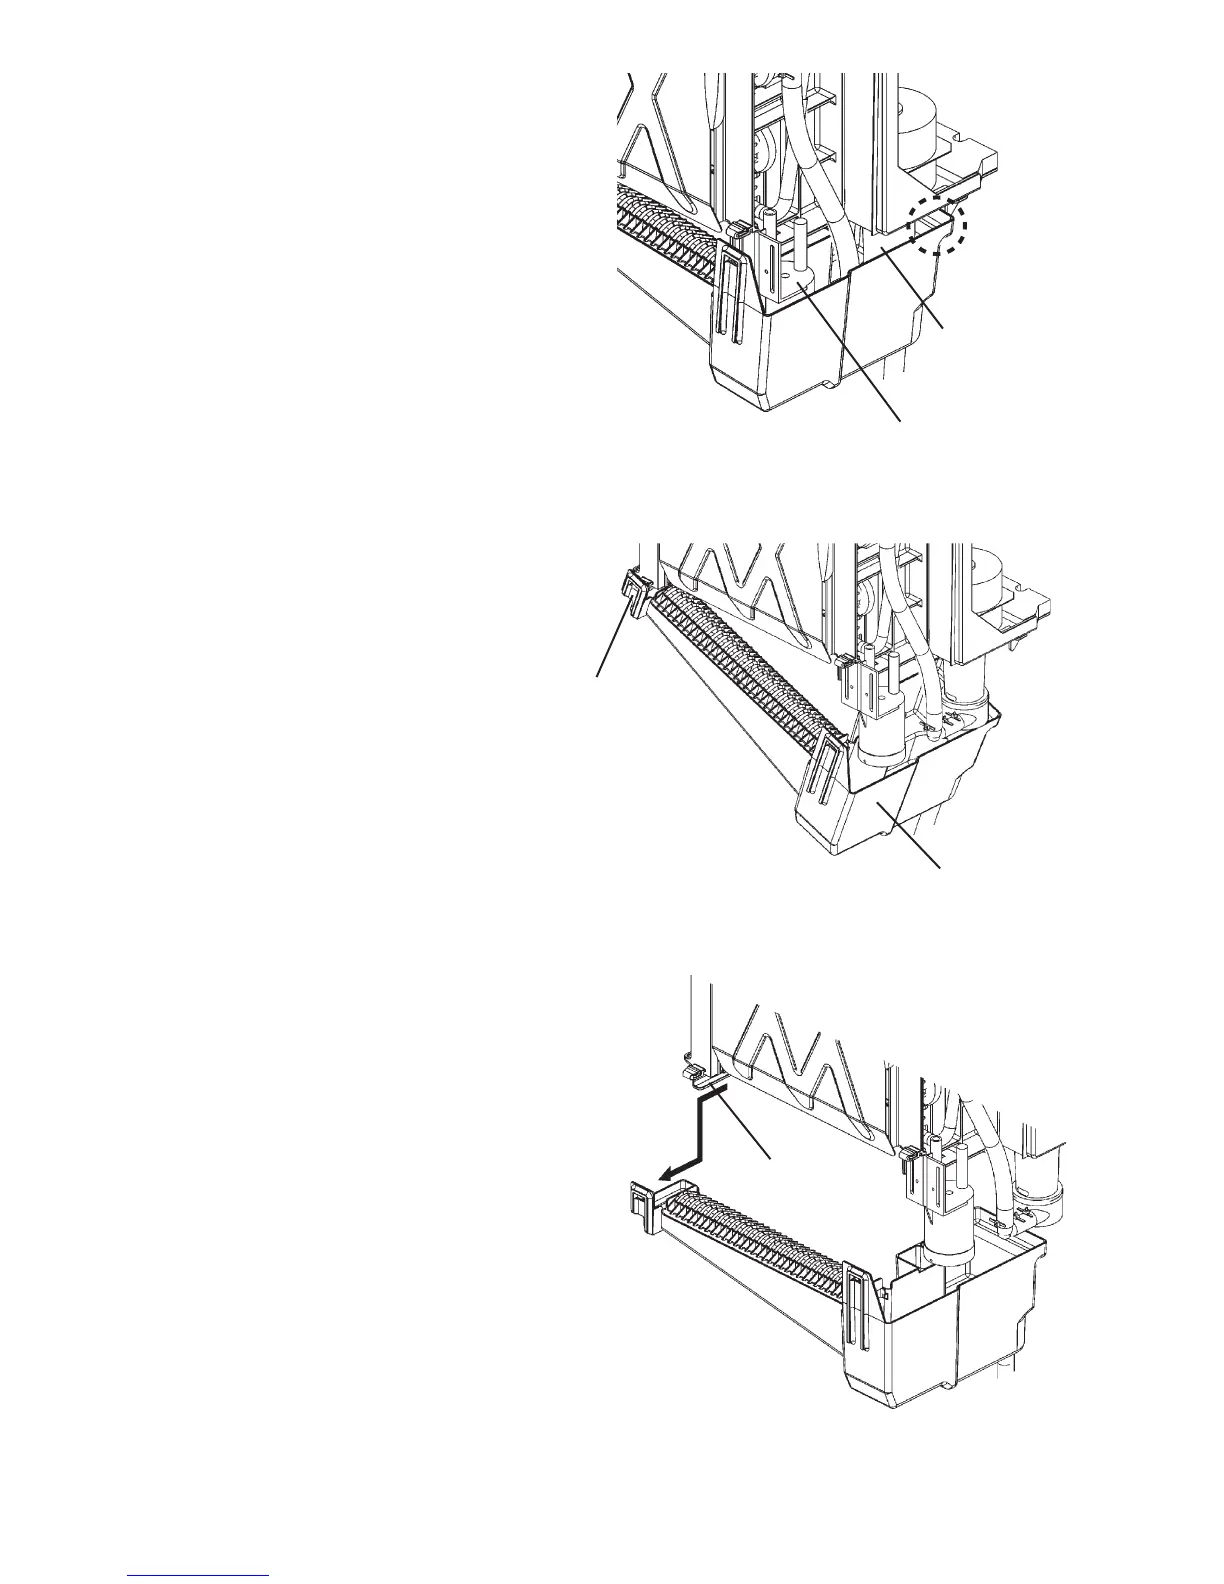
6) Slide the left side of the water tank to
release it from the bracket rail, lower
the entire water tank, and pull it towards
you out of the storage bin. Do not hit the
other components.
7) Replace the water tank in the reverse
order of the removal procedure (left,
right, top, rear).
8) Plug in the appliance, then move the
control switch to the “ICE” position.
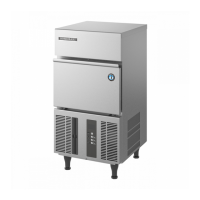
Fig. 17
Pump Motor
Float Switch
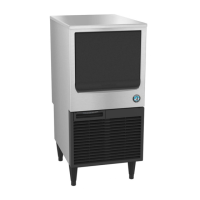
Fig. 18
Right Side
Left Side
4) When the snaps are unhooked from the
square holes, the rear part of the water
tank (dotted circle in Fig. 17) is also
unhooked. Hold the water tank with both
hands.
5) Tilt the right side of the water tank and
pull it towards you. Do not hit the pump
motor or float switch. Slightly twist the
left side of the water tank inward and
pull it towards you.
Fig. 19
Bracket Rail
 Loading...