47
Thermistor • Attach the new thermistor to the same location on the previous thermistor.
• Smoothly ¿ ll the recessed area of the thermistor holder with high thermal conductive
type sealant. Hoshizaki America part number 4A0683-01 (Silicone Heat Sink
Compound 10-8108 manufactured by GC Electronics), KE-4560 RTV (manufactured
by ShinEtsu Silicones), or equivalent are recommended.
• Attach the new thermistor in position and press down the thermistor holder over the
thermistor.
• Be very careful to prevent damage to the leads.
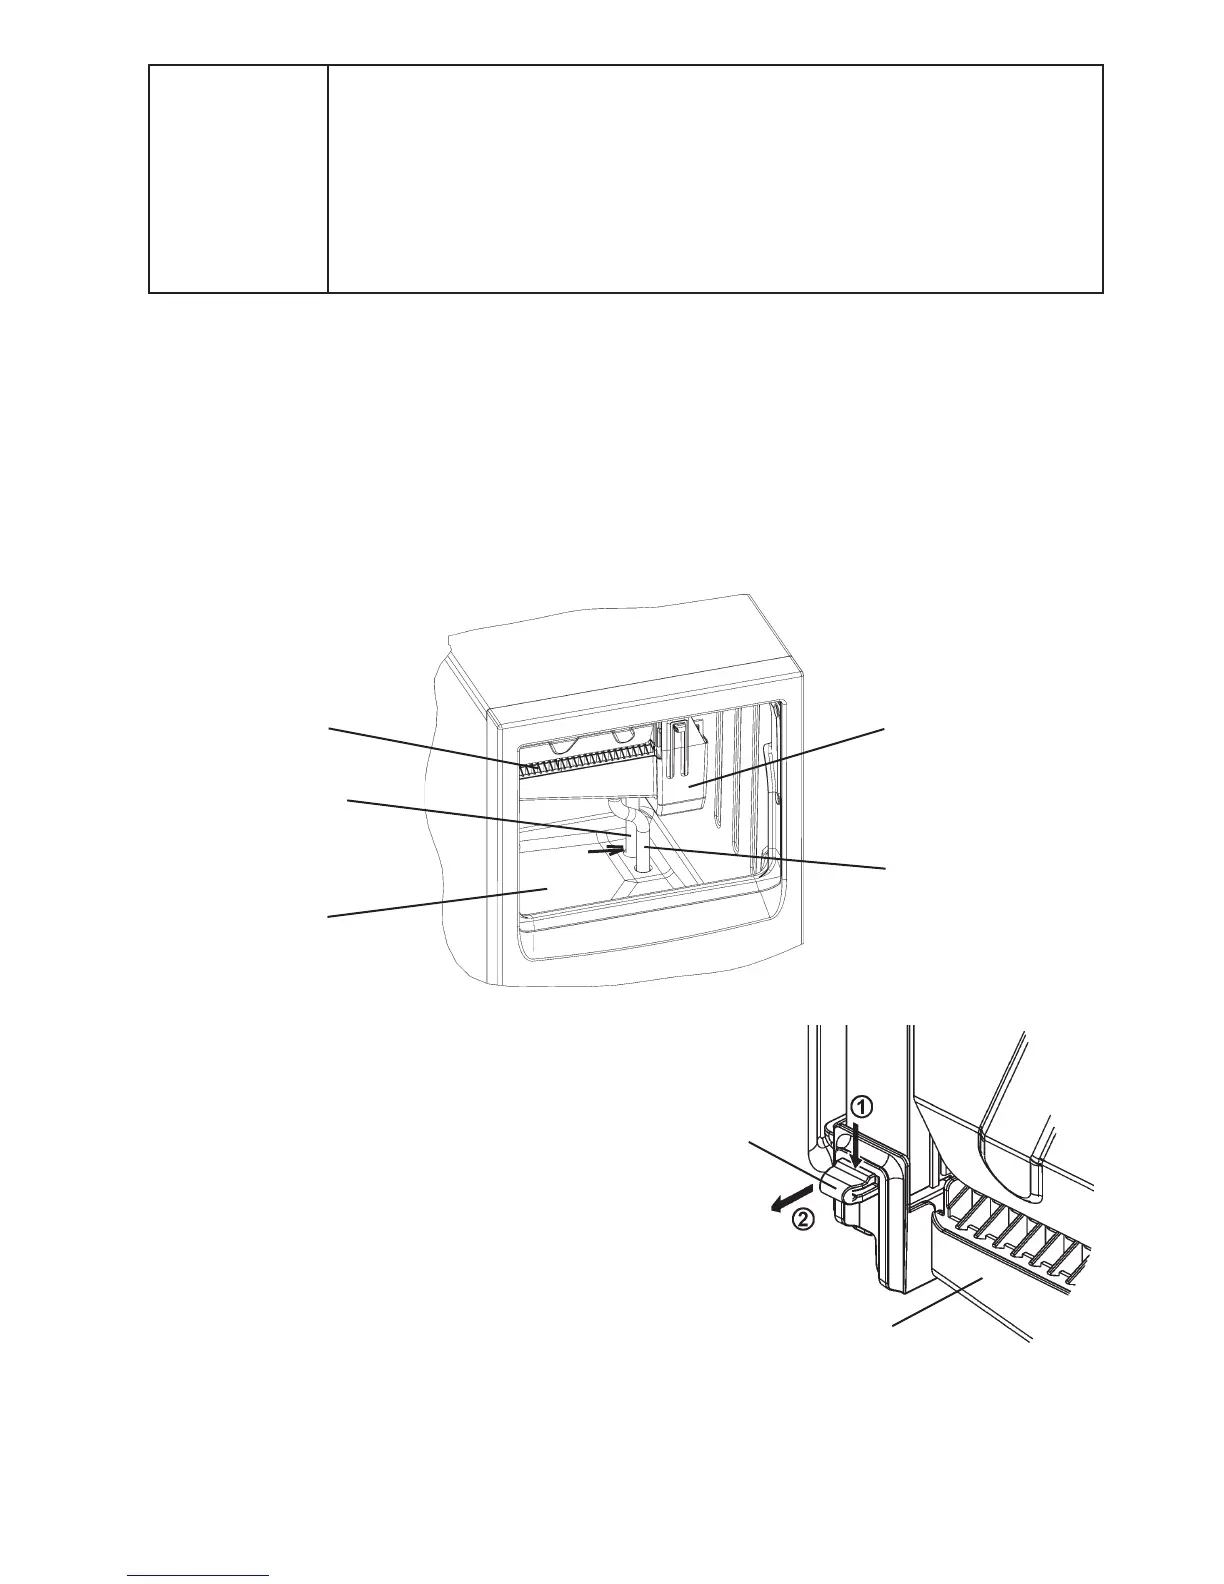
C. Water Tank
1) Remove the air ¿ lter. Move the control switch to the “OFF” position, then unplug the
appliance. Remove all ice from the storage bin.
2) Drain the water tank by pulling off the overÀ ow pipe from the water tank bottom and
the silicone hose from the storage bin bottom. See Fig. 15.
Fig. 15
Cube Guide
Silicone Hose
(Connect/disconnect
where indicated)
Storage Bin
Water Tank
OverÀ ow Pipe
(Disconnect from
tank bottom)
3) Pinch and push down the snaps on both
sides of the bracket to unhook the water
tank from the square holes, and pull it
about 1” towards you.
Fig. 16
Water Tank
Snap
Pinch
Pull
 Loading...