Section
V
P~ag~aphs 5-36 to 5-50
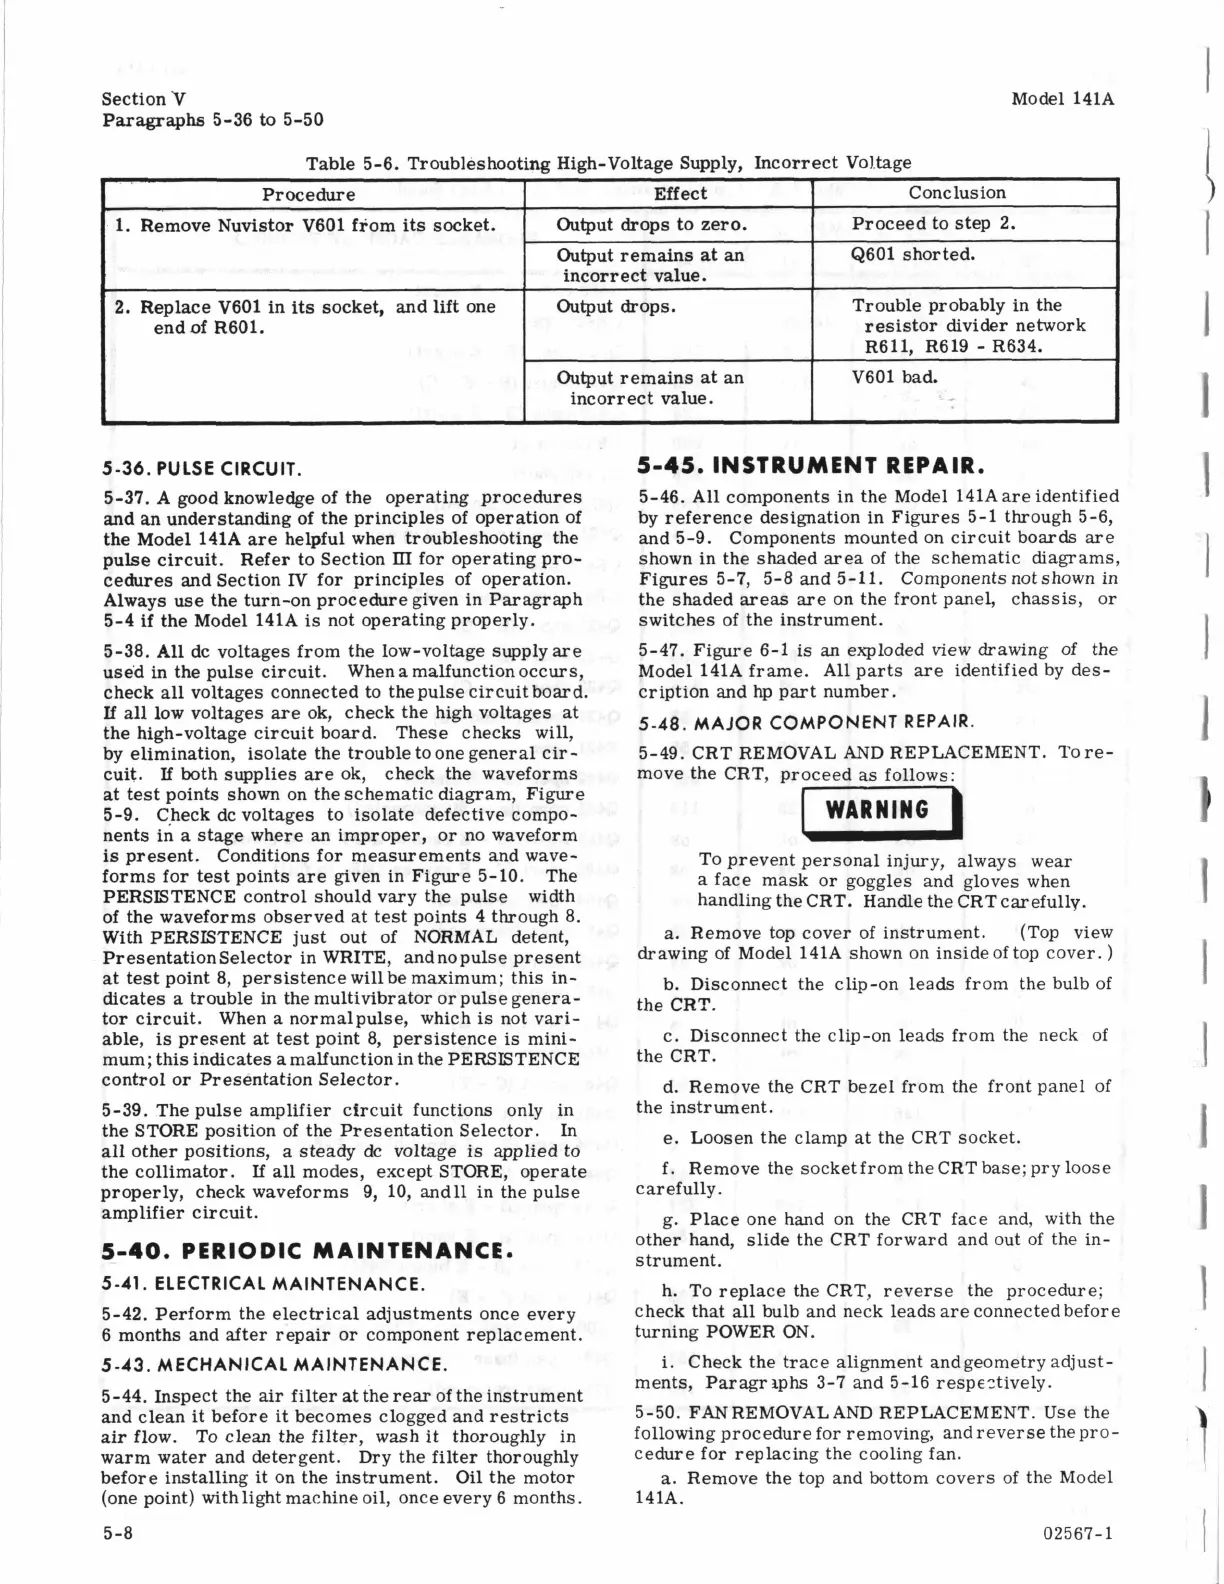
Procedure
1.
Remove Nuvistor V601 from
its
socket.
2.
Replace V601 in
its
socket, and
lift
one
end
of
R601.
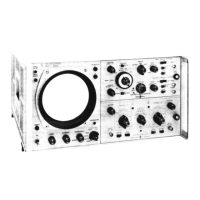
Model
141A
1
Effect Conclusion
Output
drops
to zero.
Output remains
at
an
incorrect value.
Output drops.
Proceed to step
2.
Q601 shorted.
Trouble probably in the
resistor divider network
R611, R619
-
R634.
Output remains
at
an
V601 bad.
incorrect value.
5-36.
PULSE CIRCUIT.
5-37.
A
good
knowledge of the operating procedures
and
an
understanding of the principles of operation of
the Model
141A
are helpful when troubleshooting the
pulse circuit. Refer to Section
Ill
for operating pro-
cedures and Section
IV
for principles of operation.
Always use the turn-on procedure given in Paragraph
5-4
if
the Model 141A
is
not operating properly.
5-38. All dc voltages from the low-voltage supply
are
used in the pulse circuit. When a malfunction occurs,
check
all
voltages connected to thepulse circuit board.
If
all
low voltages are ok, check the high voltages at
the high-voltage circuit board. These checks will,
by elimination, isolate the trouble to one general cir
-
cuit.
If
both supplies
are
ok,
check the waveforms
at
test points shown on the schematic diagram, Figure
5-9. Check dc voltages to isolate defective compo-
nents in
a
stage where an improper,
or
no waveform
is
present. Conditions for measurements and wave-
forms for test points are given in Figure 5-10. The
PERSISTENCE control should vary the pulse width
of the waveforms observed at test points 4 through
8.
With PERSISTENCE just out of NORMAL detent,
PresentationSelector in
WRITE,
andnopulse present
at
test point
8,
persistence will be maximum; this in-
dicates
a
trouble in the multivibrator or pulse genera-
tor circuit. When
a
normalpulse, which
is
not vari-
able,
is
present at test point
8,
persistence
is
mini-
mum; this indicates
a
malfunction in the PERSISTENCE
control or Presentation Selector.
5-39. The pulse amplifier circuit functions only in
the STORE position of the Presentation Selector.
In
all
other positions,
a
steady dc voltage is applied to
the collimator.
If
all
modes, except STORE, operate
properly, check waveforms 9,
10,
and11 in the pulse
amplifier circuit.
5-40.
PERIODIC MAINTENANCE.
5-41.
ELECTRICAL MAINTENANCE.
5-42. Perform the electrical adjustments once every
6 months and after repair
or
component replacement.
5-43.
MECHANICAL MAINTENANCE.
5-44. Inspect the
air
filter
at
the
rear
of the instrument
and clean
it
before
it
becomes clogged and restricts
air
flow.
To
clean the filter, wash it thoroughly in
warm water and detergent. Dry the filter thoroughly
before installing it on the instrument. Oil the motor
(one point) with light machine oil, once every
6
months.
5-8
5-45.
INSTRUMENT REPAIR.
5-46.
All
components in the Model 141Aare identified
by reference designation in Figures 5-1 through 5-6,
and 5-9. Components mounted on circuit boards are
shown in the shaded area of the schematic diagrams,
Figures 5-7, 5-8 and 5-11. Components notshown in
the shaded
areas
are on the front panel, chassis,
or
switches of the instrument.
5-47. Figure 6-1 is
an
exploded
view
drawing of the
Model 141A frame.
All
parts are identified by des-
cription and hp part number.
5-48.
MAJOR
COMPONENT REPAIR.
5-49. CRT REMOVAL
AND
REPLACEMENT. Tore-
move the CRT, proceed as follows:
pGi-1
TO prevent personal injury, always wear
a face mask
or
goggles and gloves when
handling the CRT. Handle the CRT carefully.
a. Remove top cover of instrument. (Top view
drawing of Model
141A
shown on inside of top cover.
)
b. Disconnect the clip-on leads from the bulb of
the CRT.
c. Disconnect the clip-on leads from the neck of
the CRT.
d. Remove the CRT bezel from the front panel of
the instrument.
e.
Loosen the clamp at the CRT socket.
f.
Remove the socket from the CRT base; pry loose
carefully.
g. Place one hand on the CRT face and, with the
other hand, slide the CRT forward and out of the in-
strument.
h. To replace the CRT, reverse the procedure;
check that all bulb and neck leads are connected before
turning POWER ON.
i.
Check the trace alignment andgeometry adjust-
ments, Paragraphs 3-7 and 5-16 respeztively.
5-50. FANREMOVALAND REPLACEMENT. Use the
following procedure for removing, and reverse thepro-
cedure for replacing the cooling fan.
a.
Remove the top and bottom covers of the Model
141A.
02567-1
I
1
I
I
1
1
1
I
!
1
1
1
I
1
1
I
1
1
I
I
I
I