Model
5528A
Squareness
Mea
s
urement
s (In a
Verlic
al Plane)
7.
Mount
the Straightness Accessory Kit
's
Straightn
ess
R
etror
e
flector
where the
tool
normall
y
mount
s,
as
shown in Figure
13
·6
.
6.
Screw the Interferometer
into
the large Re
lr
orefl
ec
tor, using the
two)
mm
flathead
sc
rews
provided.
9.
Orient the Re
lro
reflector
so
it overlaps the
Optic
al
Sq
uar
e and the
Turning
M i
rror
,
but
wi
th
the Interferometer over the
Opti
cal Square.
10
.
Fa
sten the Re
tro
reflector il
sse
mbly to th e
ma
chine ir, such a way that the Int
erferometer
is
as
square
as
p
ossi
bl
e to the
Opti
ca
l Square and to the inco
ming
beam.
Th
e I
nterferometer
hou
si
n
lS's
pitch limitations are ± 2 degree
s;
its yaw and
rolilimilations
are ± S degrees.
Th
e
pitch and
yaw
requirements will be taken
ca
re o f automatica
ll
y by using the
St
raightne
ss
Relroreflec
tor
and an HP Post.
r<=
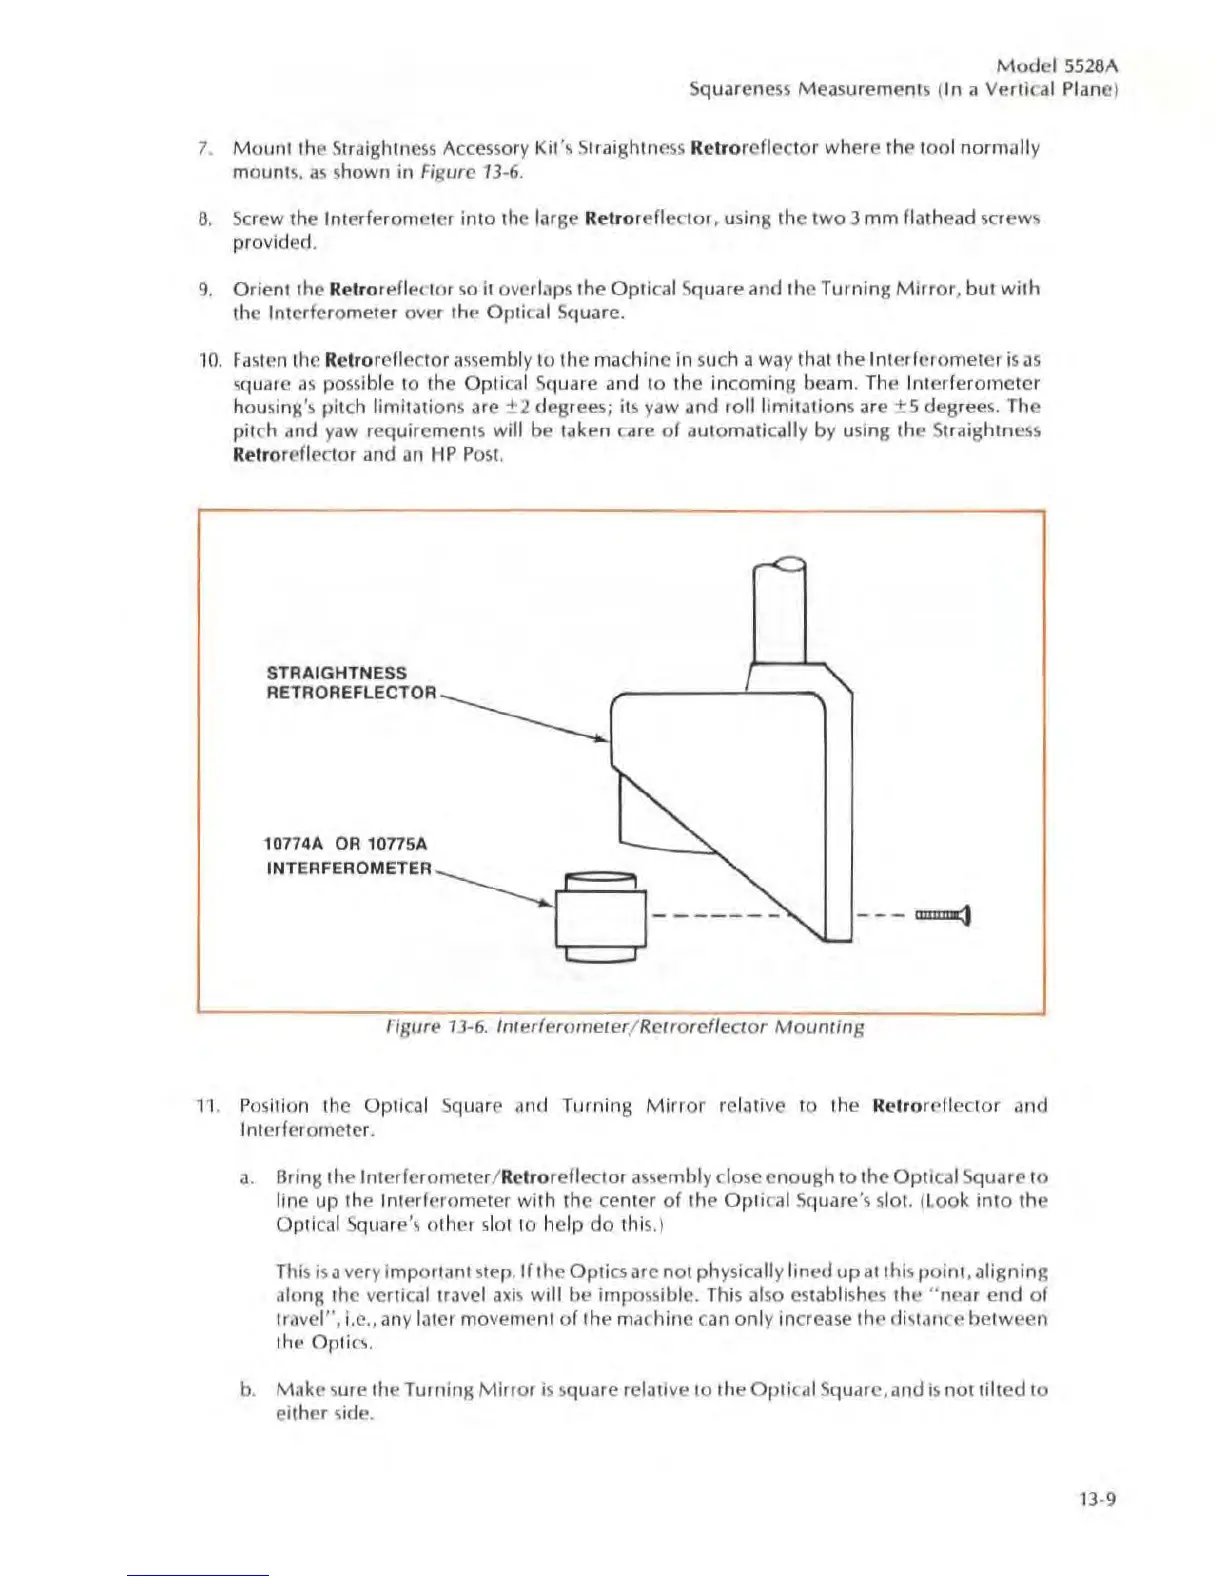
STRAIGHTNESS
'\
RETROREFLECTOR
---------..
10774A
OR
1077SA
~
INTERFEROMETER
---------"
rd
__
--~
_
___
~
rl
gu
re
1
J·
6.
Inlerf
er
ome
ler
j
Rclr
ore
ffe
cto
r
Moun/lng
1'
1.
P
os
ition the Optical Square and
Turnin
g
Mirror
relative to the Rc
tro
reflector
and
Inte
rf
e
rom
eter.
a. Bri ng the
Interf
e
romctcr
/
RClr
or
efl
ecto
r a
sse
mbl
y d o
se
enoug
h to the Optical Square to
line up the Interferometer with the center
of
the
Opti
ca
l Square's slot. (l
oo
k i
nt
o the
Optical
S
qua
r
e'~
ot her slat 10 he
lp
do
thi
s.
)
This
iSJ
ve
ry i
mporlant
ste
p.
If
the
Optic
s
ar
c not
ph
ysica
lly tined
lip
at
this
point,
ali
gni
ng
al
ong the
ve
rl
ica
l tra
ve
l axis w
ill
be impossibl
e.
This also
cs
ta
bli
sh
es
the "
near
end
of
travel
",
i.e
..
any later
mo
vement o f the
ma
c
hine
can
on
ly incr
ease
the
di
stance bet
wee
n
th
e
Op
t
ics.
b.
Make
sure the Turning
Mirr
or
is
s
qu
are relative to the
Optical
S
qu
ar
c,a
nd is
not
t
ilted
to
either side.
13·9