HP D300 Digital Dispenser
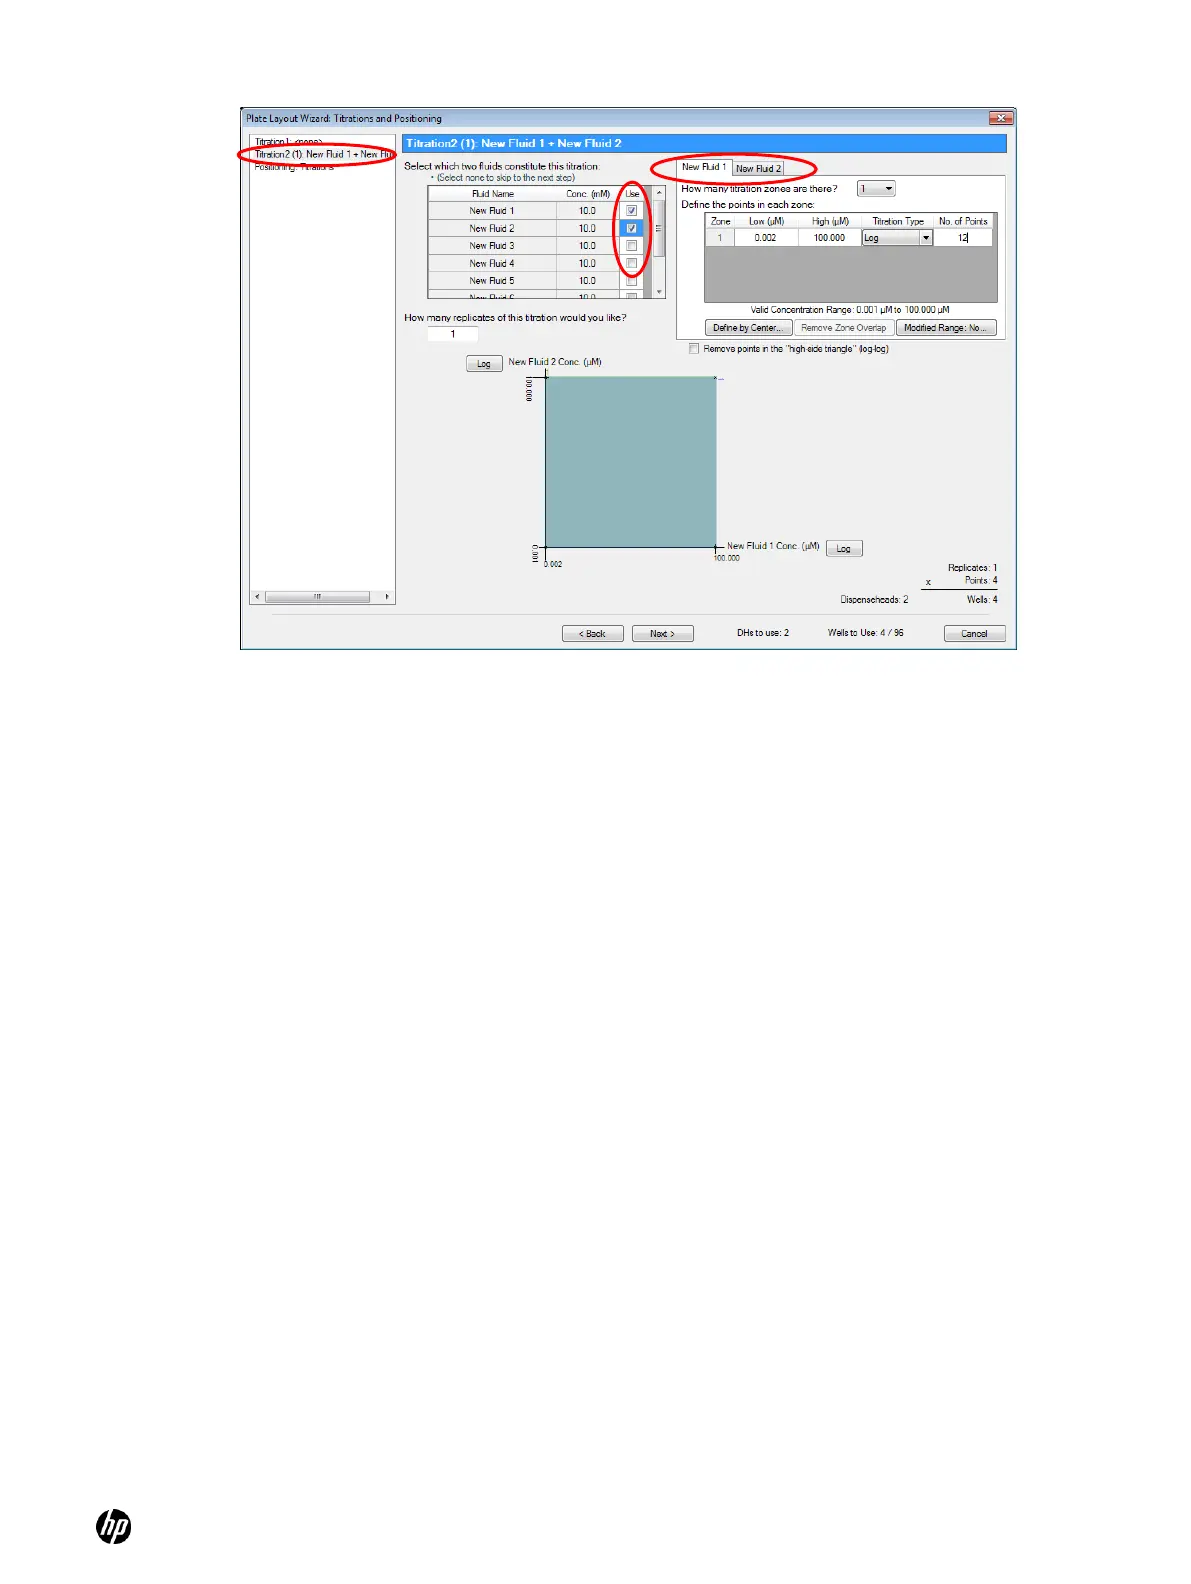
Figure 5-31 Titration2 pane of the Plate Layout Wizard: Titrations and Positioning dialog box
4. Define the titration for the first compound.
Notice that there are two tabs in the titration definition section of the Titration2 pane.
To keep things simple, we will use one replicate and one titration zone titration for both
compounds, over the maximum Valid Concentration Range of 2 nM to 100 µM. Of course,
more complicated designs can be created using the techniques described in the ―Create
multizone titration1 layout‖ section, and the ―Create modified range titration1 layouts‖
section.
a. Make sure the first tab is selected for the first compound fluid.
b. Select 1 in the How many titration zones are there? drop-down list box.
c. Type 0.002 in the Low (µM) column.
d. Type 100 in the High (µM) column.
e. Type 12 in the No. of Points column to create a 12-point singlet.
5. Click the second tab for the second compound and use the same settings as you did for fluid 1.
6. If desired, select the Remove points in the “high-side triangle” (log-log) check box.
In looking for additive effects one might choose to ignore the high-high drug concentration
combinations. This will result in removing all combinations of the two fluids which have a
combined concentration exceeding the average of the High (µM) concentrations of the two
fluids, the result of which is shown in the graph at the bottom of the dialog box.
7. Note that the design uses 78 of the 96 wells when the ―remove points in the high-side triangle‖
is selected, leaving room for controls on the plate.