10
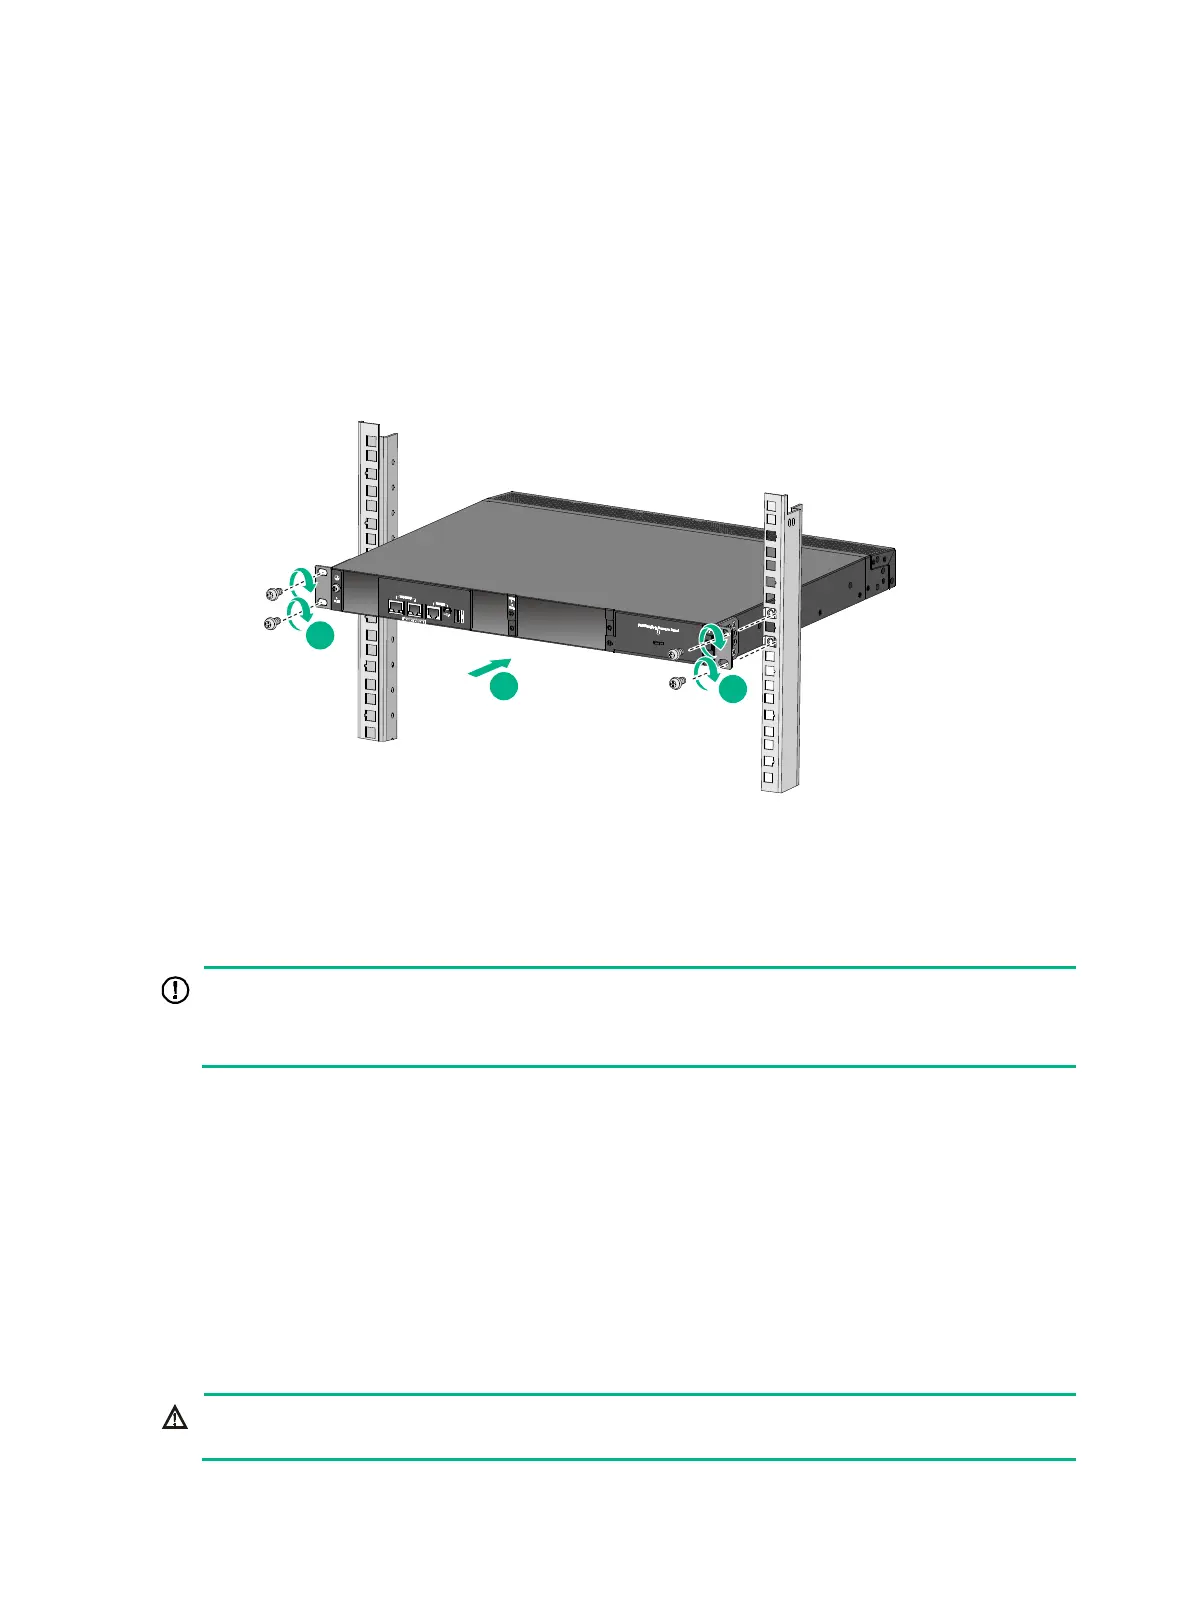
5. Mount the switch chassis in the rack:
a. One person supports the chassis bottom with one hand, holds the front part of the chassis
with the other hand, and pushes the chassis into the rack gently.
b. The other person attaches the front mounting brackets with M6 screws (user-supplied) and
cage nuts to the front rack posts.
Figure 6 Mounting the switch in the rack (front mounting brackets at the power supply
side)
Mounting the switch on a workbench
Ensure good ventilation and 10 cm (3.9 in) of clearance around the chassis for heat dissipation.
• Avoid placing heavy objects on the switch.
To mount the switch on a workbench:
1. Verify that the workbench is sturdy and reliably grounded.
2. Place the switch with bottom up, and clean the round holes in the chassis bottom with dry cloth.
3. Attach the rubber feet to the four round holes in the chassis bottom.
4. Place the switch with upside up on the workbench.
Grounding the switch
!
Correctly connecting the switch grounding cable is crucial to lightning protection and EMI protection.

 Loading...