Rack options 17
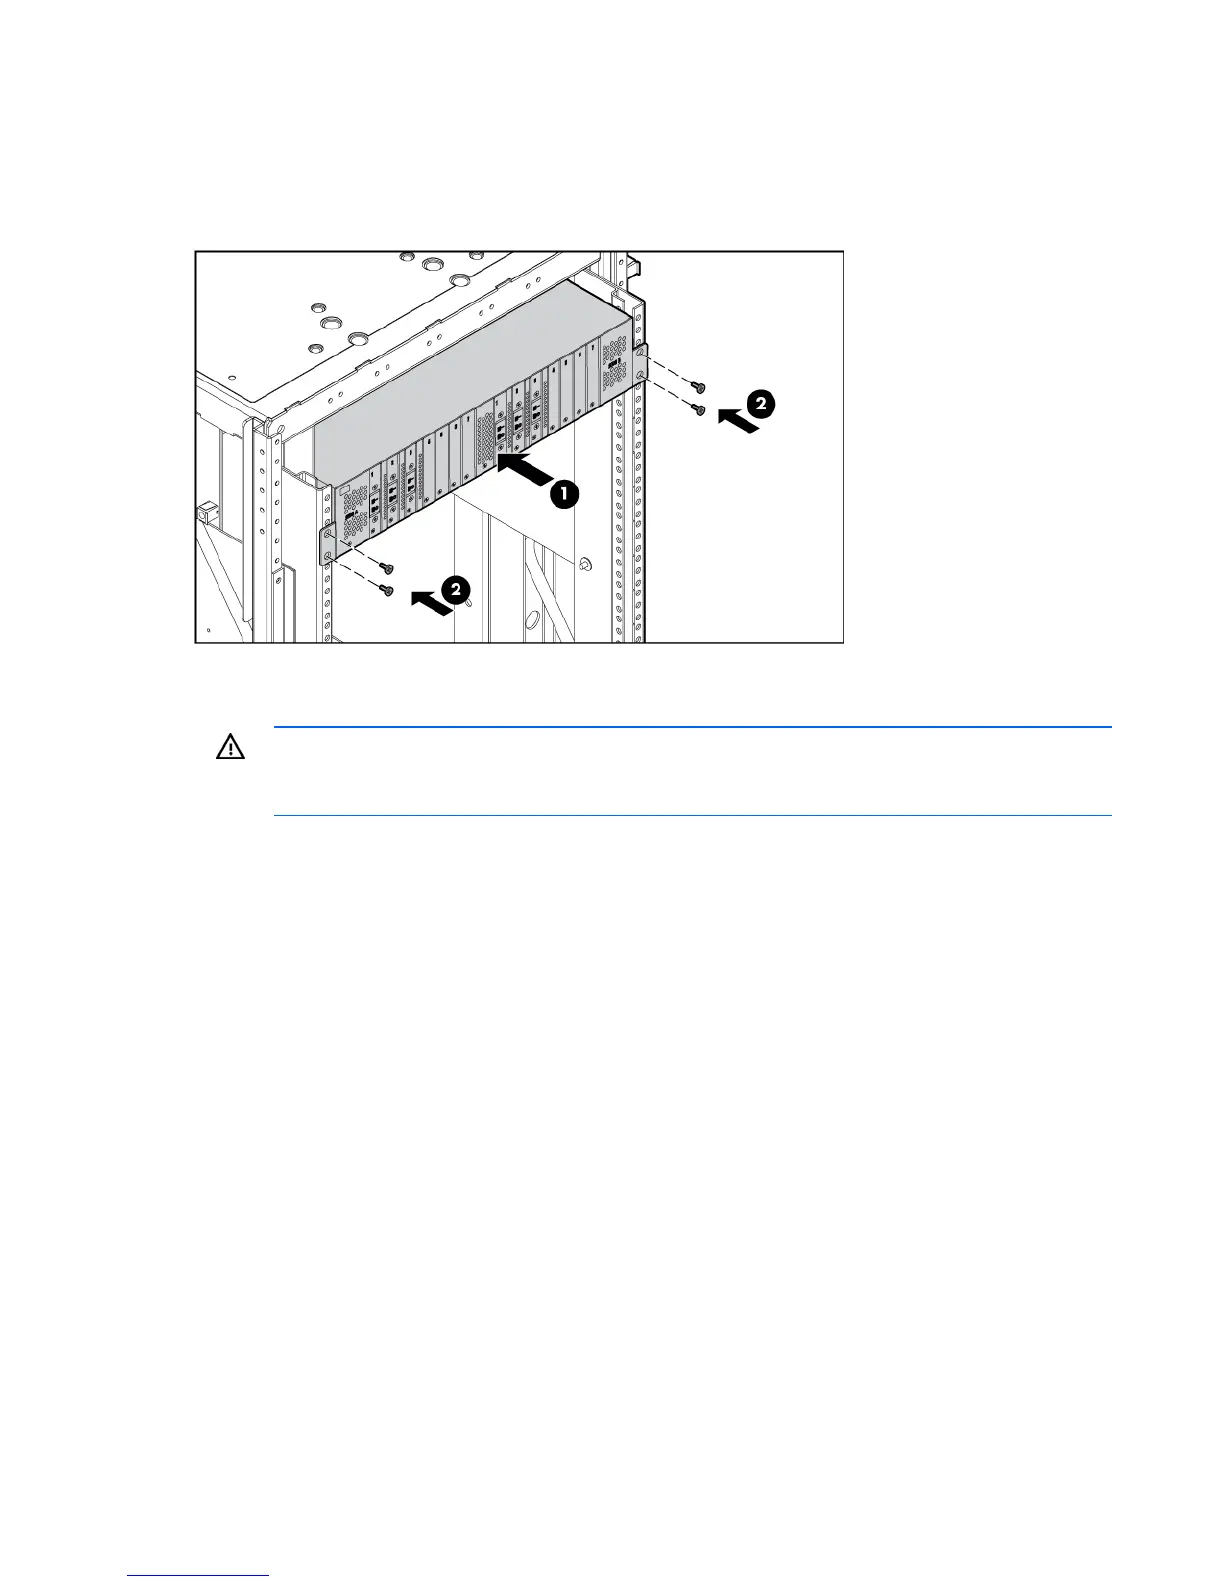
Installing the breaker panel into the rack
1. Align the rack support brackets on the breaker panel with the rail brackets, and slide the breaker
panel into the rack.
2. Secure the breaker panel with the screws provided.
Power cable connections for the breaker panel
WARNING: Only a certified electrician must connect power to the breaker panel. Before
removing the breaker panel rear cover, make sure that the power from the site into the
breaker panel is off, and switch all breakers in the front of the breaker panel off.
The breaker panels are installed from the top down, and the enclosures are installed from the bottom up.
In this configuration, the power cables are routed from the top breaker to the bottom enclosure and from
the bottom breaker to the top enclosure.
For connections up to 80A, use breakers 1-3. For connections up to 50A, use breakers 4-7. Each module
connecting to the breaker panel has a dedicated connection on Side A and Side B. Each module
connects to the same terminal number on each side. Verify that the breaker installed in the front of the
breaker is the correct amp size.
Installing Breaker Panel Output Power Cables
Lugs that connect to the breaker panel output terminals must be right angle lugs. For the 80A terminals,
use a two-hole 1/4-inch--0.63-inch lug. For the 50A terminals, use a single-hole #10 lug.
To install the breaker panel output power cables:
1. Remove the breaker panel rear cover.
2. For terminals 1-3, remove the Keps nuts on the terminals to be used.
3. For terminals 4-7, remove the nuts and lock washers on the terminals to be used.
4. Connect a module red source wire to the -48V/-60V terminal posts. Connect a module black return
wire to the RTN terminal posts.
5. For terminals 1-3, install lugs with the wires on top.
6. For terminals 4-7, install lugs with the wires on the bottom.
 Loading...


