HP OmniBook 6000 Removal and Replacement 2-23
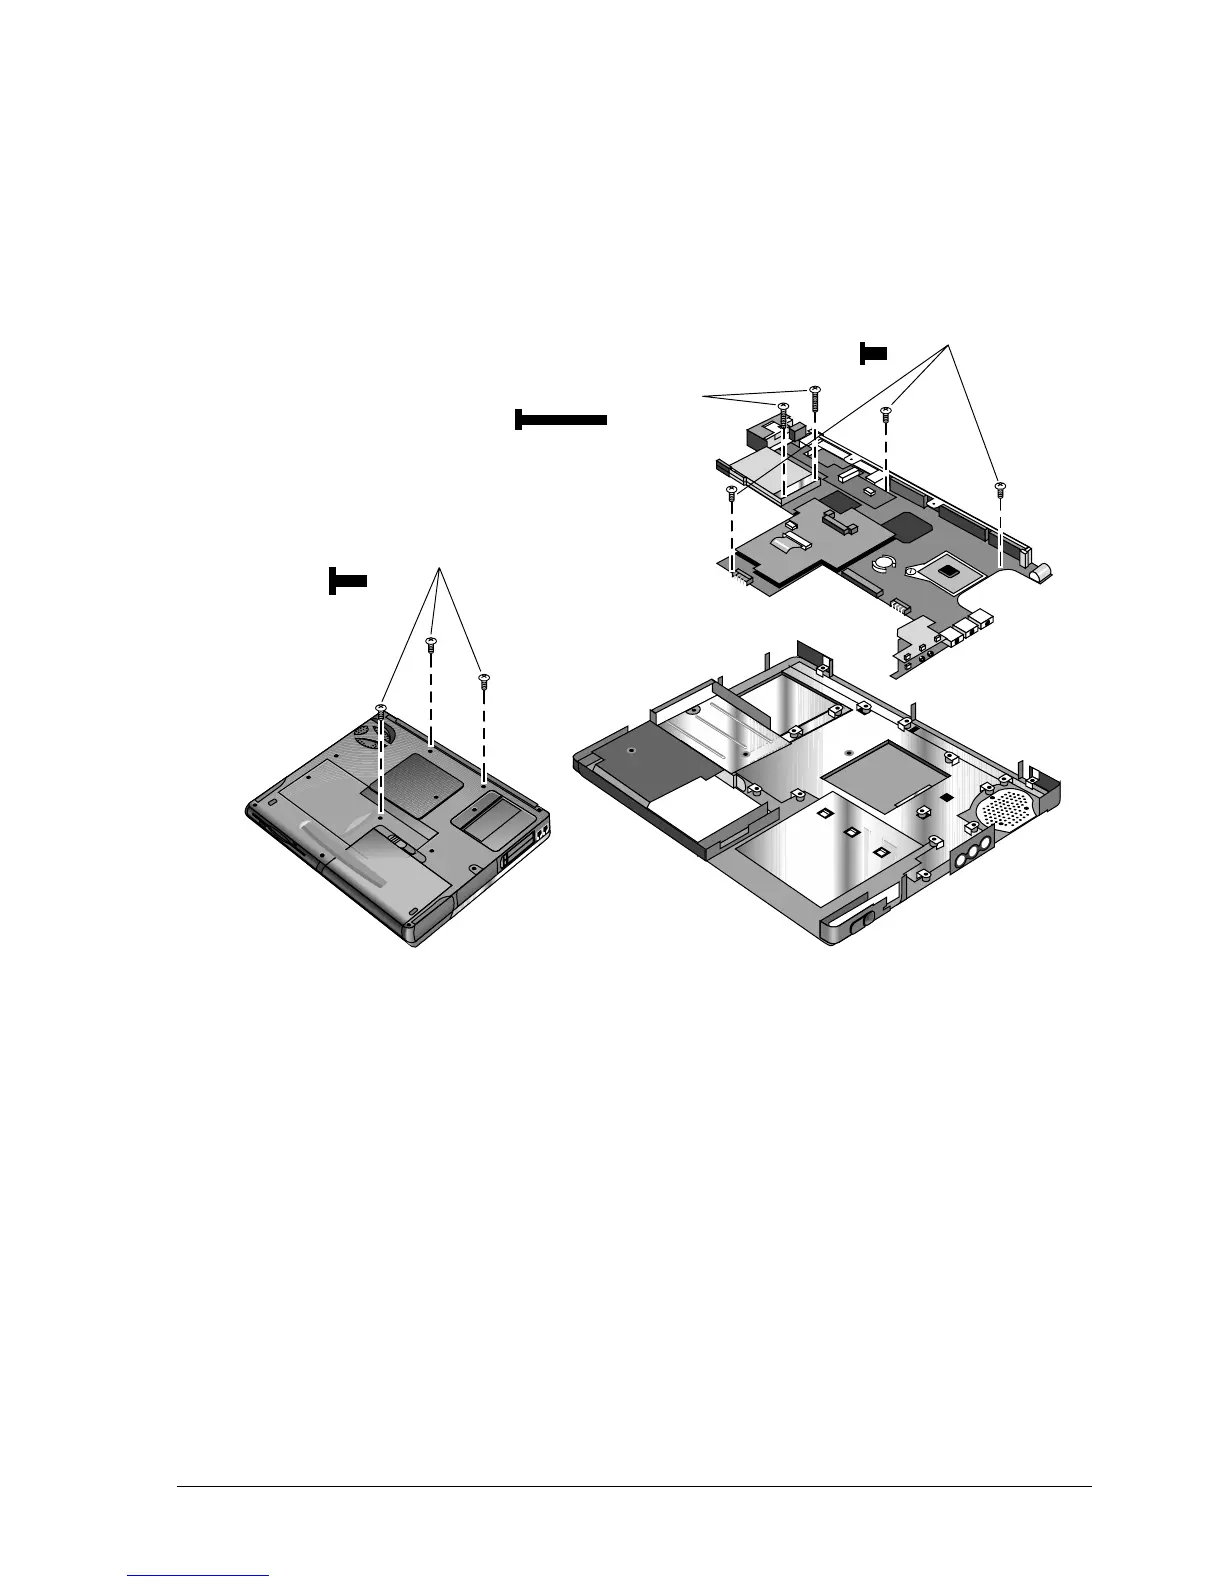
4. From the top of the computer, remove the six screws that attach the motherboard to the bottom
case.
5. Bend the casing that surrounds the audio connectors outward slightly to release the connectors.
6. Lift the motherboard off of the bottom case.
Figure 2-16. Removing the Motherboard
Reassembly Notes
• Insert the audio connectors through their openings in the bottom case, then lower the motherboard
into place.
• When reinstalling the sound/IR panel, make sure the volume control is oriented properly (pins
facing inward). Insert the tabs on the end of the panel into the slots in the bottom case.
• When installing the vent panel, insert the pin on the back end of the panel under the bracket on the
bottom case.
Screws, M2.5x6mm (3)
Screws, M2x15mm (2)
Screws, M2.5x4mm (3)

 Loading...


