EasyManuals Logo

HP ProLiant DL320e Gen8 v2 User Manual

HP ProLiant DL320e Gen8 v2
103 pages
To Next Page IconTo Next Page
To Previous Page IconTo Previous Page
Page #32 background imageLoading...
Page #32 background image
Setup 32
3.
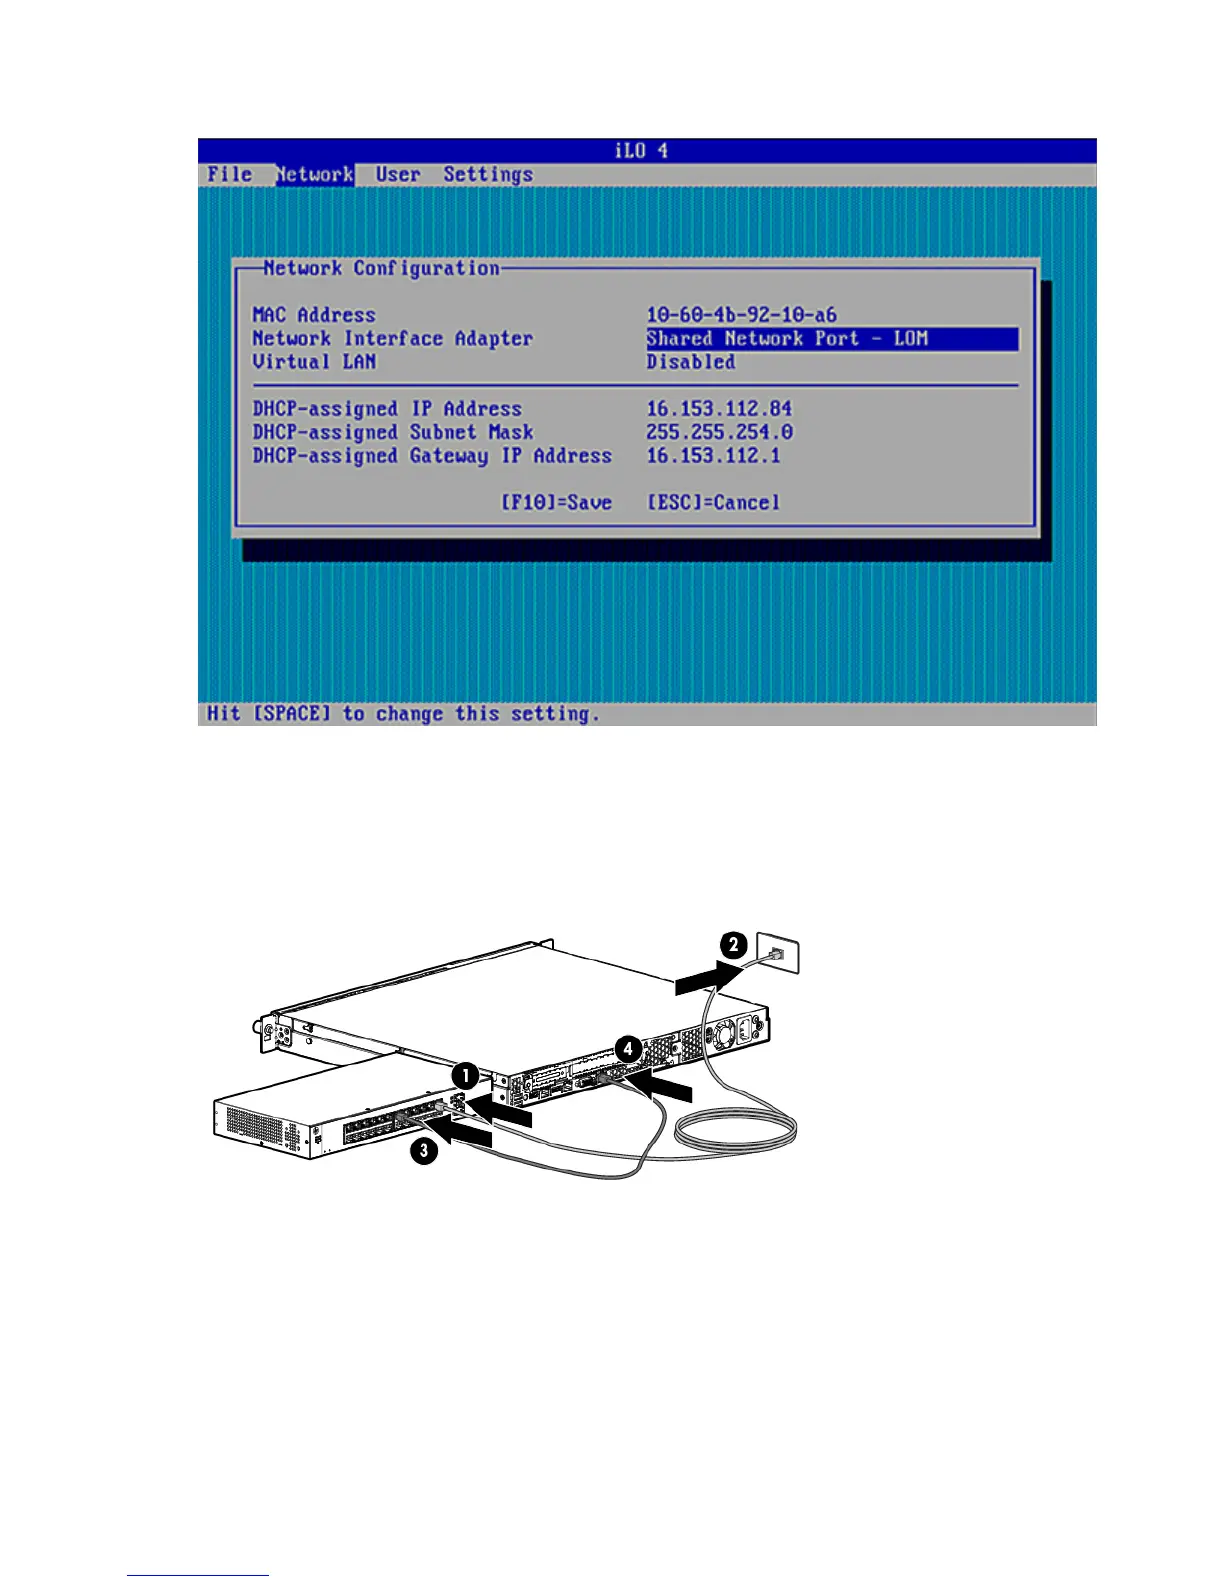
Set the Network Interface Adapter field to Shared Network Port LOM.
4. To save the change, press F10.
5. To close the iLO RBSU, under the File menu, select the Exit option.
6. Connect an Ethernet cable to the switch, and then connect the cable to a network jack.
7. Connect an Ethernet cable to the server NIC 1/shared iLO connector, and then connect the cable to any
switch network port.
Completing the switch Self-Test
1. Connect the power adapter to the switch.
2. Connect the power adapter to the AC power source.
3. Check the status of the switch Power LED. This LED is solid green to indicate that the power connection
is established.
4. Check the status of the following switch LEDs:

Table of Contents

Other manuals for HP ProLiant DL320e Gen8 v2

Questions and Answers:

Question and Answer IconNeed help?

Do you have a question about the HP ProLiant DL320e Gen8 v2 and is the answer not in the manual?

HP ProLiant DL320e Gen8 v2 Specifications

General IconGeneral
ProcessorIntel Xeon E3-1200 v3 series
Processor Sockets1
MemoryUp to 32GB
Memory Slots4
Form Factor1U Rack
Memory TypeDDR3 UDIMM
StorageUp to 4 LFF or 8 SFF drives
RAID SupportHP Dynamic Smart Array B120i
Expansion Slots1 PCIe 3.0
ManagementHP iLO

Related product manuals