Hardware options installation 35
For more information about product features, specifications, options, configurations, and compatibility, see
the product QuickSpecs on the HP website (http://www.hp.com/go/qs).
Drive installation guidelines
When adding drives to the server, observe the following general guidelines:
• The system automatically sets all device numbers.
• Populate drive bays, based on the drive numbering sequence. Start from the drive bay with the lowest
device number ("Drive numbering" on page 11).
• When drives are grouped together into the same drive array, they must be of the same capacity to
provide the greatest storage space efficiency.
Installing a non-hot-plug drive
To install the component:
1. Power down the server (on page 14).
2. Remove the power from the server:
a. Disconnect the power cord from the power source.
b. Disconnect the power cord from the server.
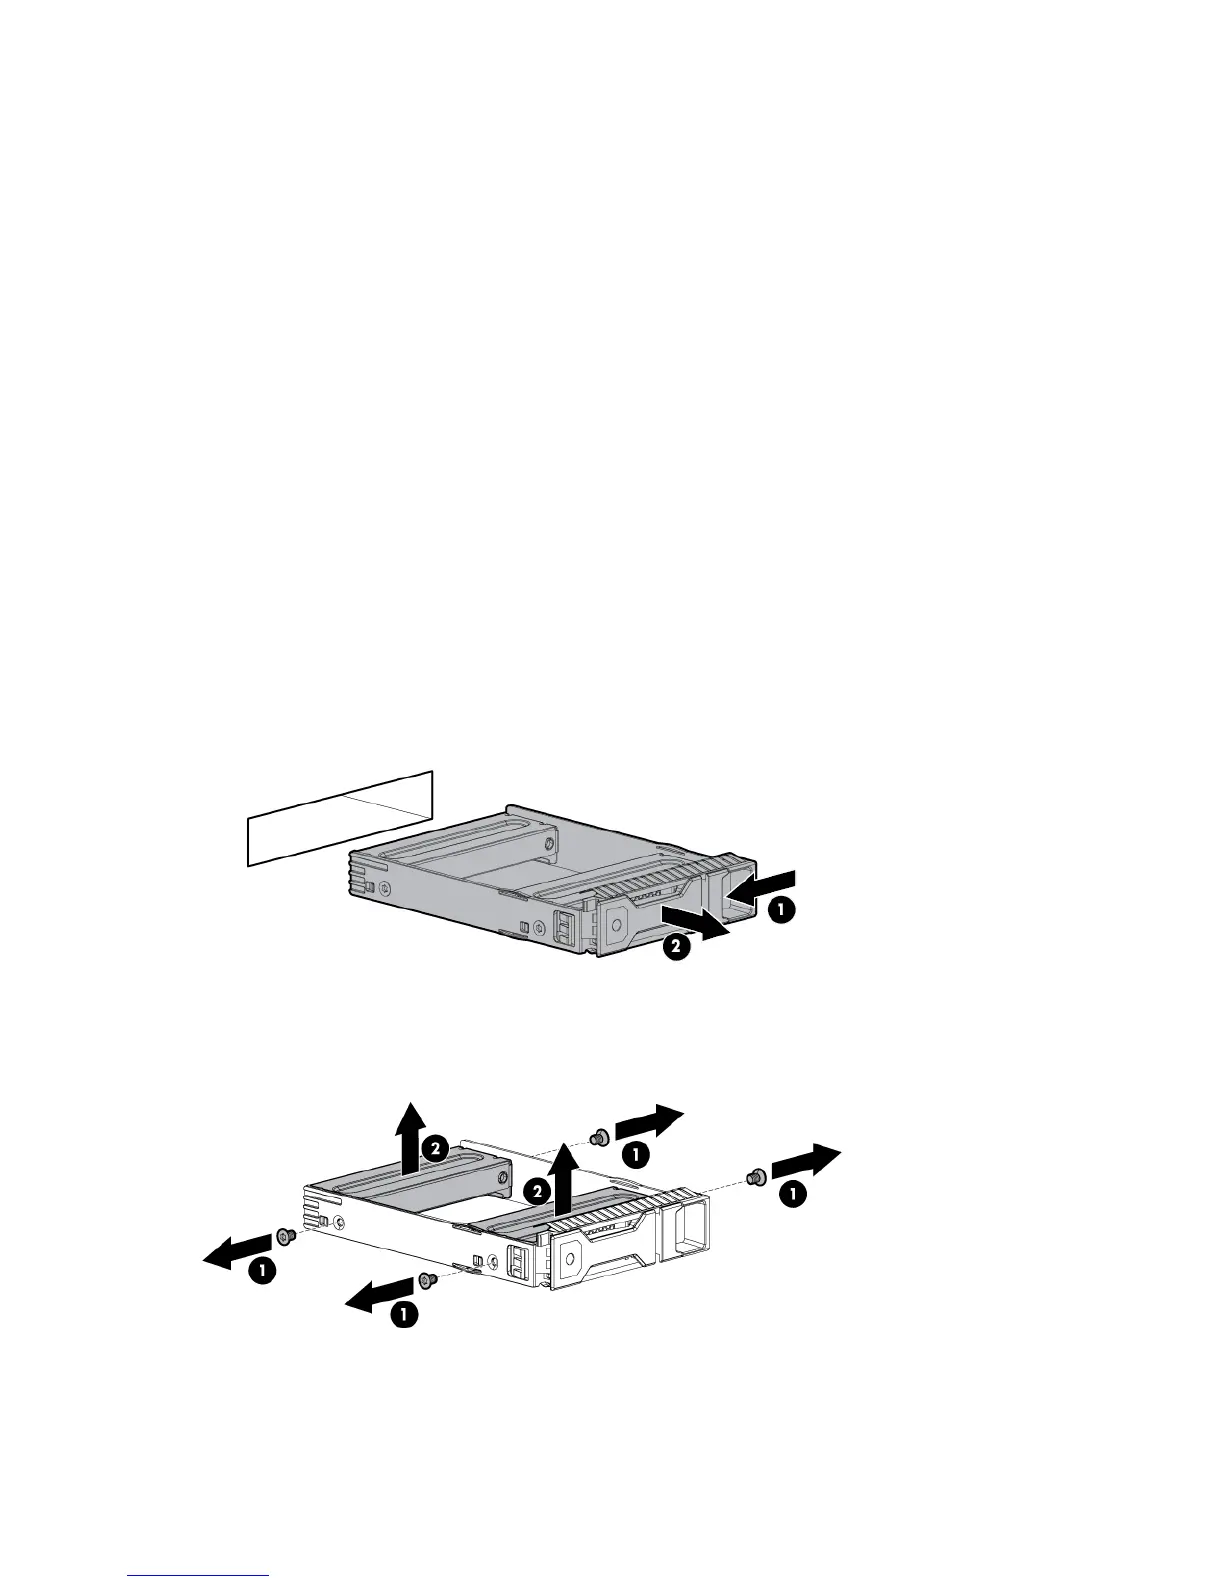
3. Remove the drive carrier.
4. Remove the two metal brackets from the drive carrier.

 Loading...