Hardware options installation 14
The password is encrypted and stored in flash memory. If you update the firmware, all data, passwords and
configurations are reset to default.
The MicroServer Remote Access Card supports following character categories:
• Uppercase letters: A, B, C
• Lowercase letters: a, b, c
• Numbers: 0, 1, 2, 3, 4, 5, 6, 7, 8, 9
• Symbol (Special characters): ` ~ @ # $ % & * ( ) _ - + = { } [ ] \ | : ; " ‘ < > , . ? /
SATA drive options
For more information about product features, specifications, options, configurations, and compatibility, see
the product QuickSpecs on the HP Product Bulletin website (http://www.hp.com/go/productbulletin).
The HP ProLiant MicroServer supports up to four non-hot-plug hard drives.
To install the component:
1. Power down the server (on page 6).
2. Place the server on a flat, level work surface.
3. Open the panel door (on page 6).
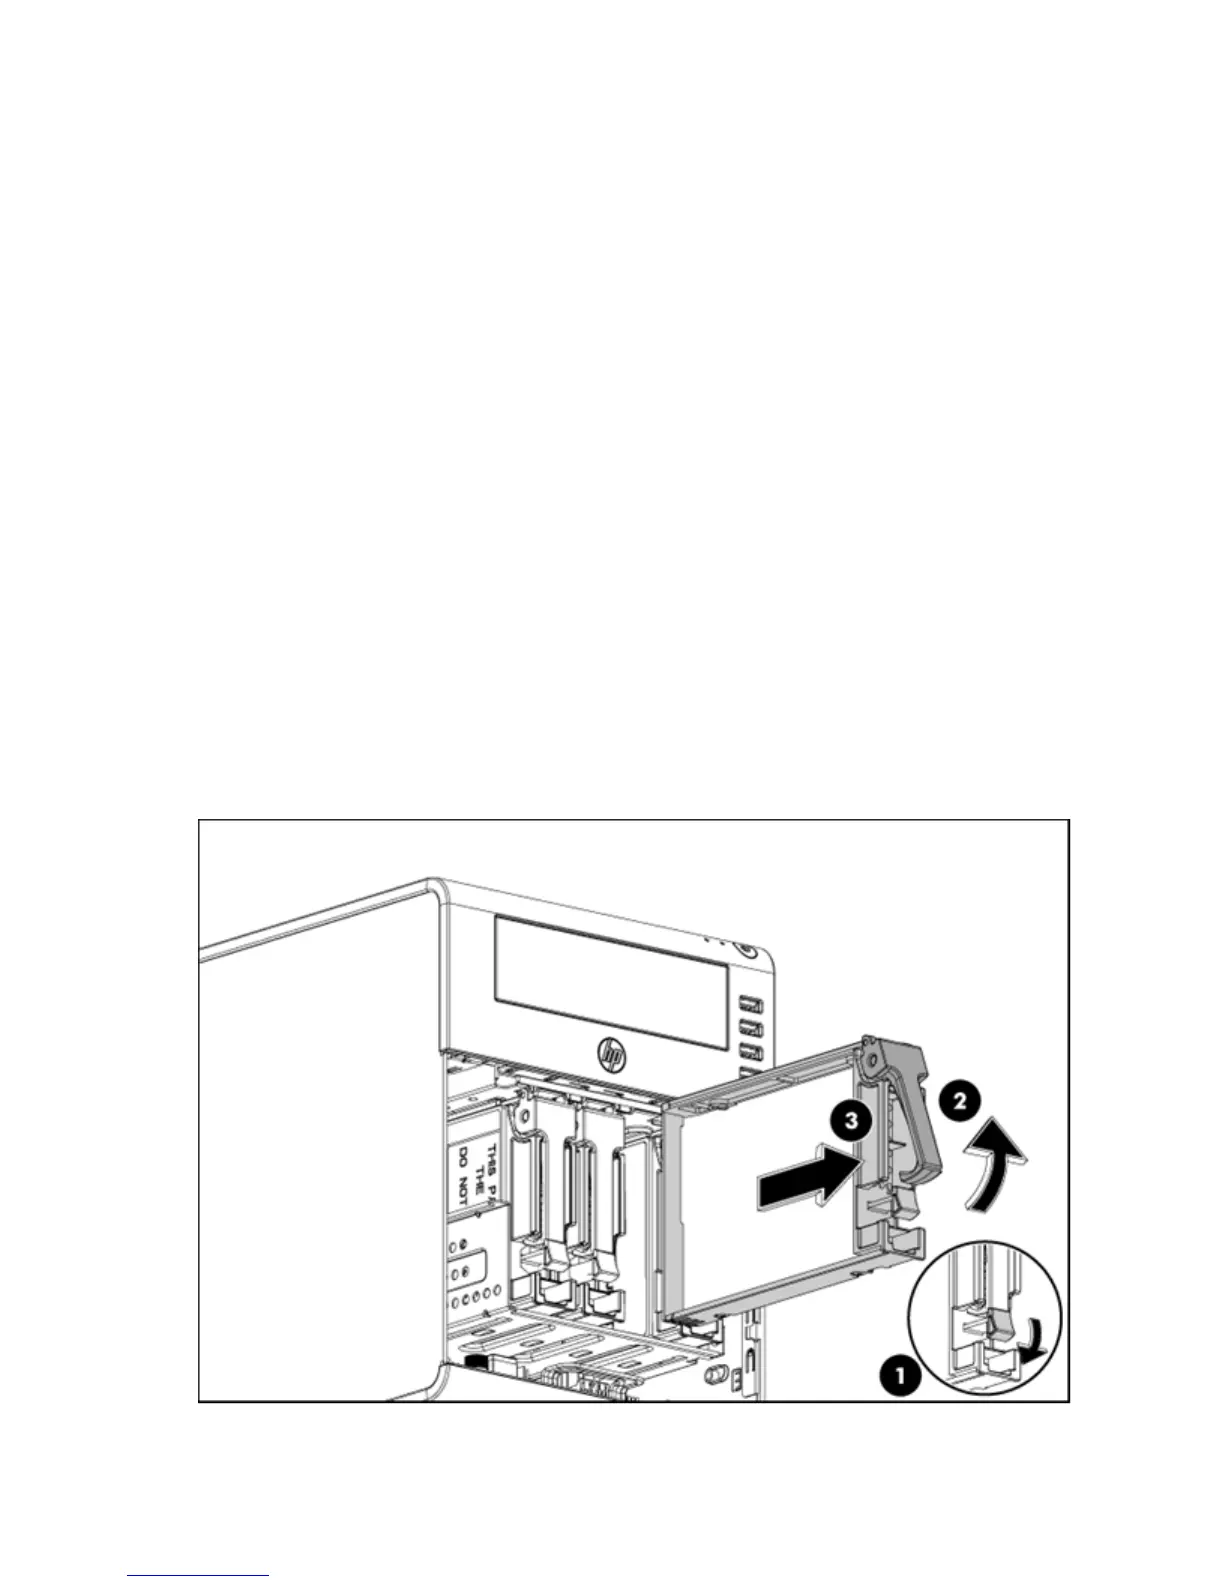
4. Remove the drive:
a. Press the drive carrier button to release the ejector lever.
b. Use the ejector lever to pull the drive out of the cage.
Make sure to support the drive when pulling it out of the cage.