To power down the server, use one of the following methods:
• Press and release the Power On/Standby button.
This method initiates a controlled shutdown of applications and the OS before the server enters standby
mode.
• Press and hold the Power On/Standby button for more than 4 seconds to force the server to enter standby
mode.
This method forces the server to enter standby mode without properly exiting applications and the OS. If
an application stops responding, you can use this method to force a shutdown.
• Use a virtual power button selection through iLO.
This method initiates a controlled remote shutdown of applications and the OS before the server enters
standby mode.
Before proceeding, verify that the server is in standby mode by observing that the system power LED is
amber.
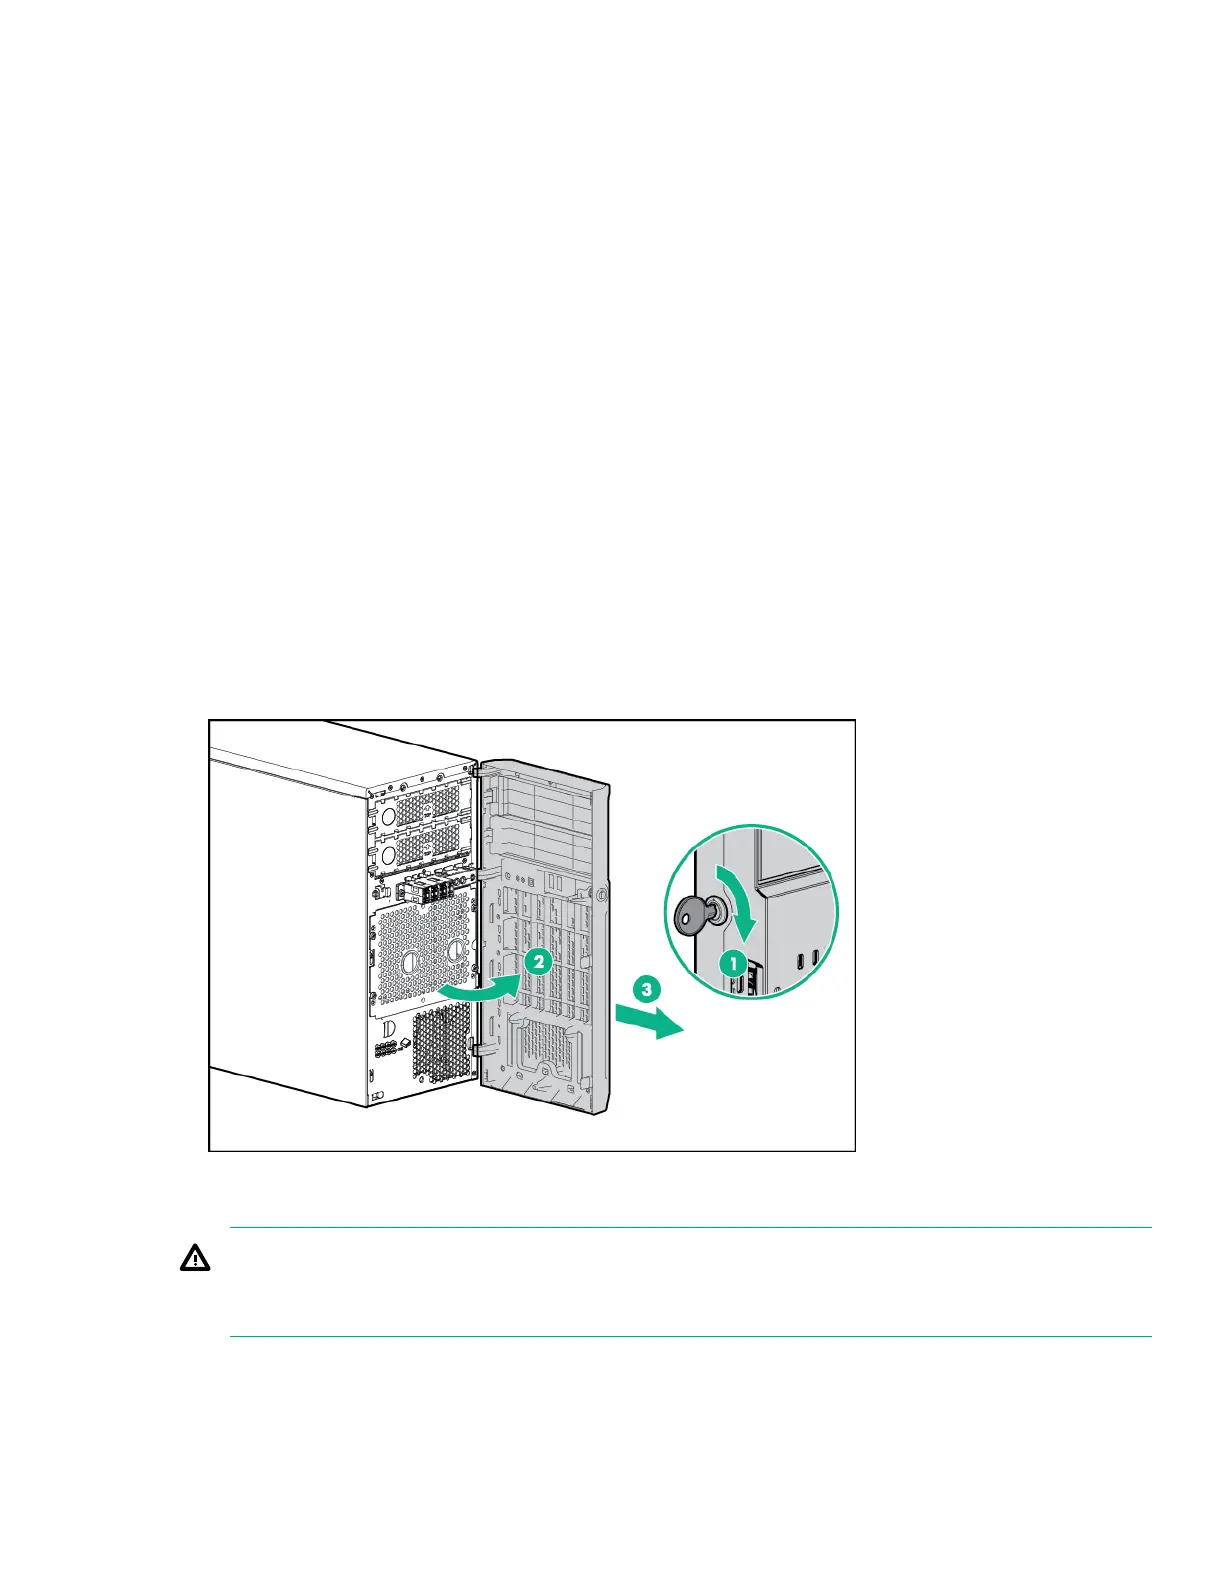
Removing the bezel
The tower bezel must be unlocked and opened to access the drive cage and media bays. It must be unlocked
to remove the access panel. The bezel must remain closed during normal server operations.
Procedure
1. Unlock the bezel.
2. Open the bezel.
3. Pull the bezel away from the chassis.
Removing the access panel
WARNING:
To reduce the risk of personal injury from hot surfaces, allow the drives and the internal system
components to cool before touching them.
Removing the bezel 29
 Loading...