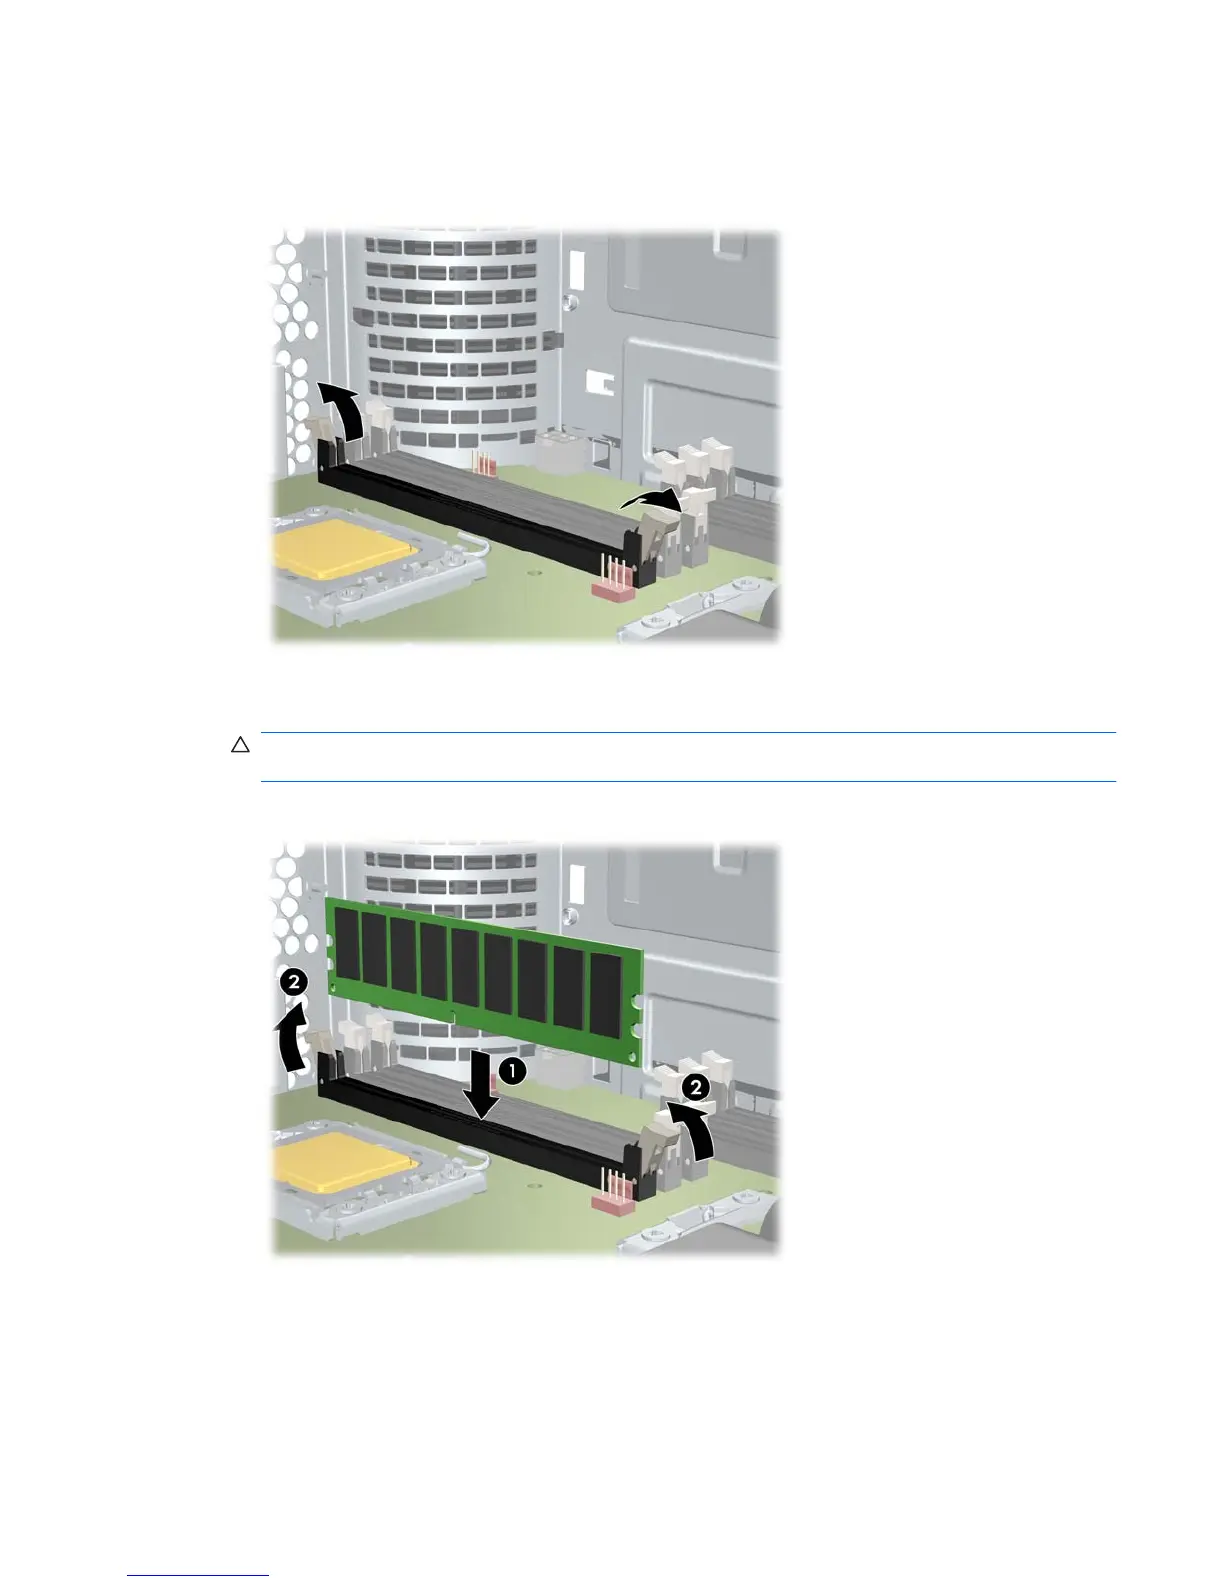
2. Push gently outward on the DIMM socket levers as shown in the following illustration. (The
example shows a HP Z600 Workstation.)
Figure 7-1 Opening DIMM socket levers
3. Align the DIMM connector key with the DIMM socket key, and then seat the DIMM firmly in the
socket (1) as shown in the following illustration.
CAUTION: DIMMs and their sockets are keyed for proper installation. To prevent socket or
DIMM damage, align these guides properly when installing DIMMs.
Figure 7-2 Seating the DIMM
4. Secure the socket levers (2).
5. Replace all components that were removed in preparation for component installation.
ENWW Installing a DIMM 49
 Loading...