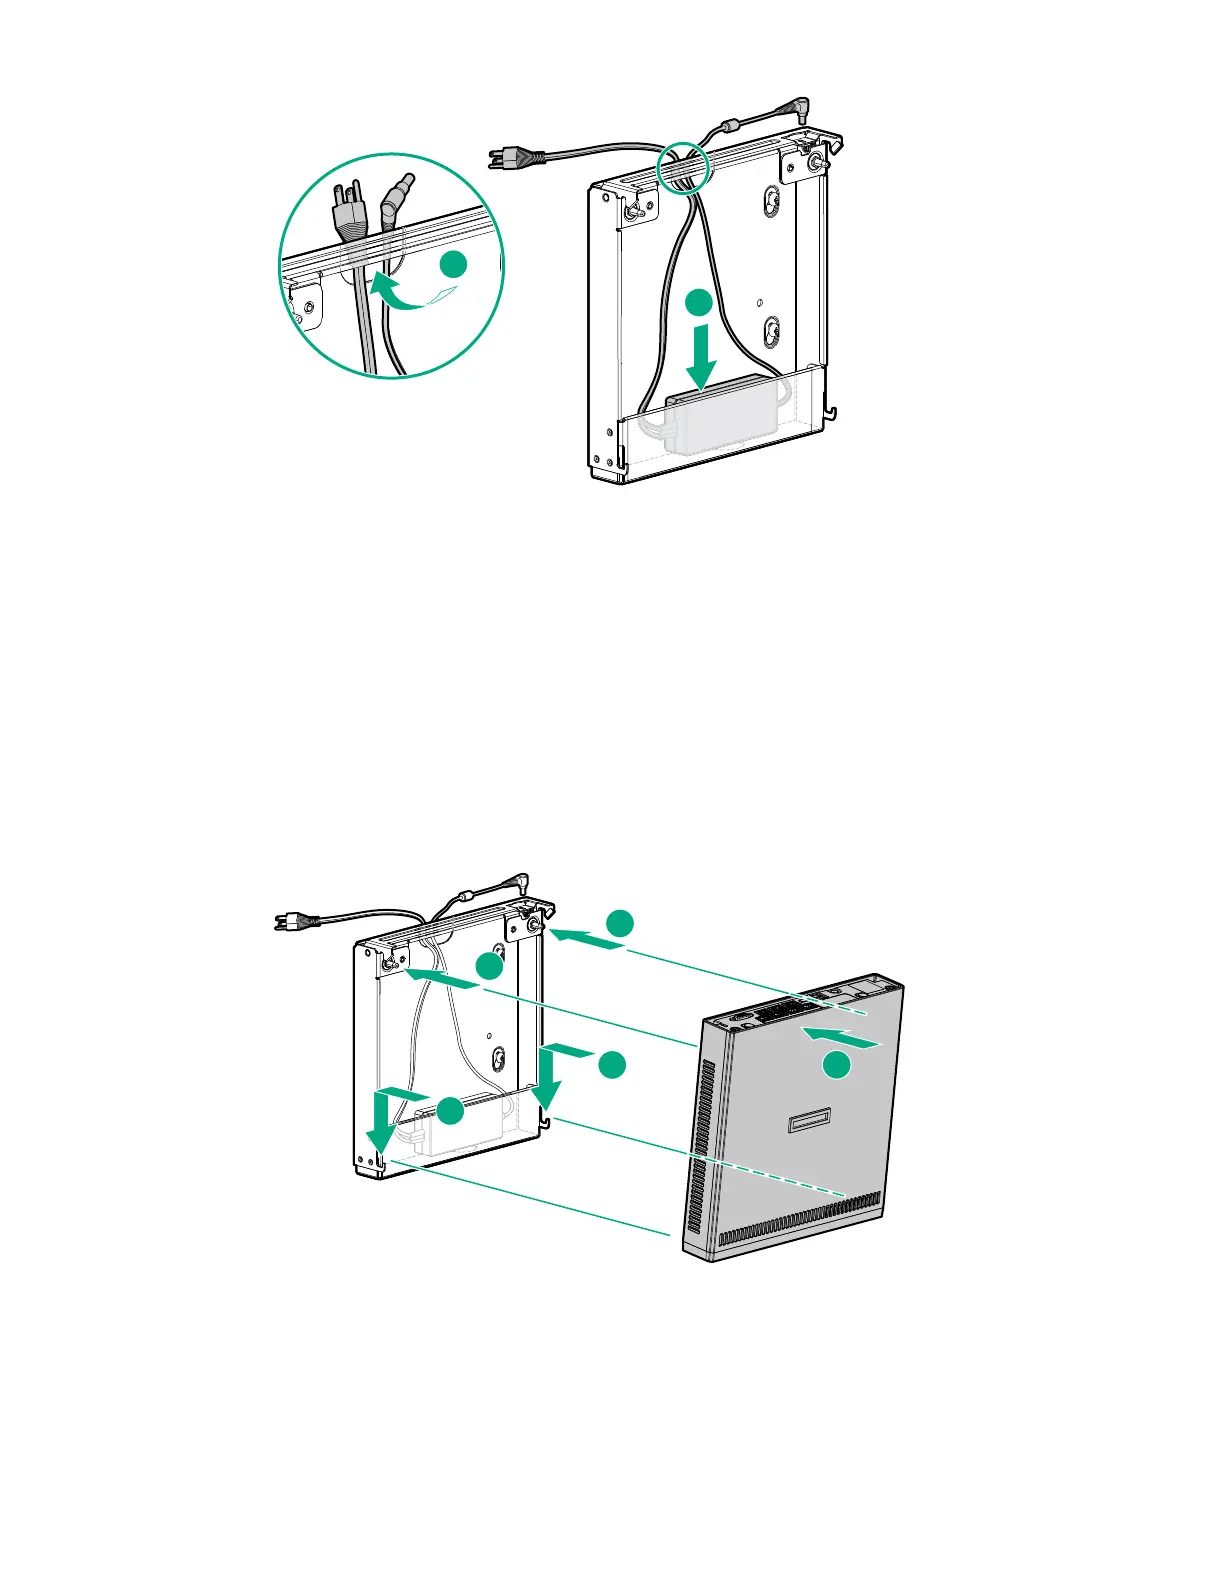
3. For cable management purposes, secure the extra length of the adapter cord that is not extended out of
the wall mount inside the wall mount.
4. Depending on how far the power source is from the wall mount, store the extra length of the power cord
inside the wall mount.
5. Install the server on the wall mount:
a. Orient the server in a vertical position with the rear panel parallel to the retention latch.
b. Insert the two hooks on the bottom side of the wall mount into the corresponding openings on the
server.
c. Align and insert the two posts on the wall mount into the corresponding openings on the server.
d. To ensure that the retention latch fully engages with the server, push the back edge of the server
against the wall mount.
• Installing the server on the wall mount when the power source location is lower than the wall mount.
• Installing the server on the wall mount when the power source location is higher than the wall
mount.
Hardware options installation 45
 Loading...