INSTALLATION
9
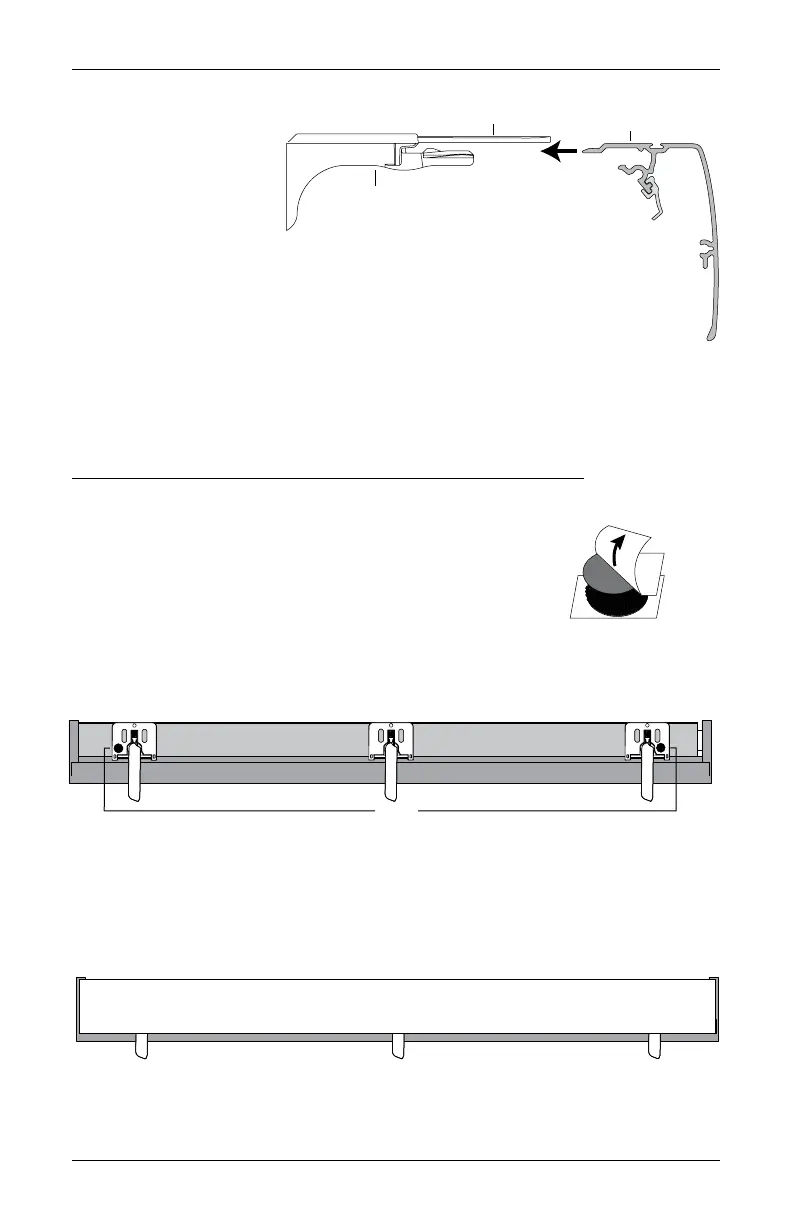
STEP 3: Install the Shade
■
Position the shade so
that the front faces you.
■
Ensure that each lever is
pushed to the left side
of the bracket before
installing the shade.
■
Slide the headrail into the installation brackets so that the headrail is between the
lever and the bracket, asshown.
■
Firmly push the headrail into each bracket until it clicks and the levers snap to the
right side of the bracket.
IMPORTANT: Push all levers to the right to confirm they are fully locked, then carefully
pull on the headrail at each bracket to ensure it is installedsecurely.
Attach the Dust Cover (Optional for Outside Mounts)
The dust cover is used to protect the top of the headrail from exposure on outside
mounted shades.
■
Cut the dust cover to desired width.
■
Remove the paper backing on one side of the hook and loop
fastener dots.
■
Apply the dots to the installation brackets on each end of
the shades.
■
Remove the remaining paper backing from the dots.
■
Center the dust cover over the top of the shade, above the dots.
■
Press the dust cover down onto the dots.
Headrail
Installation
Bracket
Slide the Headrail
Between the Lever
and the Bracket.
Remove
Paper
Backing
No Dust Cover
Dots
Dust Cover Installed