Pg 3.24 S23P
BLADE CHANGING PROCEDURE, CONTINUED
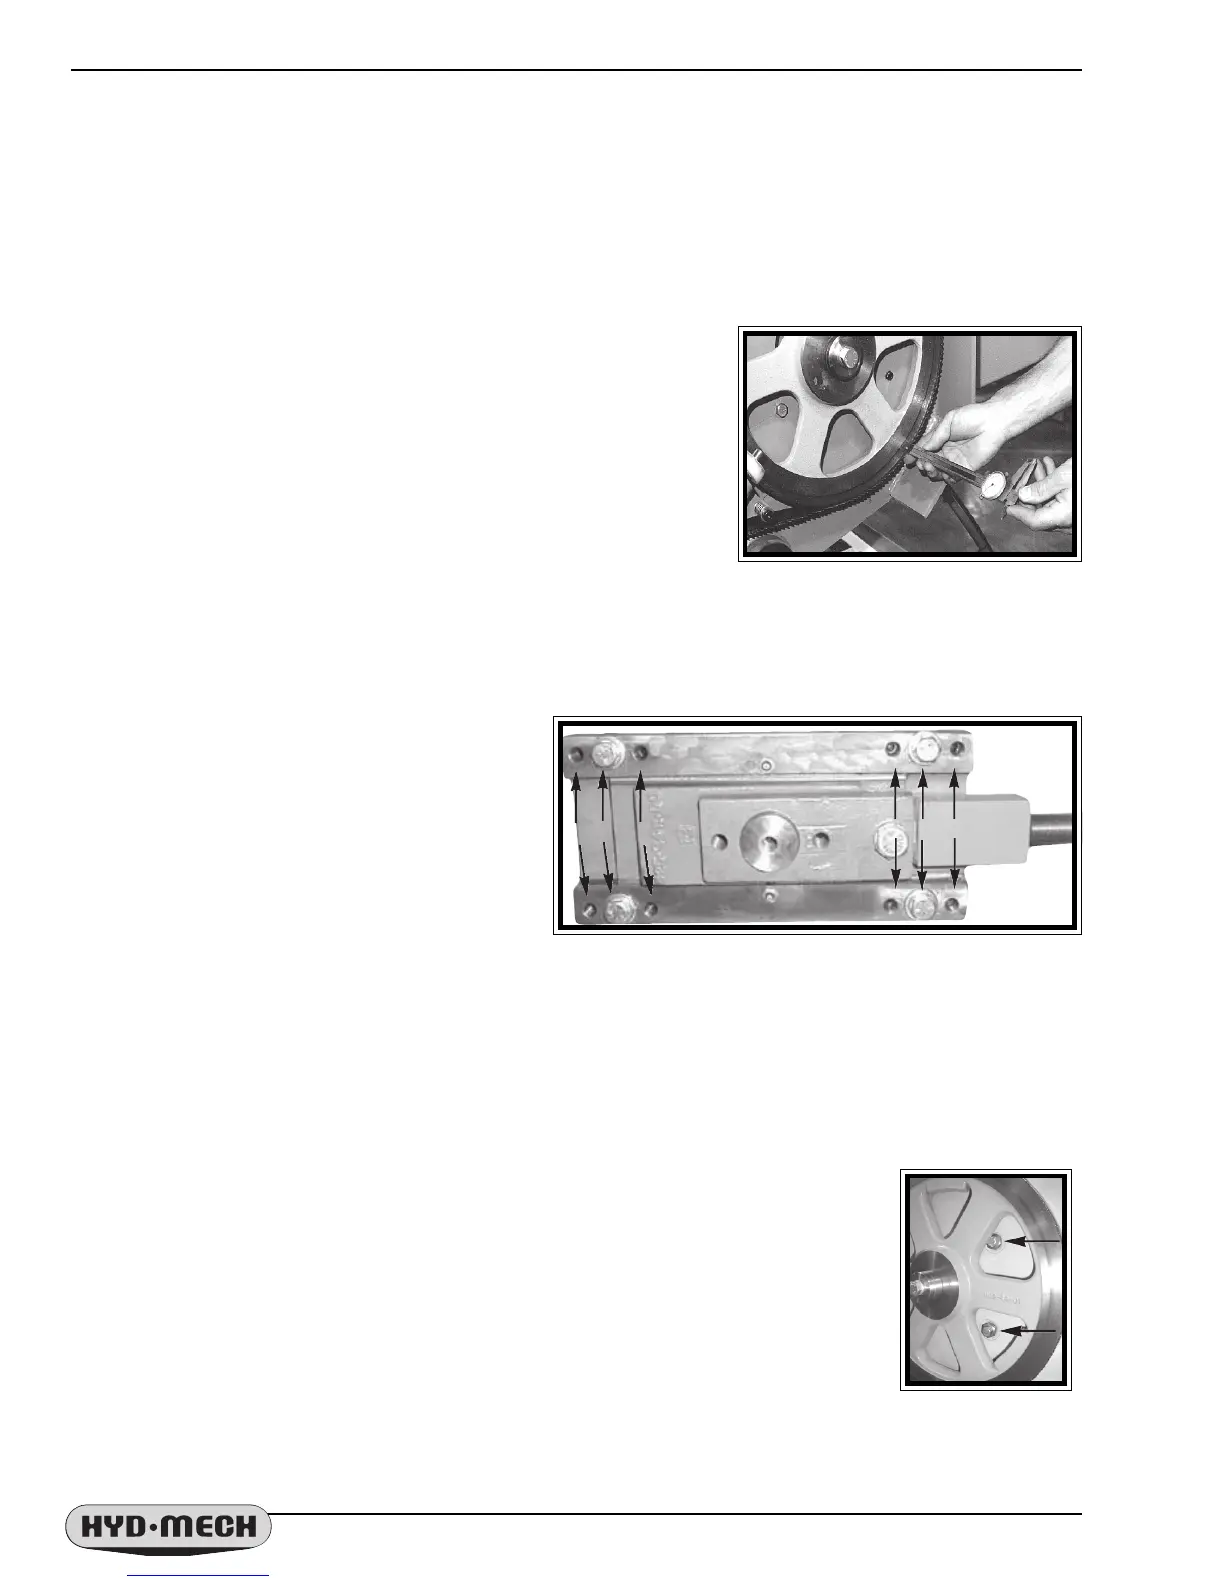
9A. As the blade tracking will stay fairly constant, it should be checked occasionally as shown on the drive
wheel tracking photo below. The blade teeth should protrude from .195" to .210" (5mm to 5.3mm) from the face
of the blade wheels. If the tracking requires adjustment, follow the instructions below.
BLADE TRACKING ADJUSTMENT
10. First, inspect the blade wheels for wear or damage and repair as
required. Blade tracking adjustment should always begin at the wheel
where the tracking is farthest out of specification. Using the
instructions below, adjust the worst wheel, jog the blade and recheck
both wheels. Repeat this process until both wheels are within
specification.
10A. Idler Wheel Adjustment
The tracking is adjusted by regulating the "push"
set screws and the "pull" hex bolts. Before
making any adjustments, bolts "A & B" should be
loosened but remain snug. This will allow easy
movement for the slide assembly. It should be
noted that most adjustments can be made with
the "B & D" bolts. Loosening bolts "A" and
turning in set screws "C" by equal amounts will
move the blade off the wheel. Loosening bolts
"B" and turning in set screws "D" by equal
amounts will move the blade on to the wheel.
After each "C" or "D" adjustment, tighten bolts "A
& B", run the blade and then check the tracking.
10B. Drive Wheel Adjustment
On the wall behind the drive wheel are two adjusting bolt assemblies and two hex bolts.
Loosen all four of them with a 3/4" socket and turn the larger hex head bolts 1/4 turn with
a 1 1/8" socket and extension and then tighten the two bolts in the assemblies, then
tighten the two hex bolts et the left. Turning the 1 1/8" bolts clockwise will pull the blade
on to the wheel and turning counter clockwise will push the blade off. Each 1/4 turn will
move the blade approximately .02".
11. Check the blade brush adjustment (next page) to be sure the blade is being cleaned
properly.
Checking the tracking.
Tracking adjusting bolts & set screws.
D B D
C A C
Drive wheel
tracking bolt
assemblies.
 Loading...