20 21
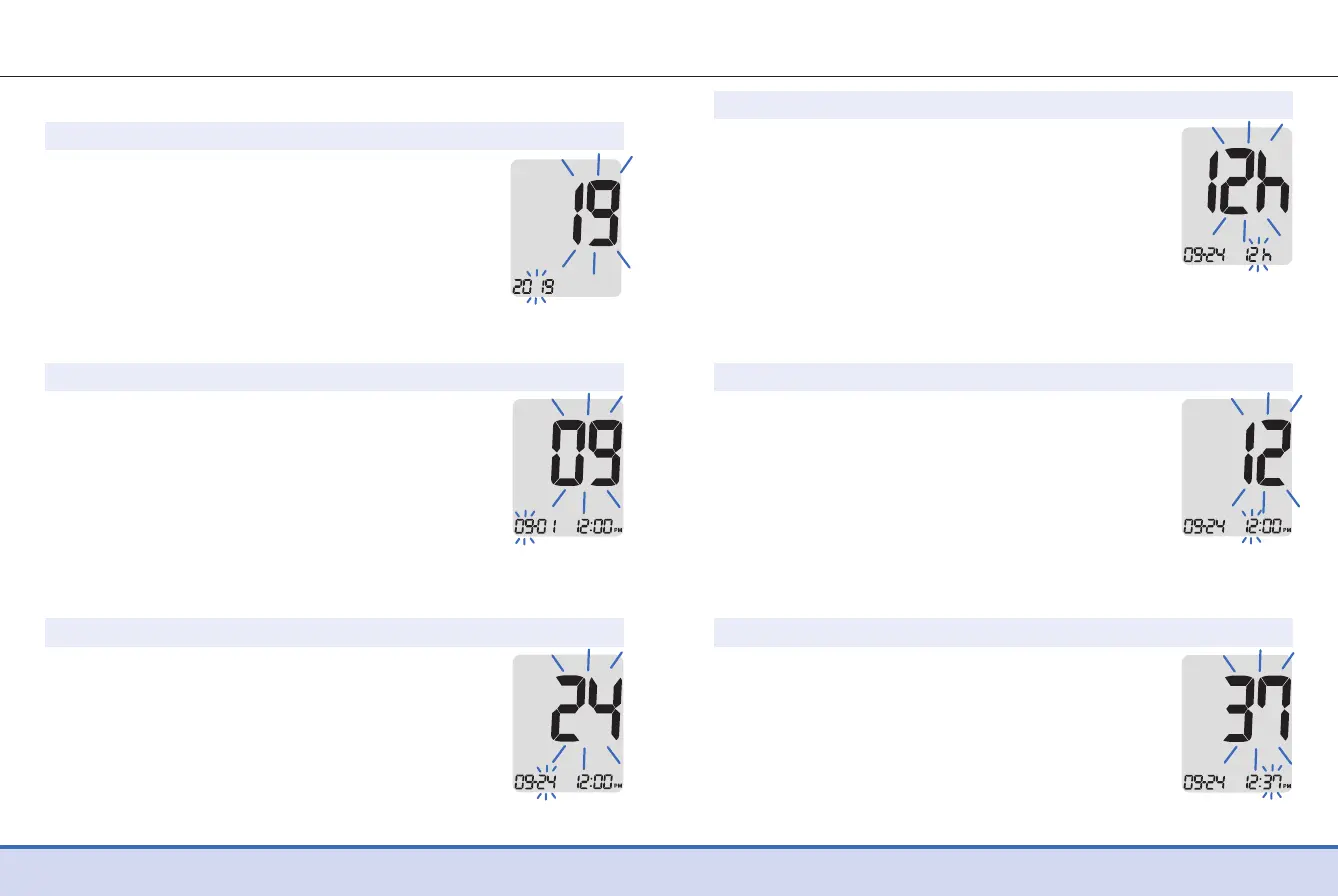
Step 5 Setting the Month
A number indicating the month will blink on
the screen.
Press the ◀ or ▶ button until the correct
month appears. Press the ●
button to
confirm your selection and to go to the next
step.
Step 6 Setting the Date
Press the ◀ or ▶ button until the screen
displays the correct date. Press the ●
button to confirm the date and to go to the
next step.
Adjusting the Date and Time
Step 4 Setting the Year
Press the ◀ or ▶ button to adjust until the
correct year appears. When the present year
appears, press the ● button to confirm your
selection and to go to the next step.
Step 9 Setting the Minute
Press the ◀ or ▶ button until the correct
minute appears. After setting the minute,
press the ●
button to go to the next step.
Step 8 Setting the Hour
Press the ◀ or ▶ button until the correct
hour appears.
After the hour is set, press the ●
button to
go to the next step.
Step 7 Setting the Time Format
The meter can be set in the AM/PM 12-hour
or the 24-hour clock format.
Press the ◀ or ▶ button to select a format.
TheAM•PMsymbolisnotdisplayedinthe
24-hour format. After selecting the format,
press the ●
button to go to the next step.
 Loading...