Chapter 2. Removal and replacement procedures
Before you begin . . . . . . . . . . . . . . . . . . . . . . . .26
Cables, connectors, and headphones . . . . . . . . . . . . . . . .26
Connecting your cash drawer to SurePOS Models 721, 741, and 781 . . . . .27
Removing the slanted I/O trays . . . . . . . . . . . . . . . . . . .28
Removing the covers . . . . . . . . . . . . . . . . . . . . . .29
Removing the top plate . . . . . . . . . . . . . . . . . . . . . .32
Removing the CD-ROM . . . . . . . . . . . . . . . . . . . . .33
Removing the hard disk drive . . . . . . . . . . . . . . . . . . .36
Removing the exhaust fan (Models 742 and 782 only) . . . . . . . . . .38
Replacing the insulating rubber seal (Models 722, 742, and 782 only) . . . . .39
Removing the spline . . . . . . . . . . . . . . . . . . . . . . .41
Removing the I/O modules . . . . . . . . . . . . . . . . . . . .42
Removing the I/O module holders . . . . . . . . . . . . . . . . . .43
Removing the air duct (Models 722, 74x, 78x, and C4x) . . . . . . . . . .44
Removing the processor fan (Models 742, 782 only) . . . . . . . . . . .45
Removing the heat sink and processor . . . . . . . . . . . . . . . .45
Removing the control switch card . . . . . . . . . . . . . . . . . .47
Removing the power supply . . . . . . . . . . . . . . . . . . . .48
Removing the riser card . . . . . . . . . . . . . . . . . . . . .49
Removing the planar . . . . . . . . . . . . . . . . . . . . . . .54
Removing the UPS . . . . . . . . . . . . . . . . . . . . . . .56
Removing the expansion housing . . . . . . . . . . . . . . . . . .58
Removing the UPS battery . . . . . . . . . . . . . . . . . . . .60
Removing the front USB card . . . . . . . . . . . . . . . . . . .61
Removing the memory modules . . . . . . . . . . . . . . . . . .62
Removing the front service housing components (wide models only) . . . . .64
Removing the system and bezel latches . . . . . . . . . . . . . .64
Removing the pull-out handle . . . . . . . . . . . . . . . . . .66
Removing the cable guide . . . . . . . . . . . . . . . . . . . .66
Removing the cable guide arm assembly . . . . . . . . . . . . . .67
Routing the cables . . . . . . . . . . . . . . . . . . . . .69
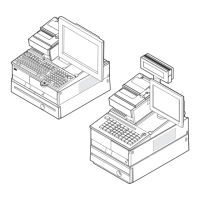
This chapter describes how to remove and replace the field replacement parts.
Updated July 14, 2008
© Copyright IBM Corp. 2003, 2008 25

 Loading...