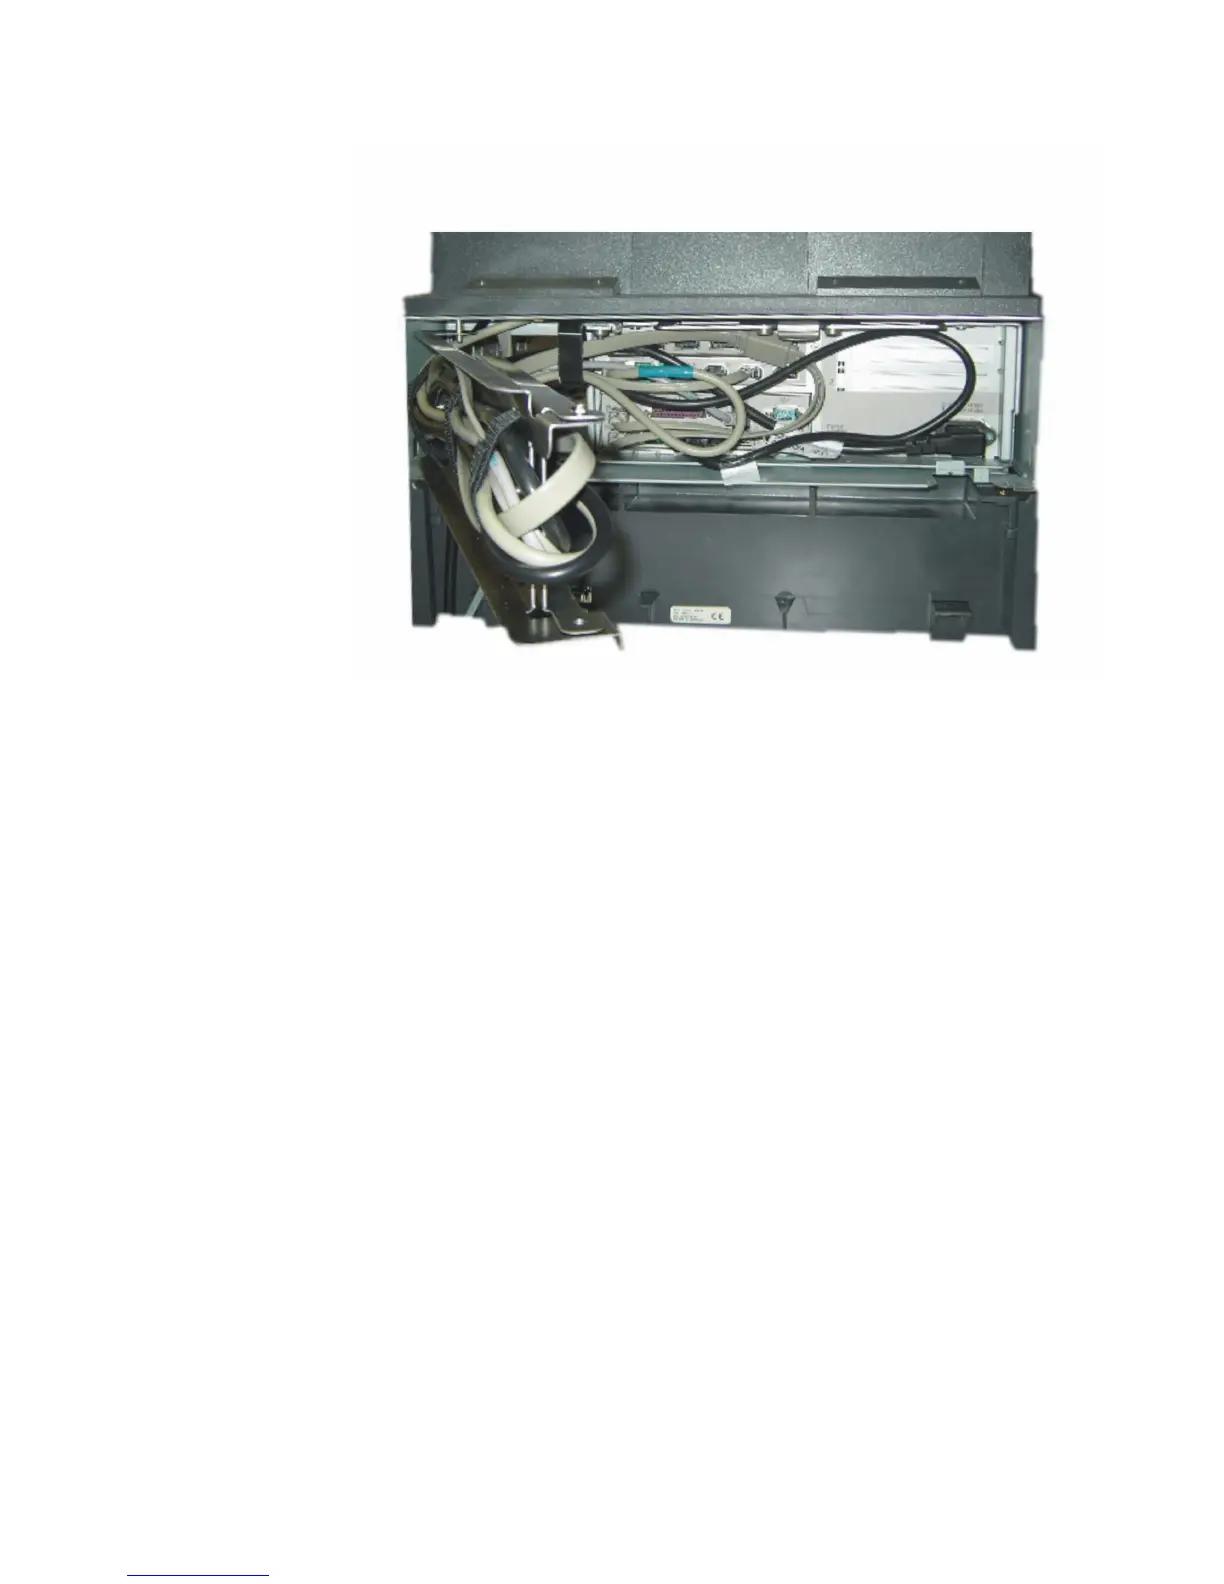
5. After all cables are routed and properly arranged, close the velcro strips.
6. See Figure 62. Ensure that the cables with cable arm assembly is properly
secured by freely moving the arm backward and forward. If this action is difficult
or impeded, open the velcro strips and rearrange the cables to allow additional
slack.
7. Gently close the cable guide assembly arm and lift it behind the latch.
Figure 62. Cable assembly arm with cables securely in place
Updated July 14, 2008
Chapter 2. Removal and replacement procedures 71
 Loading...