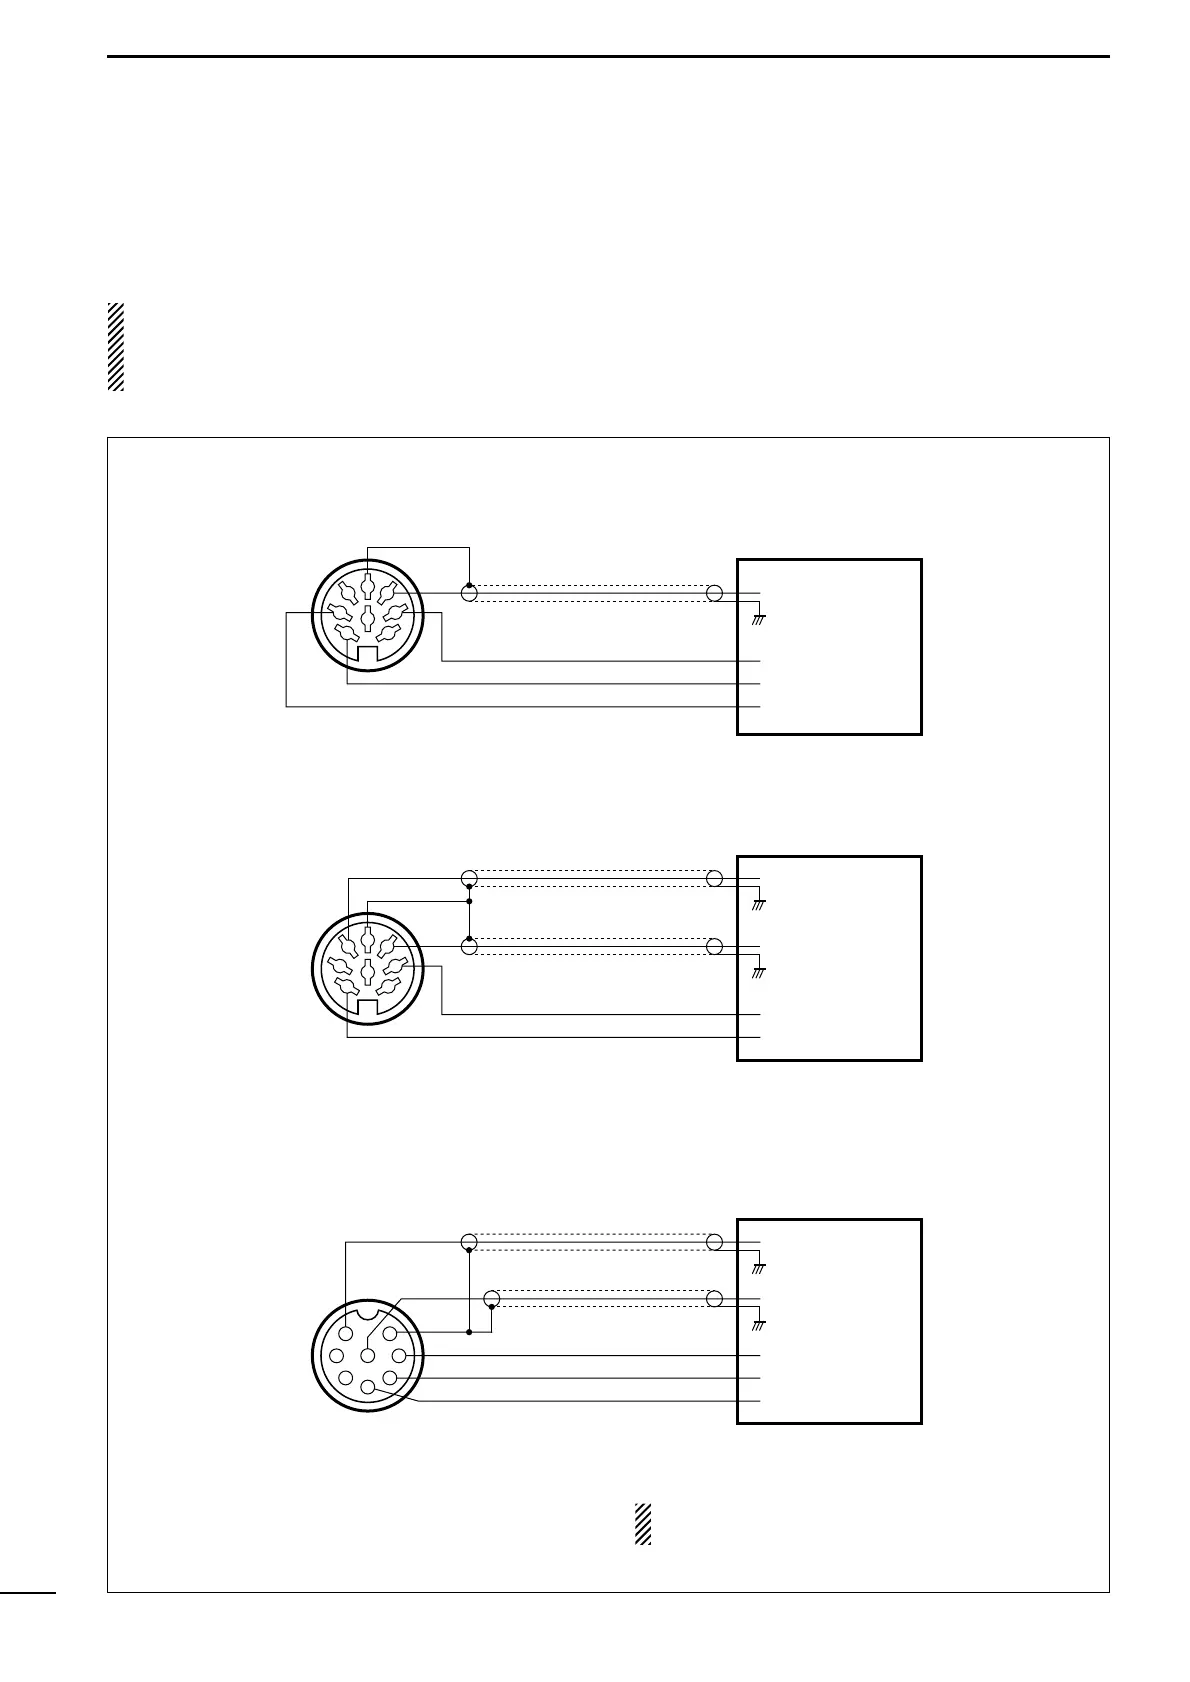
AF input
Ground (GND)
PTT
SQUELCH input*
RTTY keying
* Connect the SQUELCH line when required.
Terminal unit (TU) or
Terminal Node Controller (TNC)
[ACC(1)] socket
(Rear panel view)
1
2
3
4
5
6
7
8
AFSK output
AF input
Ground (GND)
Ground (GND)
PTT
SQUELCH input*
* Connect the SQUELCH line when required.
Terminal Node Controller (TNC)
or Scan converter
[ACC(1)] socket
(Rear panel view)
1
2
3
4
5
6
7
8
AF input
Ground (GND)
AFSK output
PTT
SQUELCH input*
* Connect the SQUELCH line when required.
Terminal Node Controller (TNC)
or Scan converter
[MIC] connector
(Front panel view)
1
2
3
4
5
6
7
8
■ FSK and AFSK (SSTV) connections
To connect a terminal unit, TNC or scan converter,
refer to the diagram below.
For RTTY operation:
Narrow filter settings may not pass RTTY signals.
Be sure to select the appropriate IF filter settings
corresponding to the signal width. (p. 29)
FSK (RTTY) connection
Use RTTY mode for
operation
AFSK and SSTV connections
Use SSB or FM mode
for operation
AFSK and SSTV connections via microphone connector
Use SSB or FM mode
for operation
When connected to the [MIC] connector, [MIC
GAIN] and [AF] control adjustment is required.