77
11
MAINTENANCE
■ Tuning dial brake adjustment
The tension of the tuning dial may be adjusted to suit
your preference.
The brake adjustment screw is located on the right
side of the tuning dial. See the figure at right.
Turn the brake adjustment screw clockwise or coun-
terclockwise to obtain a comfortable tension level
while turning the dial continuously and evenly in one
direction.
■ Frequency calibration
(approximate)
A very accurate frequency counter is required to cali-
brate the frequency of the transceiver. However, a
rough check may be performed by receiving radio
station WWV, or other standard frequency signals.
CAUTION: Your transceiver has been thor-
oughly adjusted and checked at the factory before
being shipped. You should not calibrate frequen-
cies, except for special reasons.
q Push [SSB] to select USB mode.
w Push [PBT CLR] for 1 sec. to clear the PBT set-
tings and make sure that the RIT/∂TX function is
not activated.
e Set the frequency to the standard frequency sta-
tion minus 1 kHz.
•When receiving WWV (10.000.00 MHz) as a standard
frequency, set the operating frequency for
9.999.00 MHz.
•Other standard frequencies can also be used.
r Push [EXIT/SET] several times to close a multi-
function screen, if necessary.
t Push [EXIT/SET] for 1 sec. to select the set mode
screen.
y Push [(F-5)OTHERS] to enter miscellaneous (oth-
ers) set mode.
u Push [(F-1)Y] several times to select the “Calibra-
tion marker” item.
i Rotate the tuning dial clockwise to turn the calibra-
tion marker ON.
•Side tone may be heard.
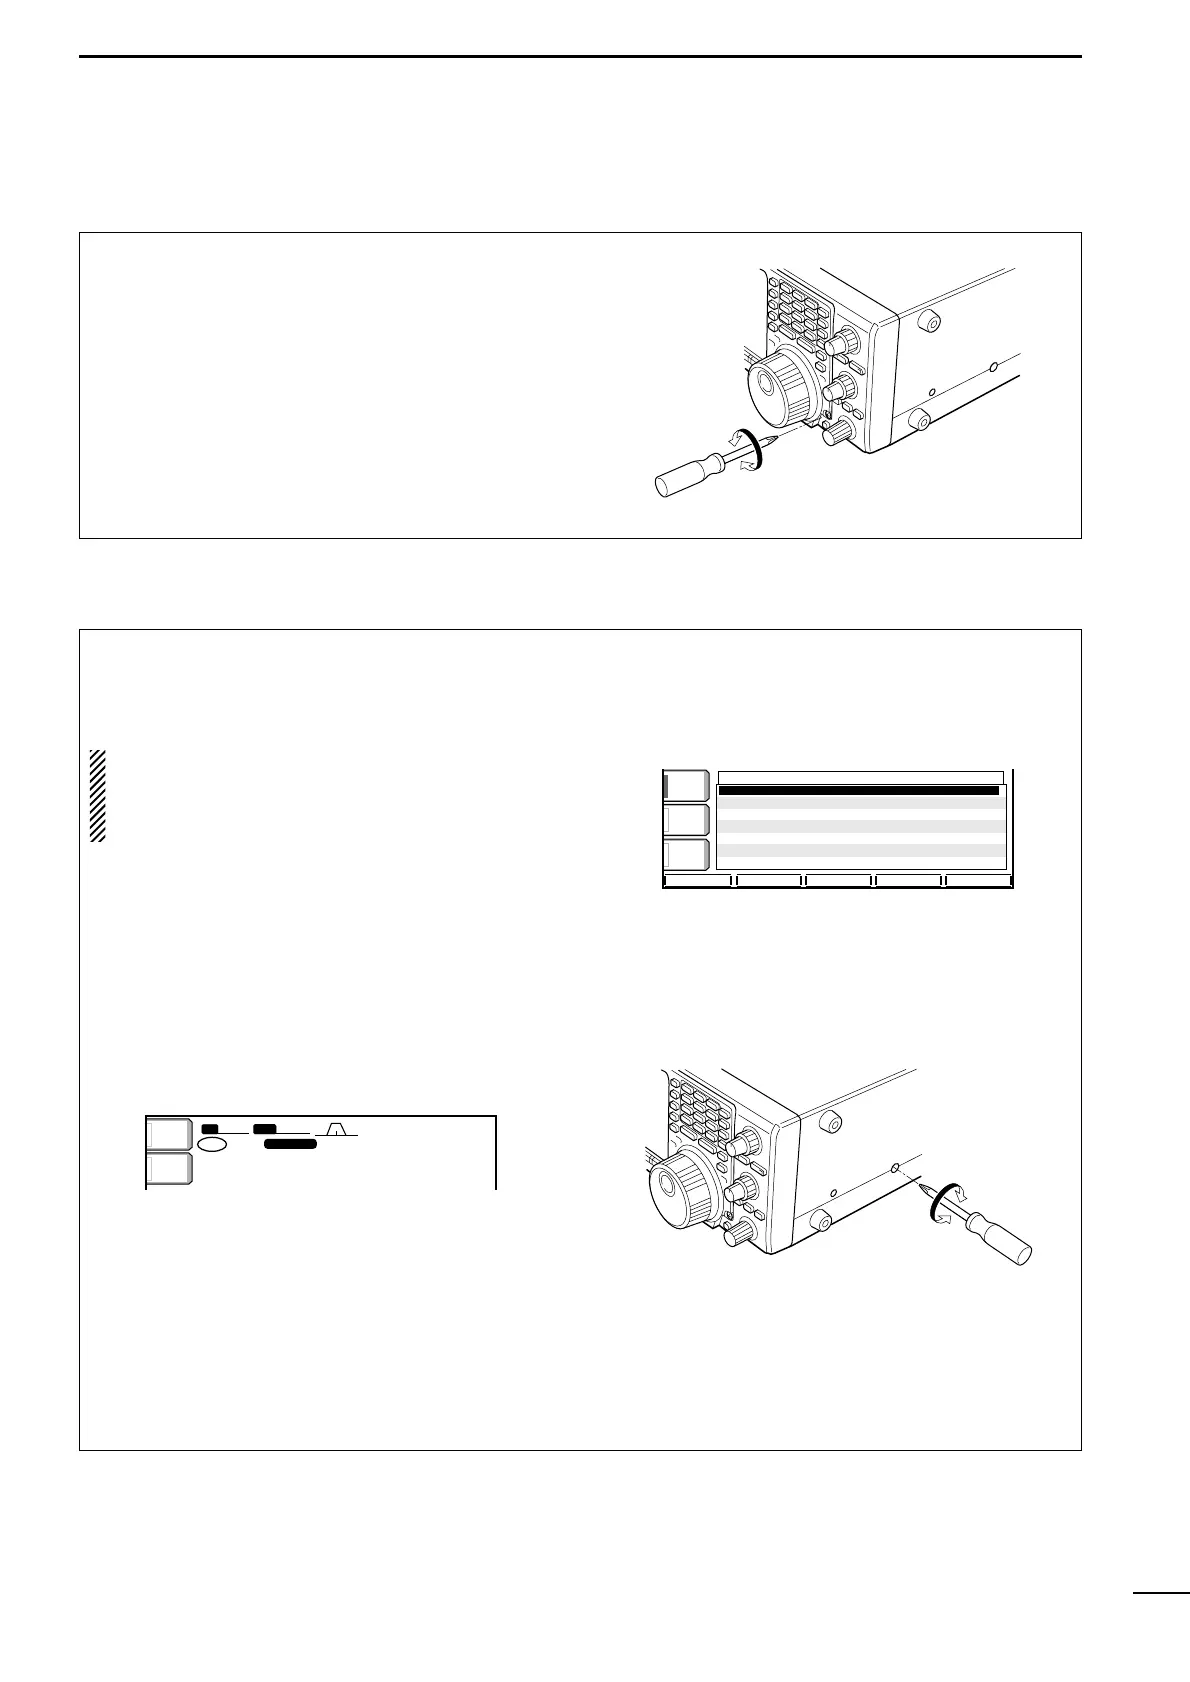
o Adjust the calibration pot on the right side panel of
the transceiver for a zero beat with the received
standard signal as shown below.
•Zero beat means that two signals are exactly the same
frequency, resulting in a single tone being emitted.
!0 Rotate the tuning dial counterclockwise to turn the
calibration marker OFF.
!1 Push [EXIT/SET] twice to exit set mode.
DEFDEF WIDEWIDE
é
è
AGCAGC
MIDMID
BK-INBK-IN
OFFOFF
1/41/4
OFFOFF
CalibrationCalibration MarkerMarker ONON
Beep(Confirmation)Beep(Confirmation) ONON
Beep(BandBeep(BandEdge)Edge) ONON
RF/SQLRF/SQL ControlControl RF+SQLRF+SQL
QuickQuick DualwatchDualwatch ONON
QuickQuick SPRITSPRIT ONON
FMFM SPLITSPLIT Offset(HF)Offset(HF) -0.100MHz-0.100MHz
OTHERSOTHERS SETSET