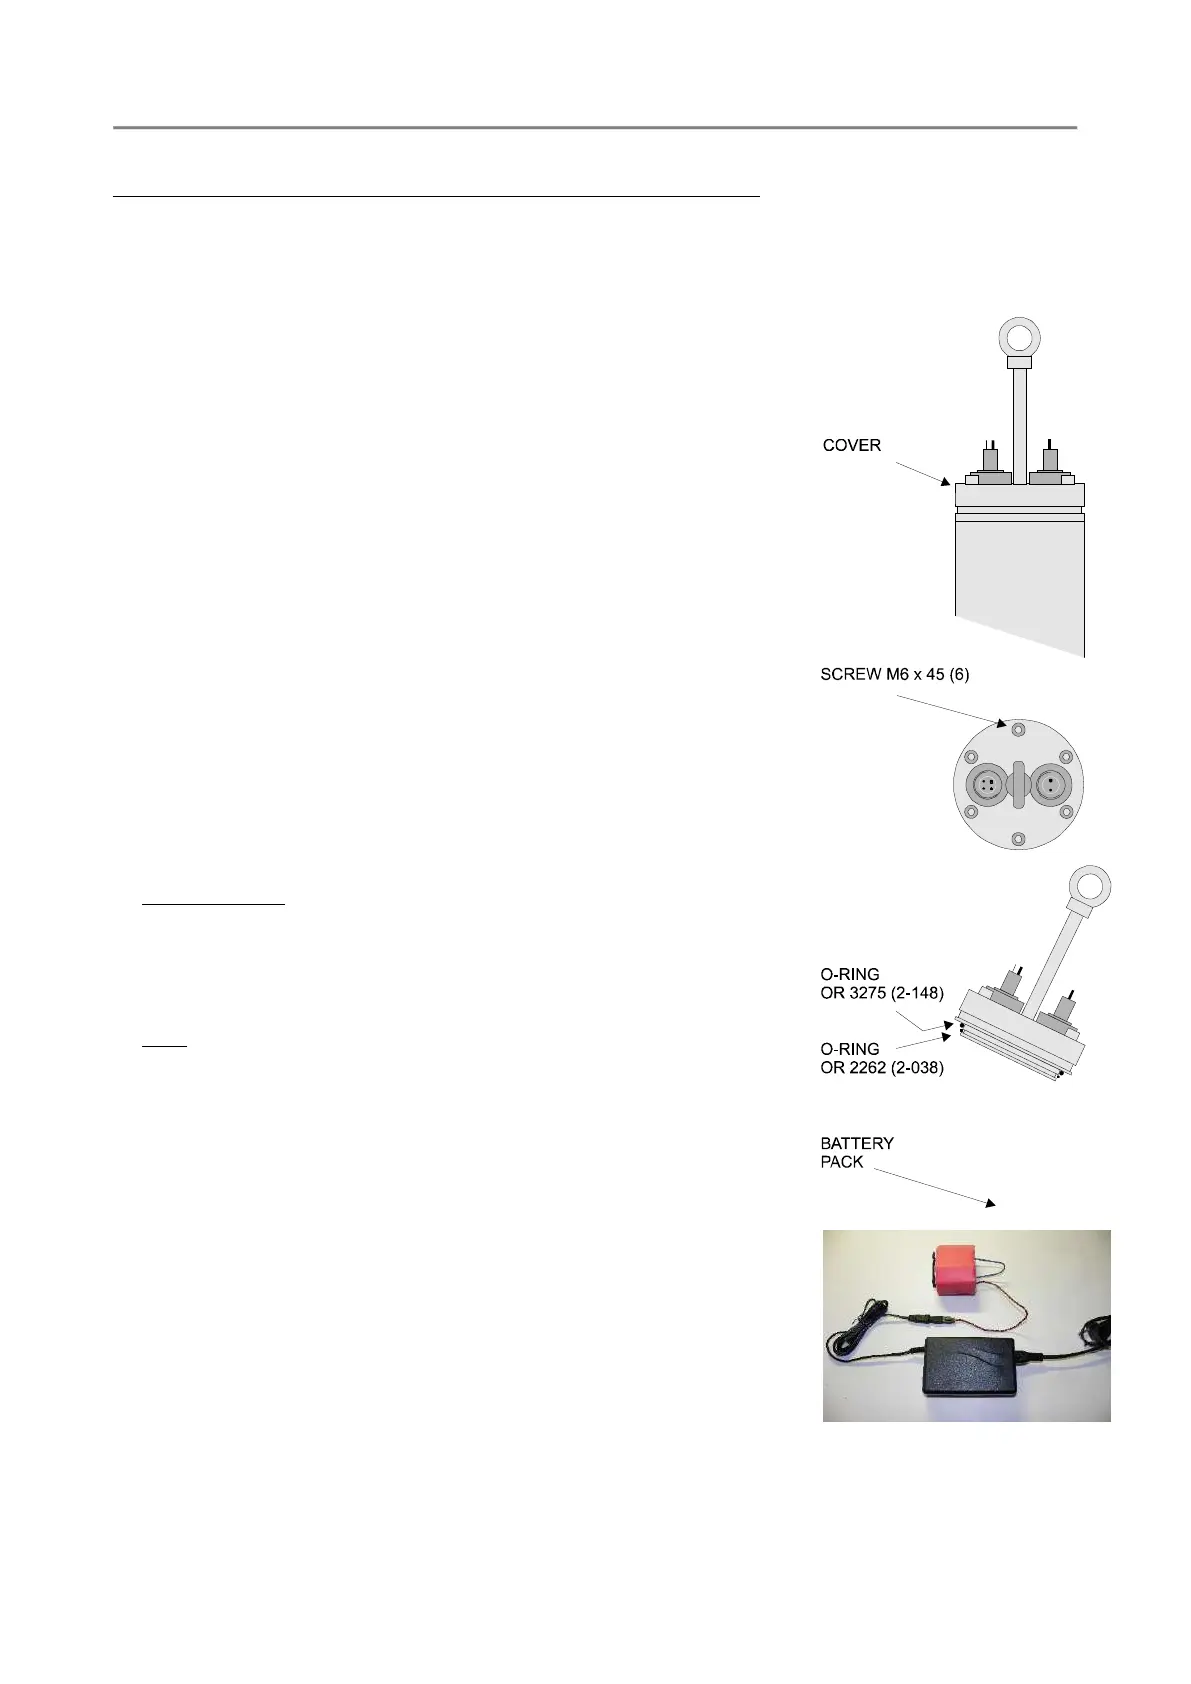
RECHARGE THE INTERNAL BATTERIES of the 100 mm HOUSING
The rechargeable battery pack can be different from probe to probe. The battery pack comes complete
with the associated international battery charger. The below instruction are valid for each battery pack
1) Dry the probe and lay it down on a table.
2) Remove the six screws on the probe cover with the hexagonal wrench
included in the CTD accessories.
3) When extracting the cover, dry the fissure between the cover and the
body of probe with a strip of paper inserted edgewise and dry any trace
of water in the proximity of the external side of the o-ring.
4) Pull the battery pack off and remove the cable connector.
5) After connecting the battery pack, the charger immediately checks the
nominal voltage, thus automatically selecting the most appropriate
action to carry out.
LED indicators
Please carefully read the booklet associated to the battery pack
for detailed instruction about the indication during the battery
charging.
Note
At the end of the quick-charging procedure, the charger undertakes a low-
current equilibration charging procedure which lasts 30 m. This procedure is
also called tricky-charging procedure. The aim of this procedure is to keep the
battery cells in good condition, thus compensating for the auto-discharge.
6) Replace the cover on the probe and lift the probe itself vertically.
7) Check the correct position of the o-ring and close again the probe with
the six screws. Gradually tighten the six screws in sequence such as to
close the cover uniformly