NOTE:
The options are only available if the corresponding option in option 14 is on.
EXAMPLE:
If the close RC is disabled, then you will not be able to set the telephone module for it. If it is enabled,
then you can choose between telephone module 1 and 2.
NOTE:
User options 20-29 can be found in the Remote Receiver Manual P/N: 700-408-02A.
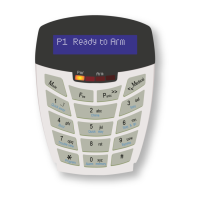
8.3.12 Option 30 - Edit a Zone Name
[*] [MASTER CODE] [*] [3] [0] [*] [ZONE No] [*] [*] [ZONE NAME] [*] [#]
1. Enter the User Program Mode as per steps 1 - 4 of section 8.2.
2. The LCD display reads „Option Menu‟, „Add User Code‟.
3. To select menu option 30 – „Edit Zone Name‟, press the [3] [0] keys or alternatively use the
[PANIC] or [MED] keys to scroll through the list of programmable options until you reach the
option you want.
4. Press the [*] key.
5. The LCD display reads „Zone Names <*>‟, „Zone Num + *‟.
6. Enter the [ZONE No] followed by the [*] key.
7. Press the [*] key to begin entering the zone name. A blinking character indicates that that
character is currently selected for editing.
8. Enter the [ZONE NAME] followed by the [*] key.
NOTE:
Pressing a key once will display the first letter on the key. Pressing a key twice will display the
second letter on the key etc. Numbers will be displayed once all the letters listed on the key have
been displayed.
The [PANIC] and [MED] keys may be used to scroll right or left through the name respectively.
The [MODE] key is used to toggle between upper and lower case.
Pressing the [#] key will reset the zone name to [Zone Number] if a character has been entered.
If no character has been entered, then pressing [#] will exit zone name programming and return
to the options menu.
9. Repeat steps 5 - 7 if more zones are to be named.
10. Press the [#] key to exit the User Program Mode.
NOTE:
When you are at step 6, entering a zone number, you can use the following options to copy or delete a
zone name: