Replacing Hard Disk Drives
For the Infoblox 1400 Series Platforms 35
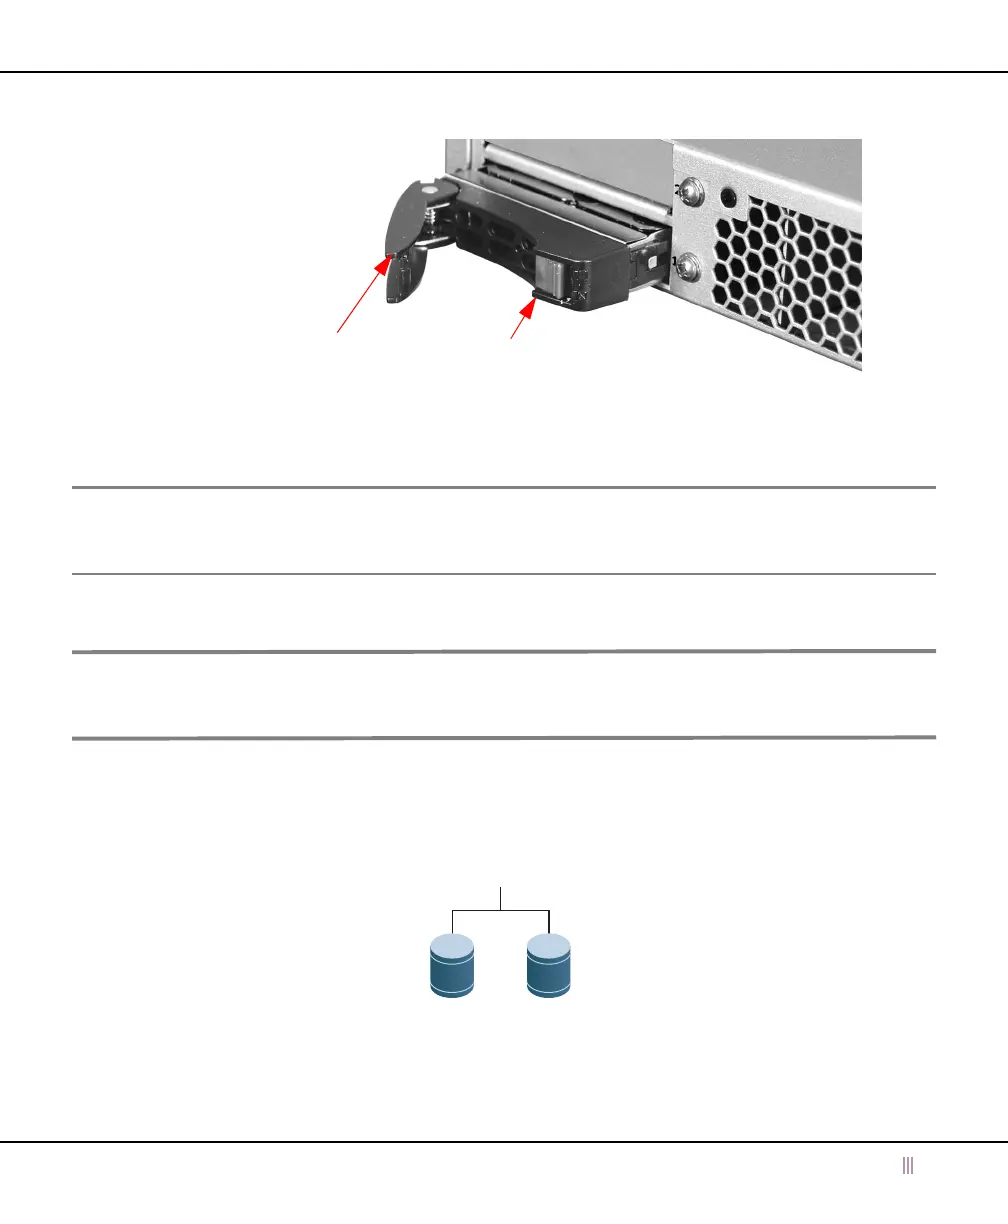
Figure 14 Pull the catch-release lever to remove hard drive
4. Remove the disk, extract it from its carrier and handle it with care. Do not drop the disk or ship it loosely
in a carton.
5. Securely mount the replacement disk in the drive carrier and replace the carrier in the system.
Note: For replacement disk assembly part numbers, see Table 7 on page 39. See the following subsection, Notes on
Disk Replacement, for details regarding TR-1405 appliances, which are the only Infoblox SoT 1405 Series appliance
that supports RAID features; and information about drive swapping practices.
Notes on Disk Replacement
Caution: Never remove a correctly functioning drive in a live Infoblox SoT 1405 Series appliance. If a disk drive fails,
remove the failed disk only. Removing the hard disk from a correctly operating Infoblox SoT 1405 Series appliance
can cause a complete failure of the appliance and require an RMA (Return Material Authorization).
The Trinzic Reporting TR-1405 appliance uses a RAID 1 two-disk array for data redundancy. The disk mirroring
configuration resembles the following figure:
Figure 15 Trinzic TR-1405 RAID 1 Array Configuration
In the Trinzic Reporting TR-1405 appliance, if the Disk 1 Primary experiences problems, the appliance switches to
the Disk 1 Backup unit, displays an alarm message and issues an SNMP trap. Both disk drives in the RAID 1 array
Catch-release lever
Release button (red)
Disk 1
Backup
RAID 1
Disk 1
Primary
 Loading...