SENSORS
There are 2 sensors utilized on the SSR 10-40 HP range.
One is a pressure sensor.
The other is a temperature sensor.
The temperature sensor is a thermistor located in the discharge air circuit. It
comes complete with a 6 foot lead that directly connects it to the Starter Interface
Board. It connects to terminal 20 (a red wire), terminal 21 (a black wire) and
terminal 22 has an insulated ground wire.
The temperature sensor reports its values by a change in resistance. As the
resistance decreases it relates to an increase in the temperature.
The pressure sensor is a strain gauge device that terminates in a female plug.
A male plug is connected and terminates in the Starter Interface Board. The top
part of the pressure sensor is a stainless steel diaphragm that will move as
pressure increases. This movement results in a positive voltage change. The
Intellisys directly interprets this voltage to a pressure.
The cable connects to the interface board as follows:
1 green 23
2 red 24
3 white wire connects to terminal 25
4 black wire connects to terminal 26
5 ground wire 27
OPERATION
The SSR 10-40 horsepower Intellisys is delivered completely operational. All
that is required is to hook up main power to the starter and operate the
compressor. There are no adjustments required. The initial settings will vary
according to the stated operating pressure of the compressor. Please refer to
the instruction book for these values. Compressors equipped with the Intellisys
are truly plug in and run units.
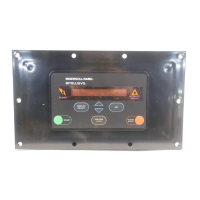
Upon initial power up, all the lights on the Intellisys will light. The numeric display
will show four 8’s. This feature accomplishes 2 things. First it gives a lamp test
to insure that all the lights and all the segments in the display are functional, and
secondly, it allows the microprocessor to perform a self-check. Since the only
way all the lights can light and the display can show all 8’s is on command from
the microprocessor. If this occurs, we know that the processor is good.
When the Intellisys display shows 8888’s, pressing the SET button will clear it.
When cleared, the display will show 0 signifying that the compressor is ready to
start.
To start the compressor be sure that the display is showing 0. Pushing the start
button, the compressor will start. It will remain unloaded until the load switch has
been pressed.
Press the load switch and the compressor will load and operate in the on-line off-
line mode. It will continue to operate in this mode which is the most efficient
mode of operation until the load button is depressed again.
-3-
-4-
 Loading...