Inner Range Inception Security Controller Installation Manual. Rev. 4.0
© 2016 - 2020. Inner Range Pty Ltd. 7 www.innerrange.com
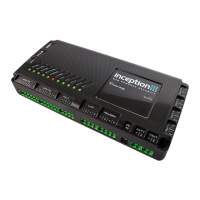
INSTALLATION
Location and Housing
The installation environment should be maintained at a temperature of 0º to 50º Celsius and 15%
to 85% Relative humidity (non-condensing).
The Inception controller should be mounted in a metal tamper-protected enclosure. Powered
enclosures are available to provide power for additional LAN expansion modules mounted in the
same enclosure. Some of the Inner Range enclosure options compatible with Inception are:
• Small Enclosure 995200
• Medium Enclosure 995201I (Enc. only) / 995201PEI (3A PS)
• XLarge Enclosure 995203PEI (3A PS) / 995203PE8 (8A PS)
• Widebody and Rack-mount Enclosures. Refer to the Inner Range website.
Power Supply Options
The Inception controller has connections for an 18 to 24V DC Power Supply input and a 12V
Sealed Lead-Acid (SLA) Battery. These connections are labelled “DC IN” and “BATT” respectively
and allow two power supply options to be supported:
1. Power Supply & Battery (Recommended). The supplied 24V Power Supply is connected to
“DC IN” and a 12V SLA Battery is connected to “BATT”. A 7AH to 18AH Battery is required
depending on battery backup time required. See ‘Specifications’ section for guidance.
2. External Power Supply. Connect a battery-backed power supply with a nominal output of
12.8V to 14V DC to the “BATT” input. e.g. Integriti 3A or 8A Power Supply (see
‘Accessories List' for P/N) or a 3rd party battery-backed security system power supply. “DC
IN” must not be used.
Ensure that the power requirements do not exceed the power supply’s current limit.
Remember to allow for the current required by detectors and other devices connected to
the Inception controller and other devices that may be powered from the same supply.
Refer to the wiring diagrams and specifications later in this document for more details.
Service Mode
Inception provides a service mode which is enabled/disabled via the web interface or an LCD
Terminal. Service mode allows one or more of the functions listed below to be disabled during
installation & commissioning or when testing, service or maintenance is required.
* V1.1.0 or later only.
In a new controller, service mode is enabled by default for an unlimited amount of time. Once
disabled, service mode can be enabled at any time for a limited period.
e.g. When needing to connect to Inception for onsite maintenance, the installer can enable Service
Mode from an LCD Terminal, open the controller cabinet and plug in a Wi-Fi Adapter for an access
point or an ethernet cable for direct connection to a laptop.
If using the web interface some additional features are provided.
• Enable: When enabling, the installer can select which functions to disable and the duration
of service mode (1 hour to 1 day).
• Update: While running, functions disabled can be updated & the duration timer re-started.
• Disable: When disabling, the installer can choose a ‘Delay Before Disable’ time so that
service mode will not be disabled instantly. e.g. The installer can disable service mode with