instantpot.com | 13
Get started
Initial test run (water test)
Do you have to do the water test? No — but getting to know the ins and outs of your new
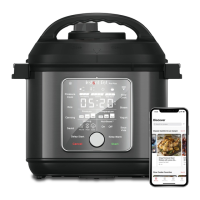
Pro Plus prepares you for success in the kitchen! Take a few minutes to get to know how
this tireless kitchen hero works.
Stage 1: Setting up the Pro Plus for
pressure cooking
01 Remove the inner pot from the
multicooker base and ll it to the rst
line (1) with water.
02 Insert the inner pot into the
multicooker base.
03 Connect the power cord to a 120 V
power source.
The display shows OFF.
04 Place and close the lid as described
in Pressure control features: pressure
cooking lid.
The lid automatically seals for
pressure cooking.
Stage 2: “Cooking” (…but not really, this
is just a test!)
05 Touch Pressure Cook.
06 When the minutes field ashes, turn
the dial to adjust the cook time to
5 minutes (00:05).
Customizations are saved to the Smart
Program when cooking begins.
07 Touch the Venting field to toggle
between Natural, Pulse and Quick
release options.
Select Quick for a quick pressure
release after the test nishes.
See Releasing pressure for more
information.
08 Touch Keep Warm to turn automatic
warming off after the test nishes.
09 Touch Start to begin.
The display shows On and the cooking
progress bar shows Pre-heating.
While the multicooker does its thing,
read Pressure cooking 101 to nd out
how the magic happens.
Stage 3: Releasing pressure
10 When the Smart Program nishes, the
display shows End.
The Pro Plus releases a short warning
burst of steam from the steam release
valve, followed by a continuous
stream of steam.
11 Once the oat valve drops, check
the pressure indicator on the control
panel to make sure the lid is safe to
open, then carefully
open and remove
the lid as described
in Pressure control
features:
Pressure cooking lid.
12 Using proper hand protection,
remove the inner pot from the
multicooker base, discard the water
and thoroughly dry the inner pot.
That’s it! You’re good to go :)
 Loading...
