Installing and Replacing Desktop Board Components
23
How to Install a Desktop Board Support Standoff
The desktop board fits in a microATX chassis, but it can also be installed in a standard ATX
chassis. When it is installed in a standard ATX chassis, one of the desktop board support positions
might not have a corresponding standoff in the chassis. The following steps describe how to install
an additional standoff in a standard ATX chassis and how to secure the desktop board to this added
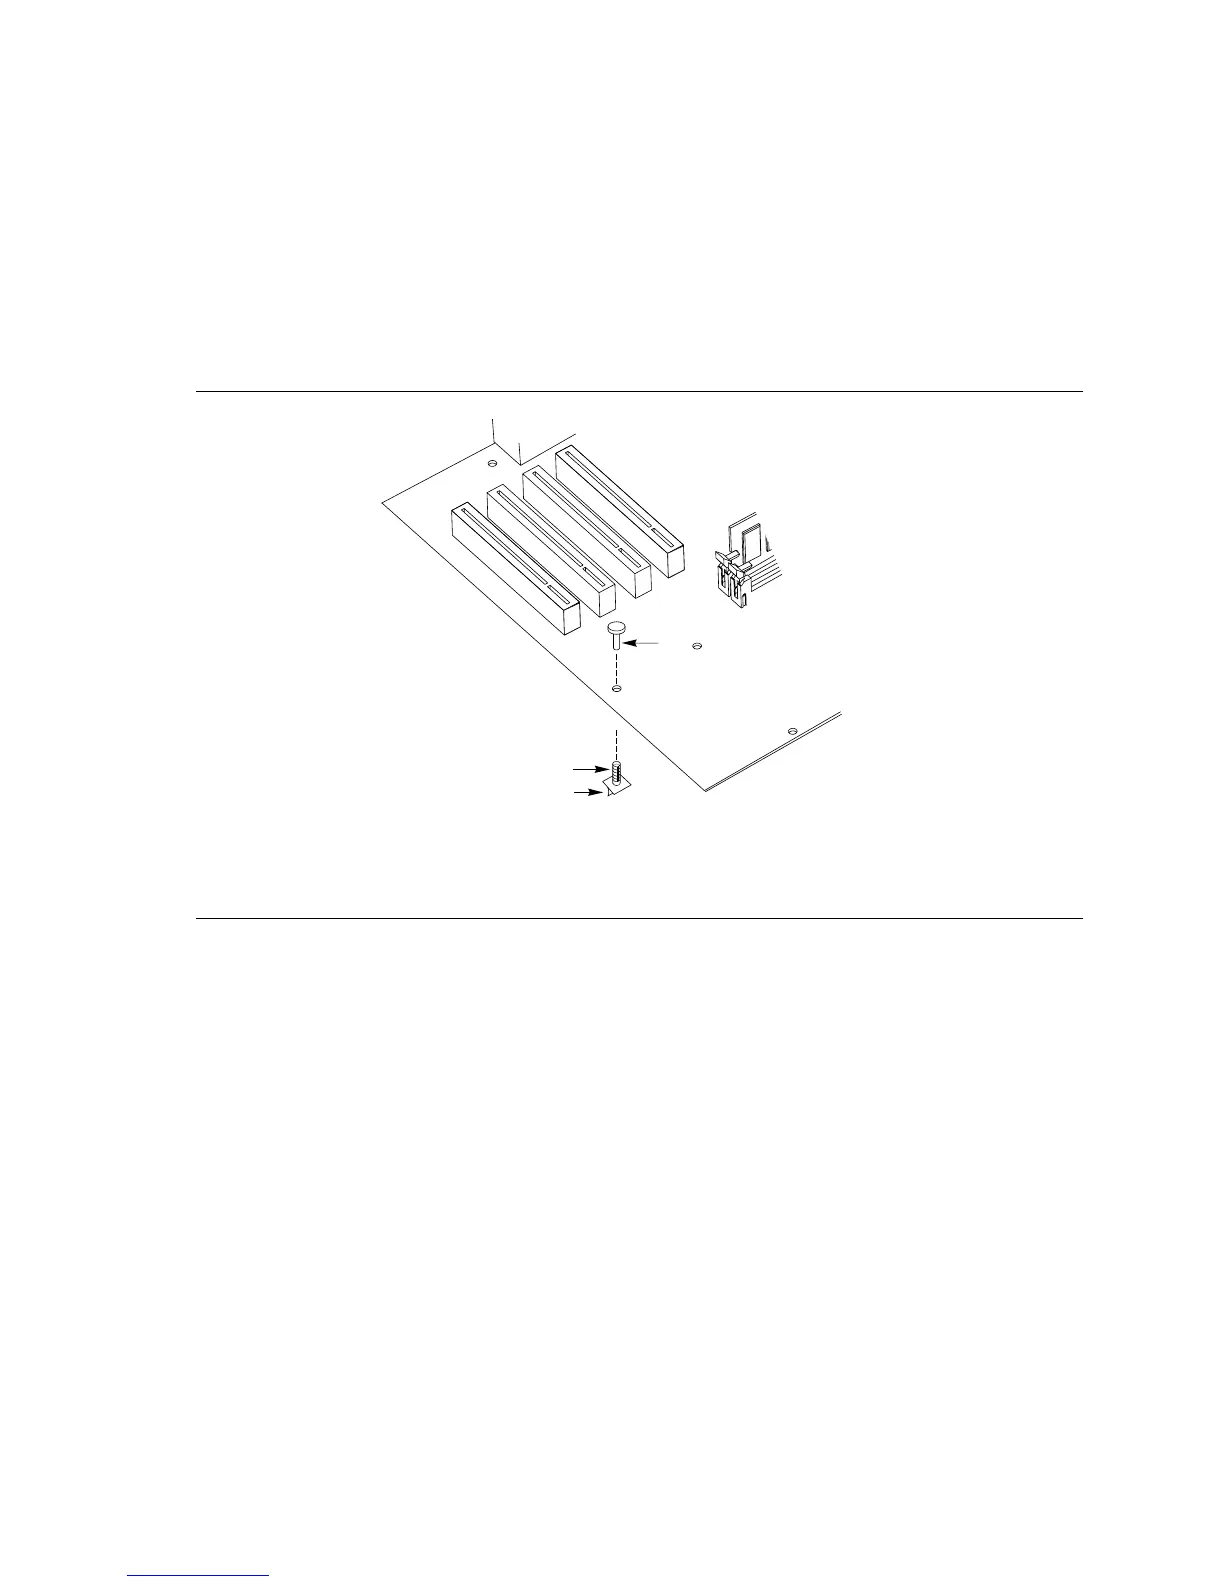
standoff. Figure 4 shows the standoff (B), its associated adhesive pad (C), and a standoff retention
pin (A).
OM08553
A
B
C
A Standoff retention pin
B Standoff
C Adhesive pad
Figure 4. Installing an Additional Desktop Board Support Standoff
Perform the following steps to install the added standoff for the desktop board:
1. Trial fit the added standoff (B) in the desktop board (in the position indicated in Figure 4), then
position the desktop board in the ATX chassis on the existing standoffs, noting the required
mounting location for the new standoff in the chassis.
2. Remove the desktop board, clean the mounting location, then remove the protective paper
covering the adhesive (C) at the base of the added standoff (B).
3. Remount the desktop board in the chassis and press down on the added standoff (B) until the
adhesive secures it to the chassis.
4. When final fitting the desktop board into the chassis, position the desktop board at the same
height on the added standoff (B) as the other standoffs. Press the standoff retention pin (A)
into the added standoff to lock the desktop board at that height.