7
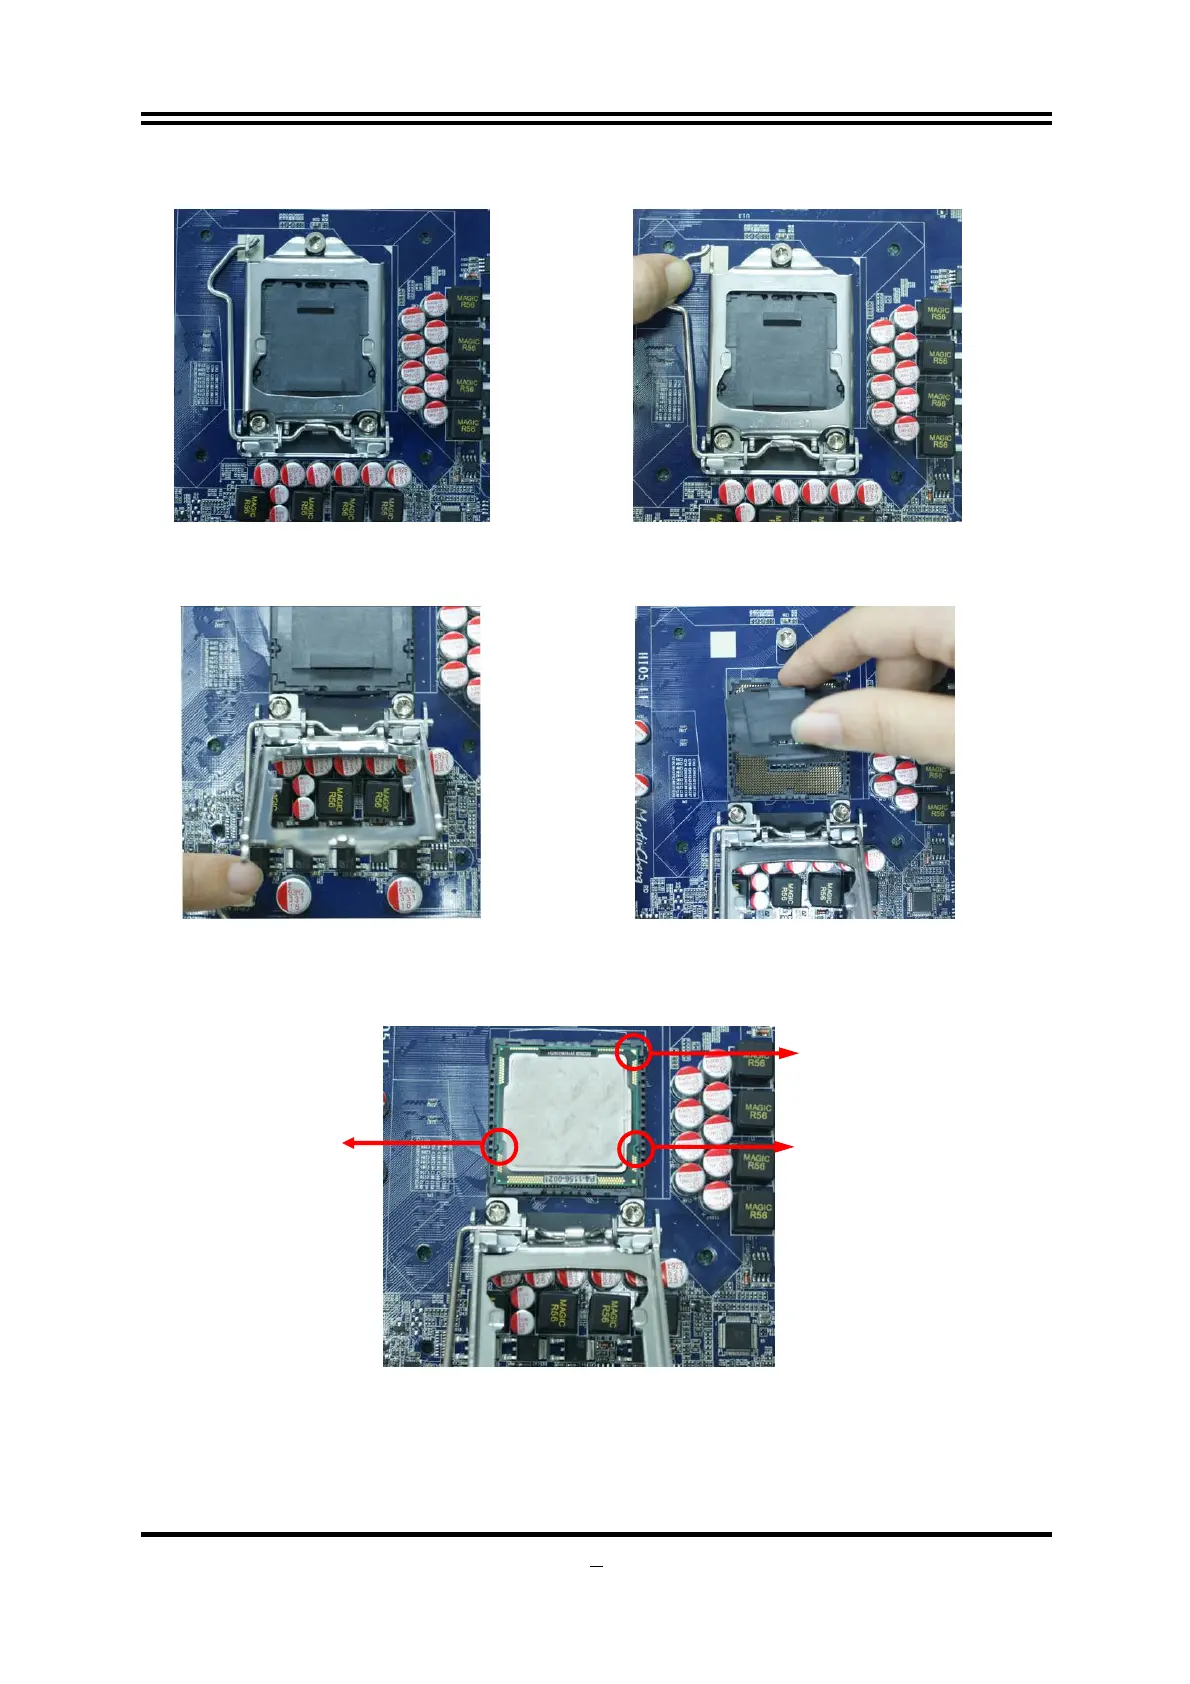
2-3-2 LGA 1155 CPU Installation Guide
1. Please make sure that CPU socket is facing
towards you and the level is on you left hand
side.
2. Press down the level and move it to the left side
to make sure it is freed from the hook and then
open it upwards about 135 degree.
3. Open the level upwards about 135 degree and the
metal protection plate will be pulled up at the same
time.
4. Remove the plastic protective cap from the
socket. (Put it to the original place if CPU is not
installed. Do not touch the metal contact point of
the CPU socket).
5. Make sire that golden finger in the right place as shown in the above illustration and
match the two alignment keys on the CPU with two points of the socket. CPU can only be
correctly installed with this direction. Incorrect installation might cause damage to CPU.
Pin-1 Indicator
Alignment Key
Alignment Key