EasyManua.ls Logo

Intel H67 User Manual

Intel H67
47 pages
To Next Page IconTo Next Page
To Previous Page IconTo Previous Page
Page #16 background imageLoading...
Page #16 background image
11
2-5-3 Installing Card Bridge
The following illustrations show you how to install the Bridge Card.
In order to activate the CrossFire/SLI technology, you have to install the optional
bridge card for your CrossFire /SLI Tech. Supported VGA Cards before you activating
the advance multi-GPUs functions.
Installation Reference
1. Install your VGA Cards in the PCI-E x16
slots.
2. Prepare with the Bridges with your
VGA Cards.
3. Be careful with the position for the pin you
would like to set up.
4. Keep straight to force the CF Bridges
plug into both sides of CrossFire Tech
Supported VGA Cards.
After the above installation completed, please connect display connectors
and VGA card independent power plug. Then refer to your graphics card
manual to install needed drivers and utilities needed for CrossFireX or
SLI function.
Notice!
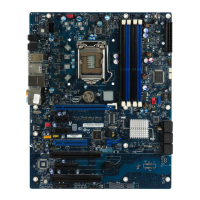
The motherboard and graphics card illustrations are for reference use only.
We suggest that you install graphics cards in PE1 and DP1 slot for better
CrossFire performance.
Question and Answer IconNeed help?

Do you have a question about the Intel H67 and is the answer not in the manual?

Intel H67 Specifications

General IconGeneral
Socket TypeLGA 1155
Memory TypeDDR3
Max Memory Size32 GB
SATA 6Gb/s2
SATA 3Gb/s4
USB 2.0 ports14
PCIe 3.0 SupportNo
ChipsetIntel H67
Integrated GraphicsYes

Summary

Chapter 2 Hardware Installation

2-1 Hardware installation Steps

Step-by-step instructions for installing hardware components like CPU, memory, expansion cards, and connecting cables.

2-3 Installing CPU

Instructions on how to properly install the CPU into the LGA 1155 socket, including alignment and seating.

2-3-2 LGA 1155 CPU Installation Guide

Visual and step-by-step guide for safely installing the CPU into the LGA 1155 socket.

2-4 Install Memory

Guide on installing DDR III memory modules, including valid configurations and dual-channel limitations.

Chapter 3 Introducing BIOS

3-1 Entering Setup

Instructions on how to access the BIOS setup utility by pressing specific keys during boot-up.

3-9 Boot Menu

Configuration of boot options, including timeout, fast boot, boot device priorities, and ROM messages.

3-11 Turbo OC

Options for CPU and memory performance tuning, including clock overrides, voltage settings, and timings.

3-11-1 CPU Configuration

Settings for CPU features like Hyper-Threading, processor cores, Execute Disable Bit, and power technology.

3-11-2 CPU Performance Tuning

Detailed tuning options for CPU performance, including clock overrides, turbo voltage, and current limits.

3-11-3 Memory Performance Tuning

Fine-tuning memory timings such as CAS Latency, Row Precharge Time, and RAS to CAS Delay.

3-11-4 Voltage Configuration

Settings for adjusting CPU Vcore, PCH core voltage, and DRAM voltage for performance tuning.

3-13 How to Update BIOS

Instructions on how to update the BIOS using DOS or Windows operating systems.

Chapter 4 Driver & Free Program Installation

4-1 Installation Instruction

General instructions for installing motherboard drivers and utilities using the provided DVD.

Related product manuals