6
2-3 Installing CPU
2-3-1 About Intel LGA 1155 CPU Socket
This motherboard provides an 1155-pin DIP, LGA 1155 Land Grid Array socket,
referred to as the LGA 1155 socket.
The CPU that comes with the motherboard should have a cooling FAN attached to
prevent overheating. If this is not the case, then purchase a correct cooling FAN
before you turn on your system.
NOTED!
Be sure that there is sufficient air circulation across the processor’s
heat sink and CPU cooling FAN is working correctly, otherwise it
may cause the processor and motherboard overheat and damage,
you may install an auxiliary cooling FAN, if necessary.
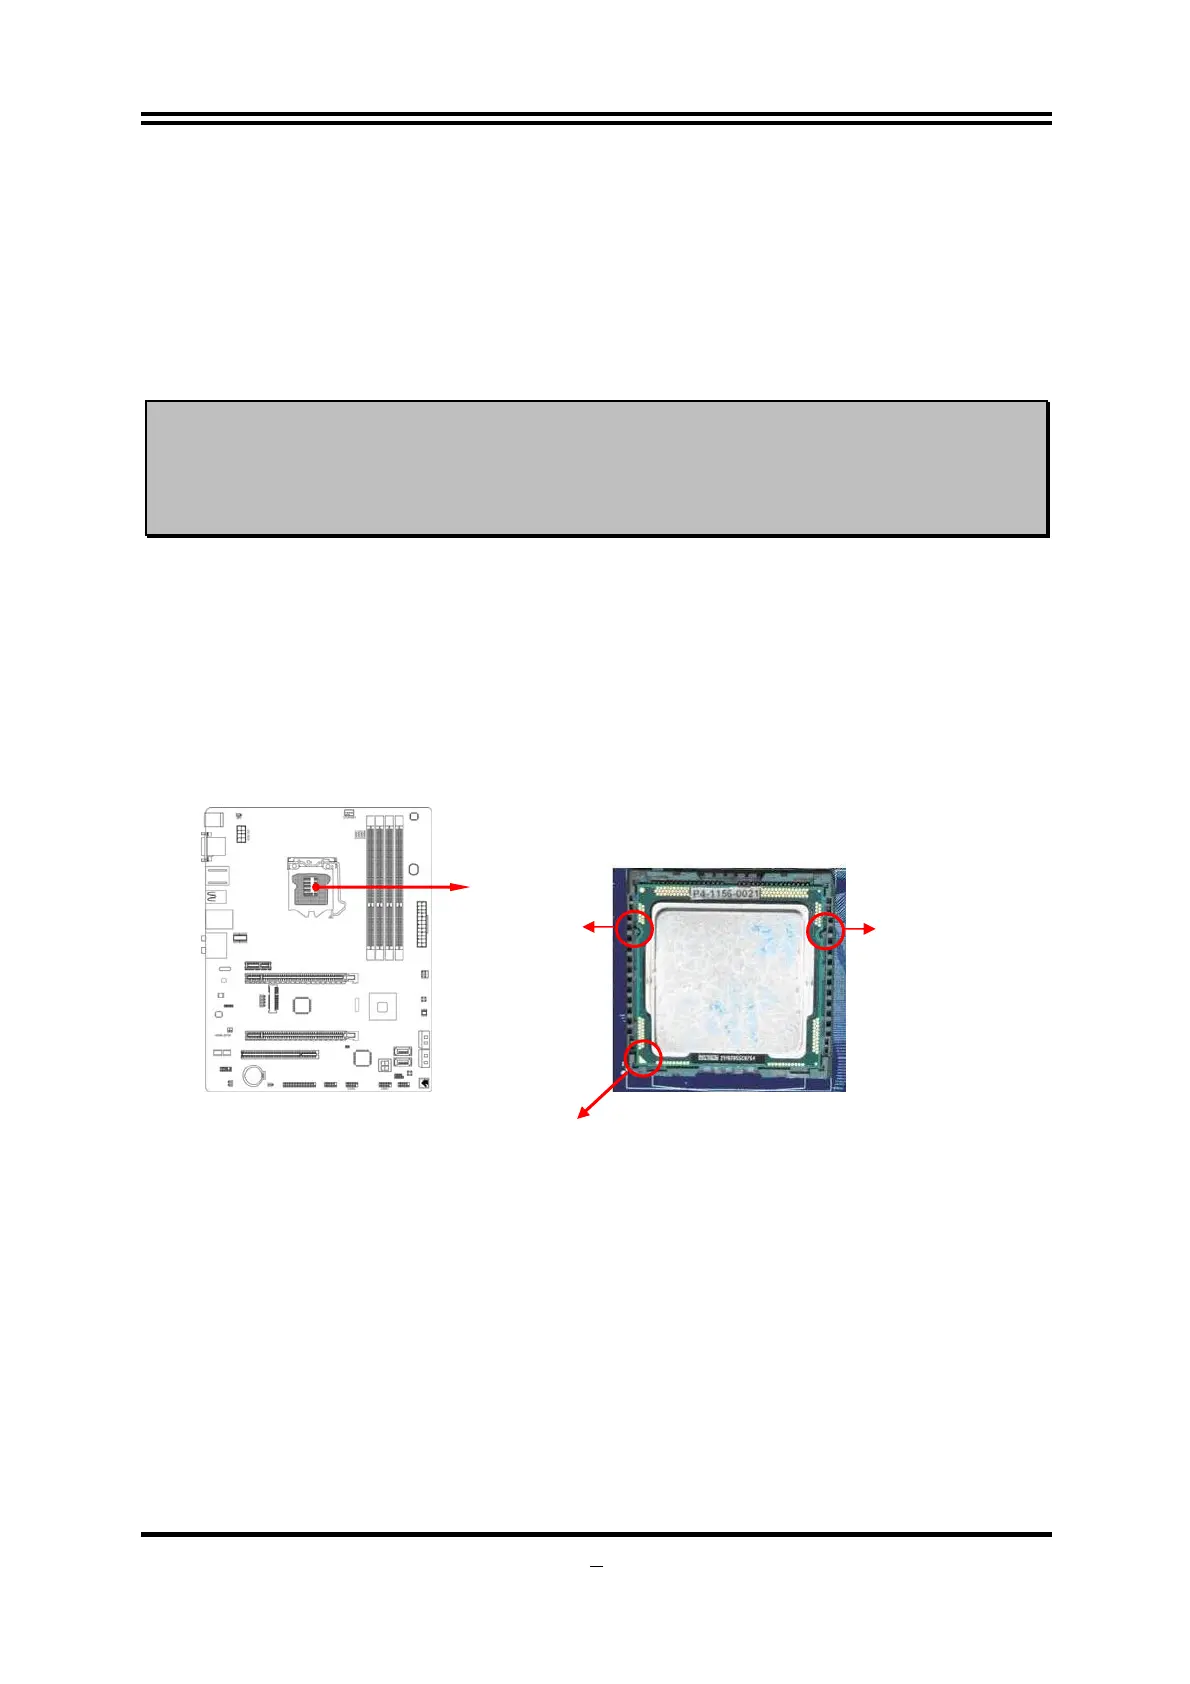
To install a CPU, first turn off your system and remove its cover. Locate the LGA 1155
socket and open it by first pulling the level sideways away from the socket then
upward to a 135-degree angle. Insert the CPU with the correct orientation as shown
below. The notched corner should point toward the end of the level. Because the CPU
has a corner pin for two of the four corners, the CPU will only fit in the orientation as
shown.
When you install the CPU into the LGA 1155 socket, there’s no force required CPU
insertion; then press the level to locate position slightly without any extra force.
Pin-1 Indicator
Alignment key
Alignment key