Outdoor Software Defined Radio (OSDR) platform
Installation & Cabling Manual - Edition 3.0
107
Outdoor AC PoNE, Continued
Pole and wall
installation
procedure
For mechanical installation and cabling of outdoor AC PoNE, proceed as
follows:
Step Action
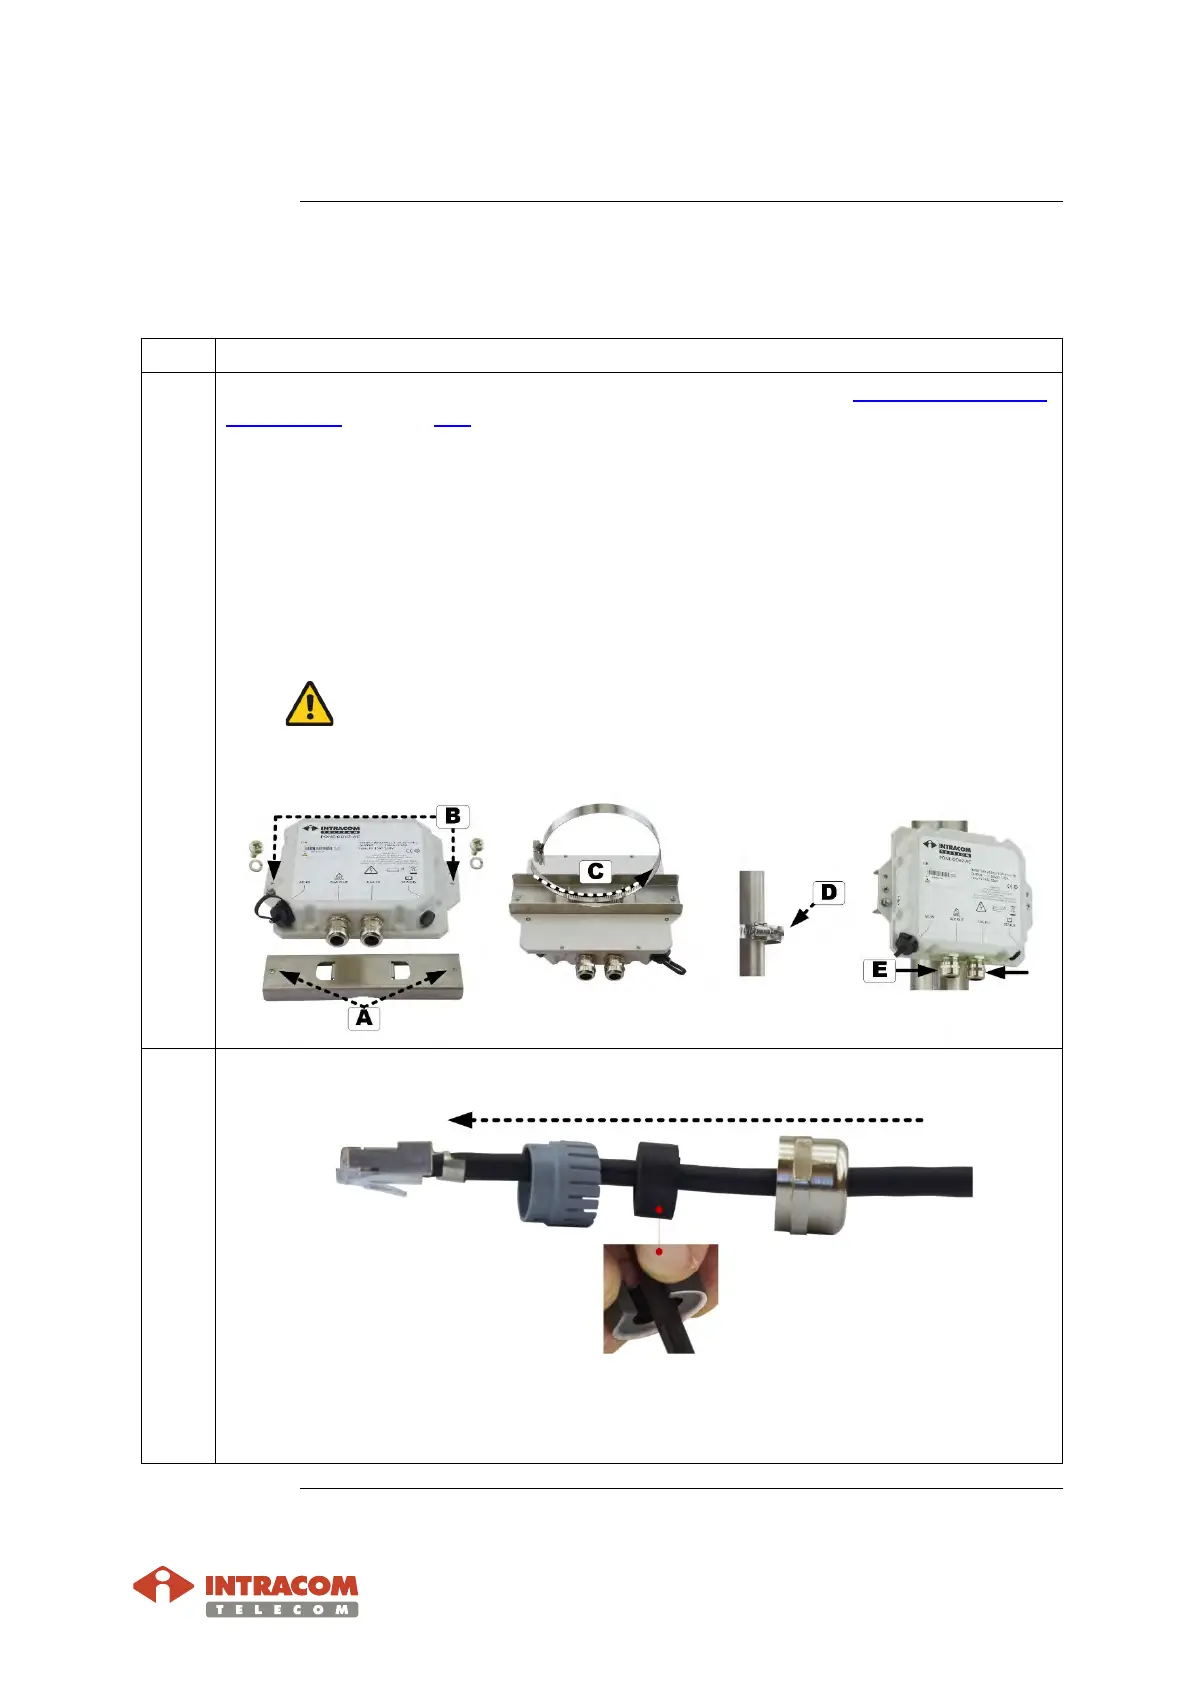
1
Prepare and terminate the Ethernet cables (x 2) as instructed to Appendix D: Cables
Termination on page 114.
For pole installation follow this step. For wall installation go to last step.
Pole installation:
A Attach the plate onto rear side of PonE, as shown below.
B:
Install lock washer and screw. Then use the cross headed screwdriver to fully
tighten.
C: Pass the hose clamp through the plate holes.
D: Install the PonE onto pole. Use the tool with M5 deep socket to tighten.
Do not over tighten. Adjust the tool for max tightening torque 2 Nm.
E:
Use the U-wrench to remove the two sealing nuts. Then remove the claw and
seal (black item).
2 Pass the cable through the parts of gland, as shown below:
Plug the Ethernet cables to the GbE receptacles (OUT: goes to radio and IN: goes to
customer network). Listen for a “click” when inserting. This verifies that the jack
has been inserted properly.
Continued on next page
 Loading...