24
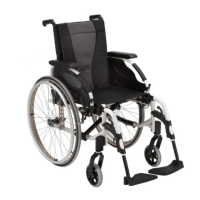
SECTION 5—REAR WHEELS/FRONT CASTORS
W A R N I N G
The seat height, seat depth, back angle, seating system, size/position of the
rear wheels, size/position of the front casters, seating options (e.g. headrest,
back bag, …) as well as the user condition directly relate to the stability of
the wheelchair. Any change to one or any combination of the nine may cause
the wheelchair to decrease in stability.
After ANY adjustments, repair or service and before use, make sure all
attaching hardware is tightened securely - otherwise injury or damage
may occur.
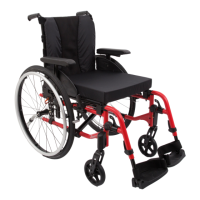
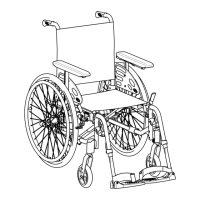
Removing/Installing Rear Wheels
W A R N I N G
If changing the size of the rear wheel or the seat-to-floor height, refer to
the table of the next page.
Fixed Axles, Transit version
NOTE: For this procedure, refer to FIGURE 5.1, next page.
Removing rear wheels
1. 12”; remove the fixed axle, washers, dust cap and locknut that secure rear wheel to
the axle brackets. Remove existing rear wheel from the wheelchair.
2. Install new/existing rear wheel onto wheelchair. Refer to Installing Transit Kit
paragraph, see STEPS 3-6 only.
3. 24” or 22”; remove the complete wheel and the axle bracket from the axle plate.
Refer to Removing/Installing Rear Wheels paragraph.
Installing Transit Kit
1. Always make sure that the axle plate is in the passive position on both sides, refer to
Adjusting the Wheel Base Length paragraph.
2. Install the axle bracket and anti-tippers bracket with the Axle brackets Hardware
3. Install fixed axle through washer, new/existing rear wheel and axle bracket.
4. Securely tighten with the existing fixed axle locknut. Torque to 25 Nm.
5. Fixed and adjust the transit brake with its brake hardware, adjust the distance
between the brake shoe and the wheel, see Adjusting Wheel Brake paragraph.
6. If necessary, repeat STEPS 1
-
5 for opposite rear wheel.
NOTE: Both Axle brackets should be set at the same position. Head of bottom mounting
screws needs to be on the outside position.