26
OPERATION AND SET-UP ON THE CONTROLLER
inVENTer Connect controller platform | Operating instructions
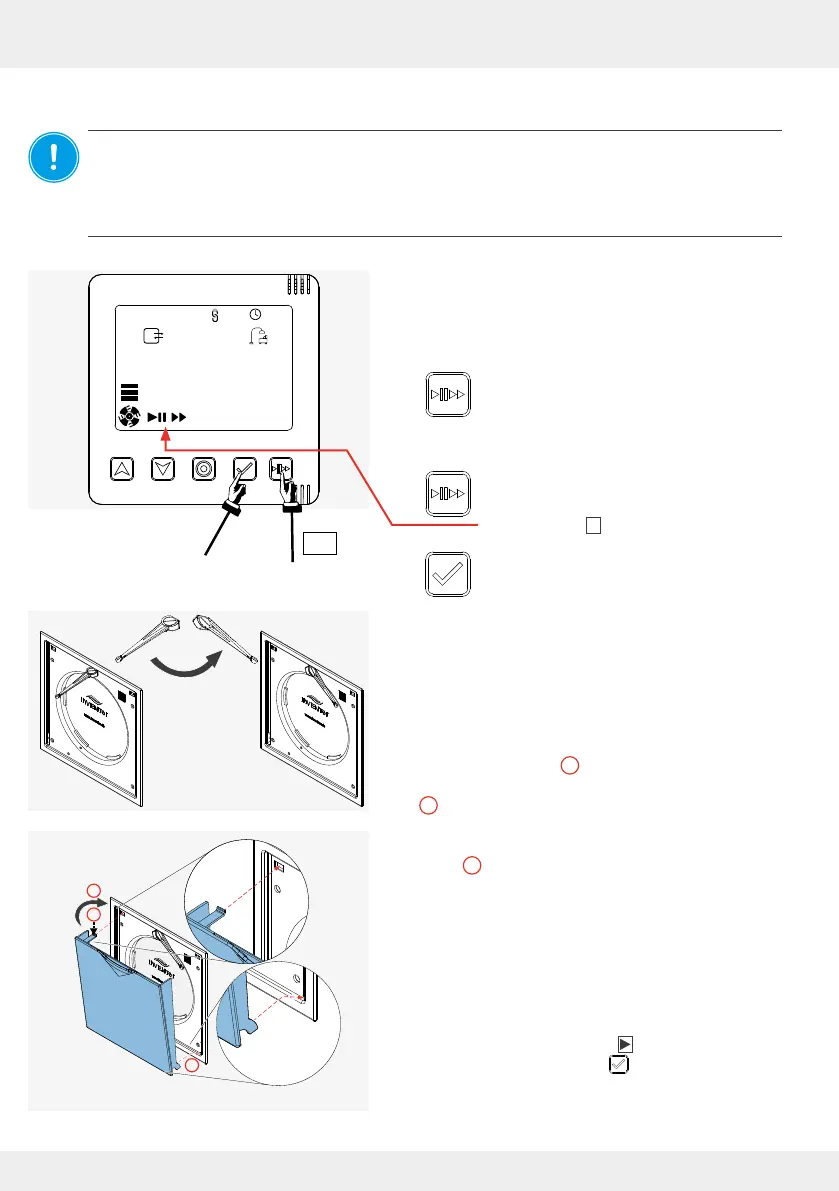
Attaching closing aps / swivelling the locking arm to the right
NOTICE: Locking arm in wrong position. Breakage of the locking arm.
Before the closing ap is retted, the locking arm must be swivelled to the right. This is done
exclusively by the controller. To do this, switch all devices to pause
( 3.6: Boost/Pause or when operating via app 4.8: Set ventilation mode and level).
Never swivel the locking arm by hand!
Requirements:
• The Connect inner covers (and any other
components) are paired with the controller.
• The "System Information" display screen is called
up.
► Press the Boost/Pause key (1) on the
controller.
The rst symbol ashes.
► Press the Boost / Pause key on the
controller again until the
Pause symbol II ashes.
► Press the selection key on the controller
to conrm the pause (2).
The locking arm swivels to the right.
Fit the closing ap.
► Hook the lugs of the closing ap into the electronics
cover at the bottom (
1
).
► Press the spring clip at the top slightly downwards
(
2
).
► Guide the closing ap to the top of the electronics
cover (
3
), pushing the spring clip, which is slightly
pressed down, into the opening provided in the
electronics cover.
The spring clip engages and the closing ap is
pulled and held by the installed magnets to the
electronics cover.
► Exit the pause function:
Press the Boost / Pause button on the controller
several times again until the symbol ashes.
Conrm with the select key .
You have retted the closing ap.
1
2
3
2 x