EasyManuals Logo

INVENTOR COOL User Manual

INVENTOR COOL
184 pages
To Next Page IconTo Next Page
To Previous Page IconTo Previous Page
Page #22 background imageLoading...
Page #22 background image
19
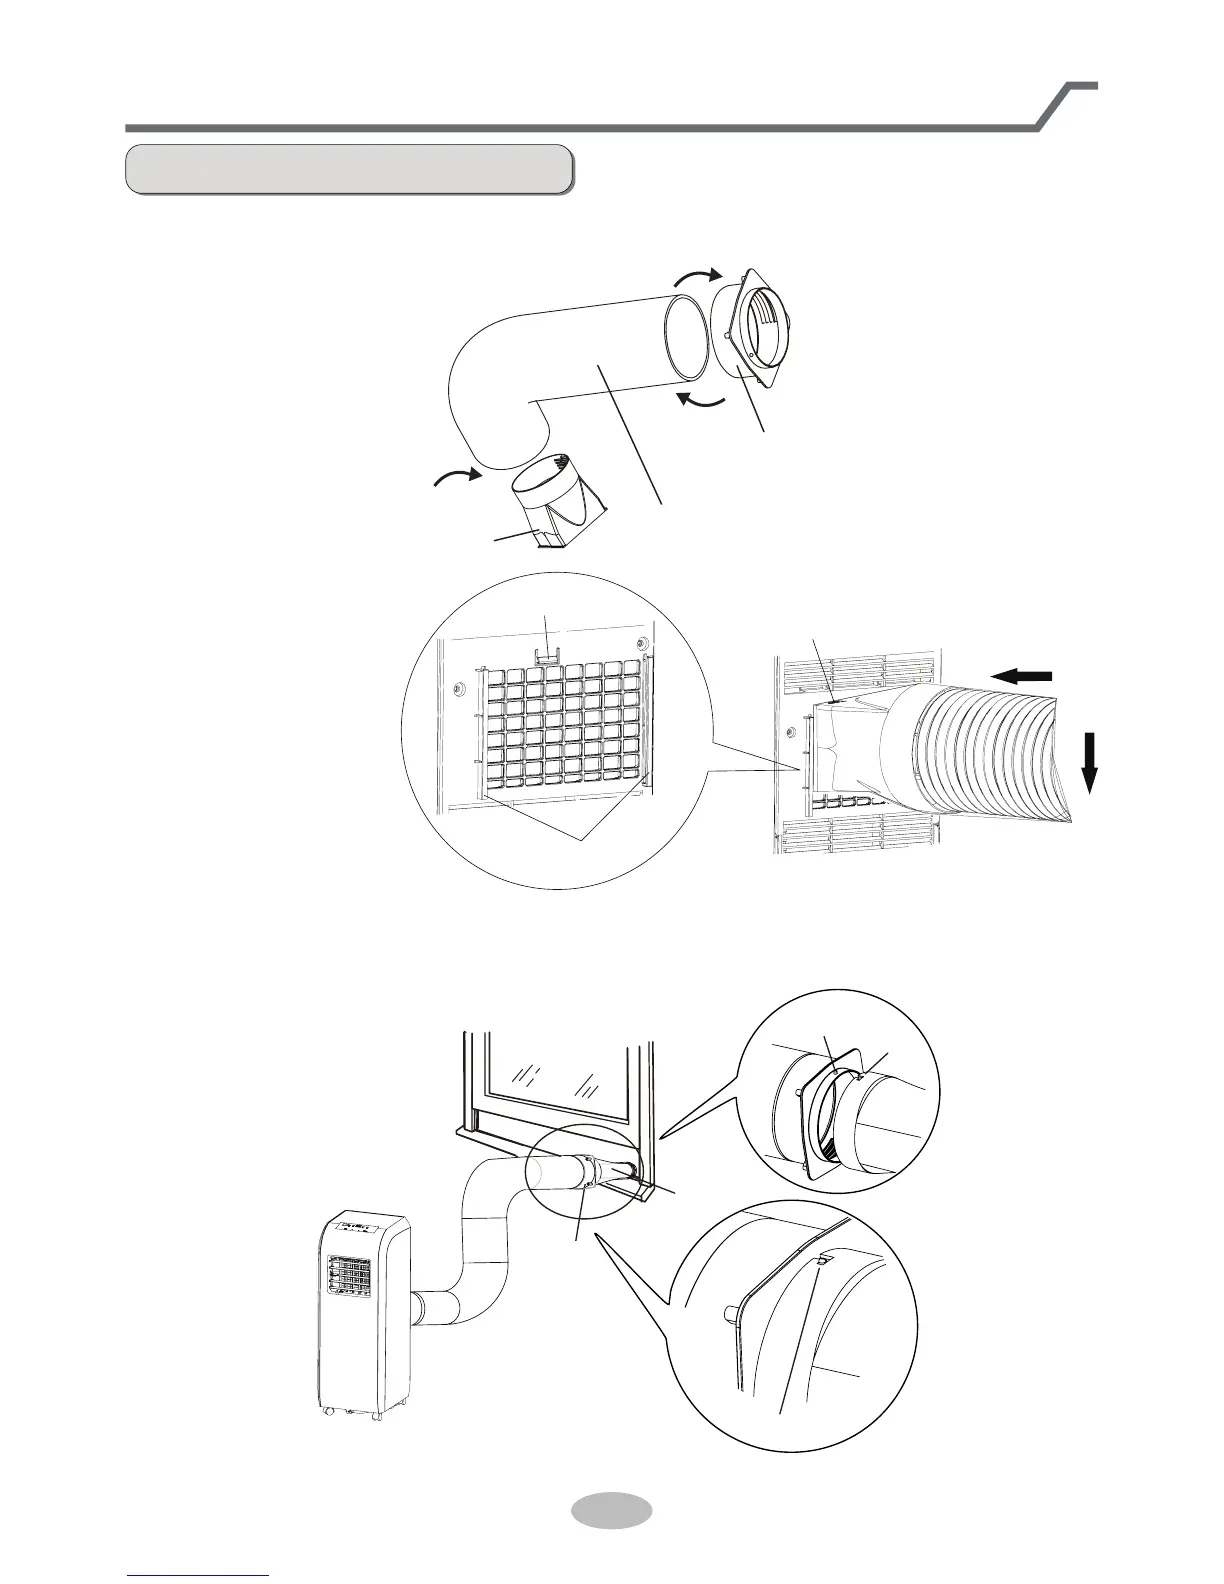
Installation and disassem b ly of heat discharg e pipe
Install heat discharg e pipe
1. Rotate oint A and oint  clockwise into the two ends of heat discharge pipe.
clockwise
clockwise
oint A
oint 
oint 
oint C
heat discharge pipe
2. Insert oint A of heat
discharge pipe (the
side with " TOP" is
upwards) into the
groove until you
hear a sound.
3. Aim the locating pole of oint  of heat discharge pipe at the opening of oint C
rotate it slightly to make oint  and oint C connect tightly.
groove
clasp
the side with " TOP" is upwards
locating pole
opening
tightened status

Table of Contents

Questions and Answers:

Question and Answer IconNeed help?

Do you have a question about the INVENTOR COOL and is the answer not in the manual?

INVENTOR COOL Specifications

General IconGeneral
BrandINVENTOR
ModelCOOL
CategoryAir Conditioner
LanguageEnglish

Related product manuals