EasyManuals Logo

INVENTOR COOL User Manual

INVENTOR COOL
184 pages
To Next Page IconTo Next Page
To Previous Page IconTo Previous Page
Page #24 background imageLoading...
Page #24 background image
21
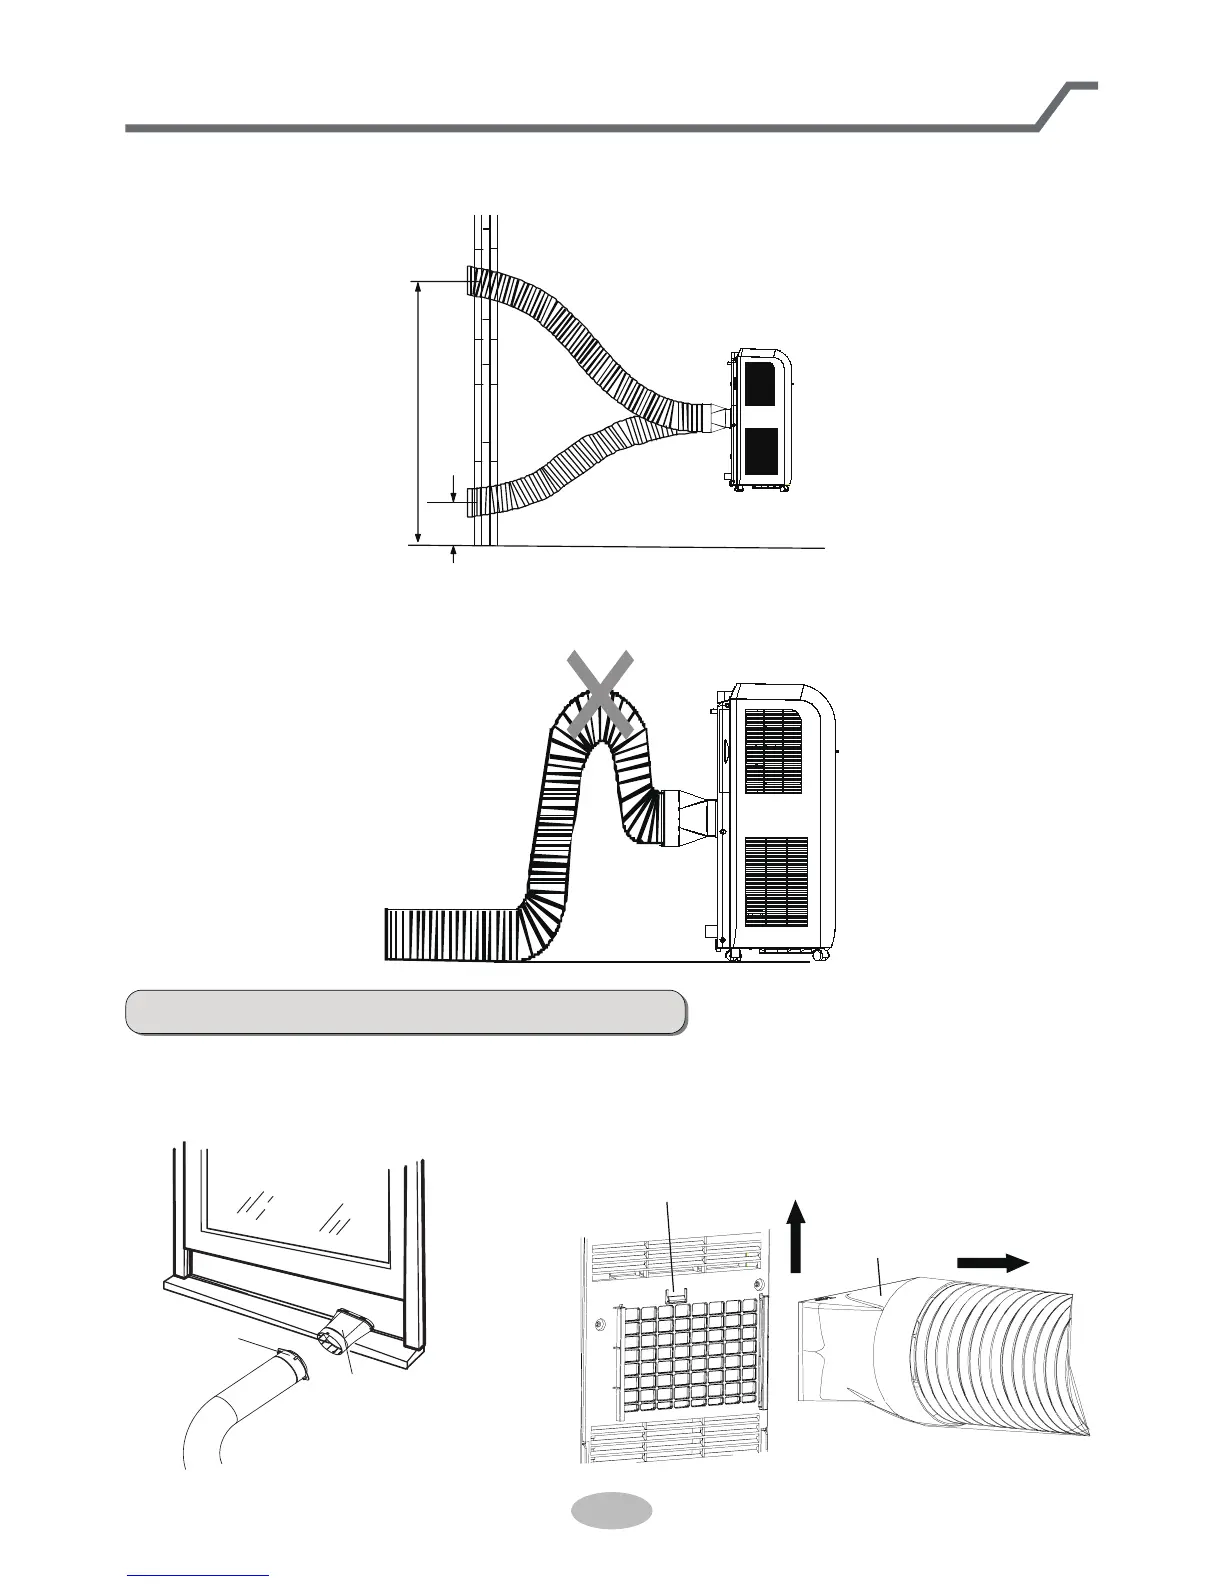
D isassem b le heat discharg e pipe
1. Remove oint :
remove oint  from oint C.
2. Remove oint A:
Press the clasp and lift oint A upwards to
remove it.
oint 
oint C
upwards
clasp
disassemble
oint A
● Correct installation is as shown in gure (hen installing it on wall, height of hall
should be about 0cm130cm from oor).
● rong installation is shown in following gure (If the pipe is bent too much, it
would easily cause malfunction.)
Installation and disassem b ly of heat discharg e pipe
130cm
40cm

Table of Contents

Questions and Answers:

Question and Answer IconNeed help?

Do you have a question about the INVENTOR COOL and is the answer not in the manual?

INVENTOR COOL Specifications

General IconGeneral
BrandINVENTOR
ModelCOOL
CategoryAir Conditioner
LanguageEnglish

Related product manuals