8. How to enable/disable Sensorless Vector mode
Page 8
This guide has been produced by The Inverter Drive Supermarket Ltd.
All content, including but not limited to graphics, text and procedures copyright The Inverter
Drive Supermarket and must not be reproduced or altered without prior written permission.
©
The standard motor control mode of the
Optidrive E3 is Sensorless Vector. By default,
the E3 uses the motor parameters for this
mode. However, low-speed torque can be
improved further by performing an “Autotune”.
The Autotune process improves performance
by building a model of the motor. This requires
the Inverter to operate the motor for a few
seconds to gather the necessary data.
To fully enable Sensorless Vector control by
performing anAutotune, first set the parameter
values specified in 8.1 (below) and then
complete the steps described in 8.2 and 8.3.
If Sensorless Vector control is not desired,
change parameter P-51 from 0 to 1 to disable
Sensorless Vector control and set the motor
control mode to simple V/f.
Extended Menu Access Code
Default is 0; set to to gain access to “advanced” parameters (P-15 to P-60).201
Rated Voltage of the motor. Set to match the motor nameplate eg V230
Rated current of the motor. Set to match the motor nameplate eg A2.4
Motor Rated Frequency (Hz)
Rated frequency of the motor. Default is Hz; change to suit the motor.50
Rated rpm of the motor. Set to match the motor nameplate eg rpm (min-1)1460
Default is for (Sensorless) Vector Control Mode. Default is required for this example.0
To disable Sensorless Vector mode set to 1 to change to simple V/f mode.
8.1 Parameters to check prior to an Autotune.
Easy Start Guide
8.2 Start Autotune.
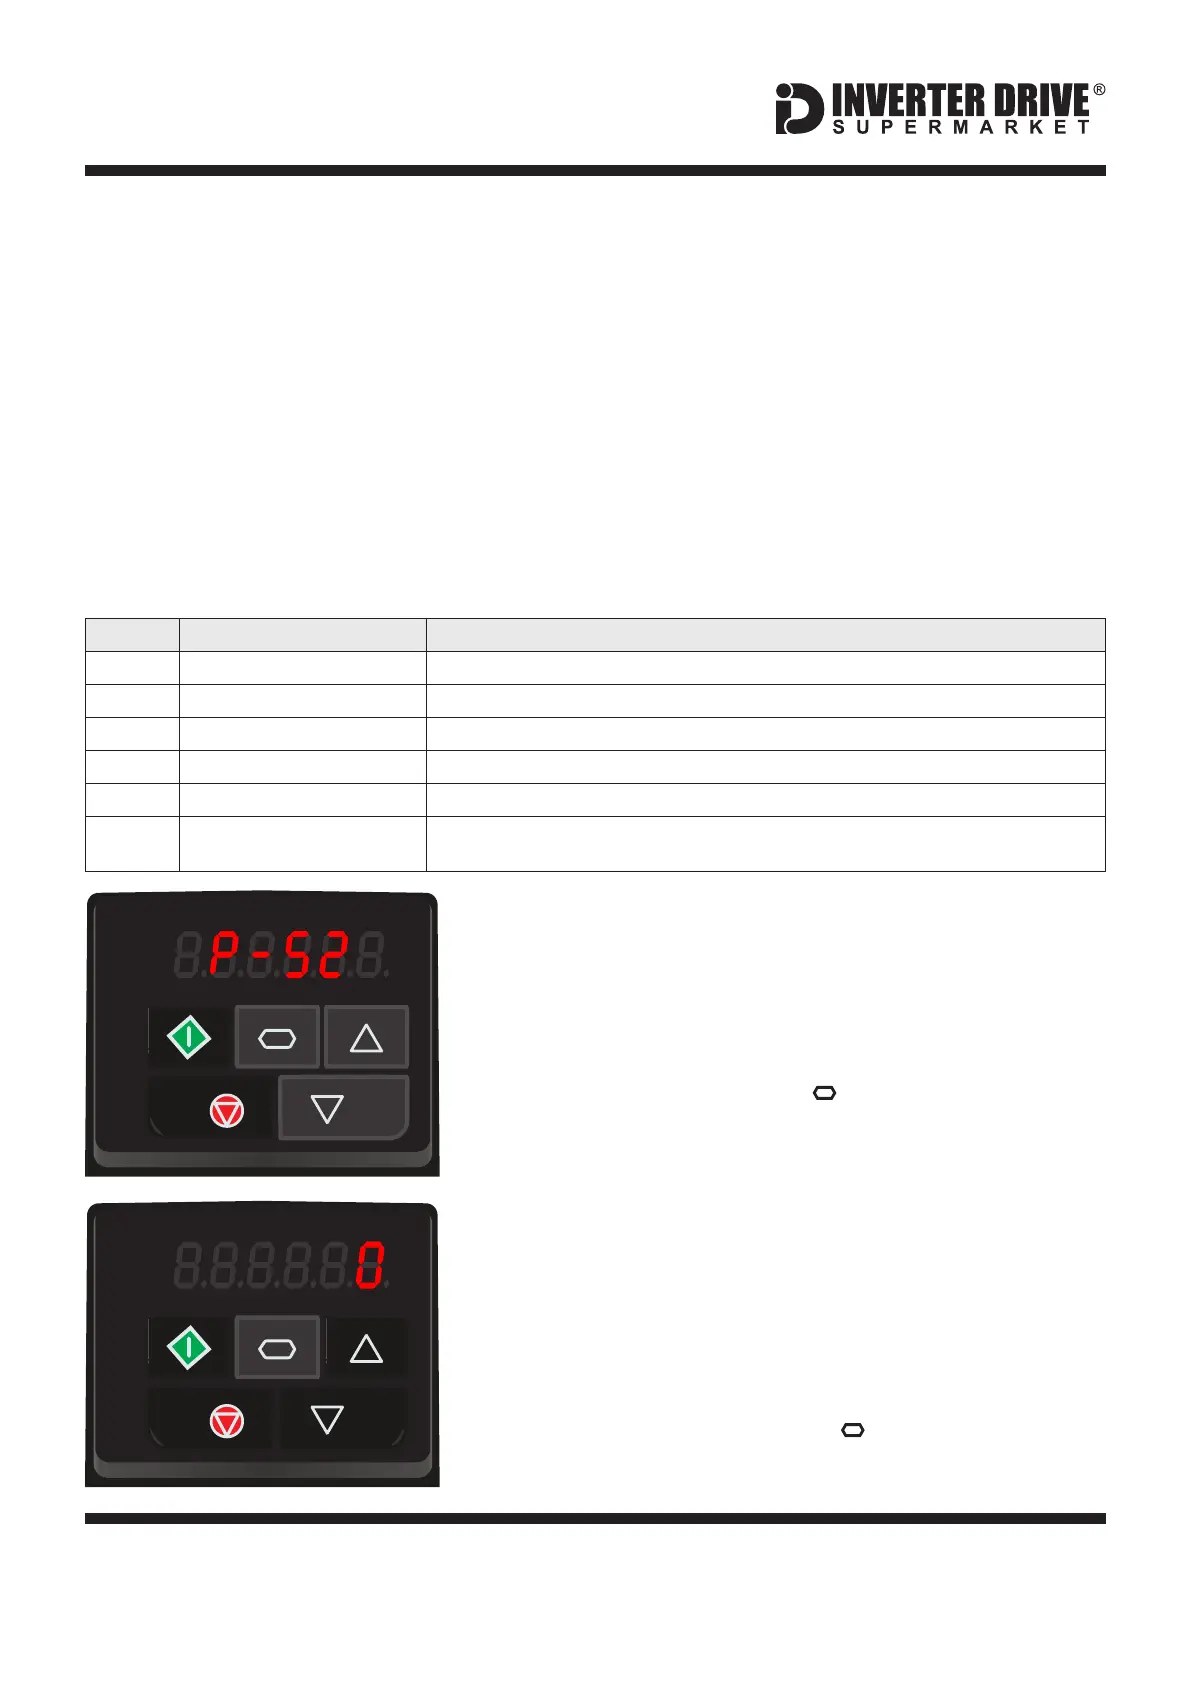
Once the parameters in 8.1 have been set, select
parameter P-52 and press the navigate key to edit the
value.
Use the up and down keys to change the value from 0 to
1 then press the navigate key again to start the
Autotune.
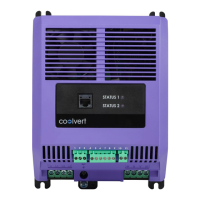
8.3 The Autotune process.
When complete, the value of P-52 will return to 0.
There is no visible indication that an Autotune is in
progress but motor excitation noise will be heard for a
few seconds whilst the required values are measured.
Press and hold the navigate key for approx. 2 seconds
to return to the main operating display.
Invertek Optidrive E3 Inverter (IP20, 3ph output)