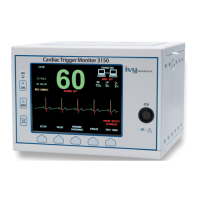
MONITOR SETUP
16 Model 3000T Operation Manual
MONITOR SETUP
To setup the instrument for operation
WARNING: Before this monitor is plugged into any power source verify visually that the line selector switch
on the rear panel displays the appropriate voltage range for your location.
For further instructions, see “To Change Mains Voltage” below.
1. Plug the ac line cord into a power source providing the proper voltage.
2. Press the ON switch at the left side of the front panel to turn power on.
3. Connect the patient cable to the ECG connector on the front panel.
To change Mains Voltage
1. Verify that the power cord is disconnected.
2. Locate the line voltage selector switch on the monitor rear panel.
3. If necessary move the selector switch to the appropriate voltage for your location (for assistance, contact your
Maintenance Department).
To set the Language
Use the following procedure to change the language of the menu and messages.
1. Turn the monitor off by pressing the STBY key.
2. Press and hold the fourth and fifth soft key (from left to right) while applying power to the monitor by pushing
the ON key.
3. Press the [LANGUAGE] key to set the desire language. The language choices are: English, Spanish, French,
German, Italian, Portuguese, Swedish, Danish, Dutch, Norwegian and Finnish.
4. To save the language setting, turn the monitor off by pressing the STBY key.
To set the Time, Date and Audio
Use the following procedure to set the date and time. The time is indicated in the upper left corner of the display.
1. Press the [SETUP] key in the main menu.
2. Press the [VOL/CLOCK] key to access the Vol/Clock menu.
3. The first setting is for QRS VOL. Use the
and keys to increase or decrease the QRS VOL setting.
4. Press [NEXT] to move to the ALARM VOL setting. Use the
and keys to increase or decrease the
ALARM VOL setting.
5. Press [NEXT] to move to the MONTH setting. Use the
and keys to increase or decrease the month
setting.
6. Press [NEXT] to move to the DAY setting. Use the
and keys to increase or decrease the day setting.
7. Press [NEXT] to move to the YEAR setting. Use the
and keys to increase or decrease the year setting.
8. Press [NEXT] to move to the HOUR setting. Use the
and keys to increase or decrease the hour setting.
9. Press [NEXT] to move to the MINUTE setting. Use the
and keys to increase or decrease the minute
setting.
When all date, clock and audio settings are correct, select [EXIT] to enter the settings into the monitor’s memory.
 Loading...