17
3.6 Replacing Fuses
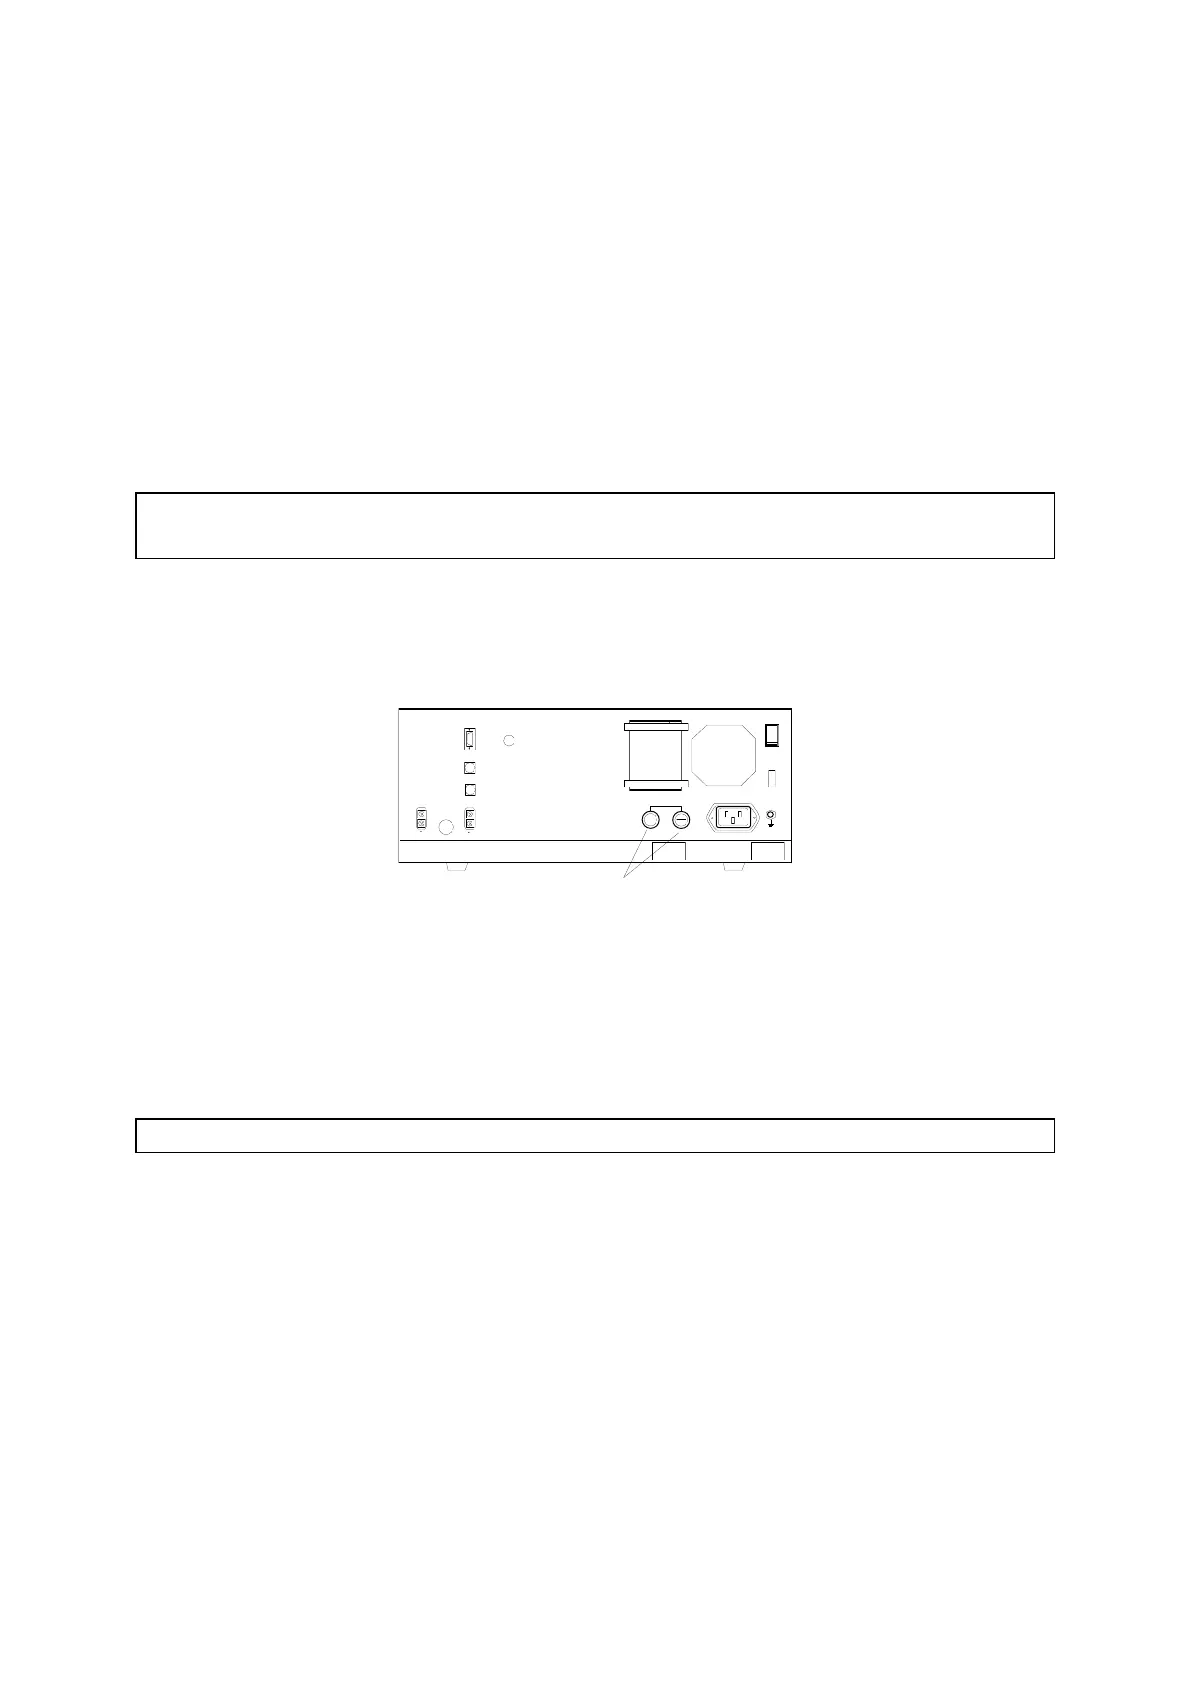
Two fuses are inserted in the rear of the main unit (as shown in Figure 3.4). Be sure
to use a fuse of the same amperage for replacement. One set of fuses is supplied as
a standard accessory.
Model P-1010 100 - 120V: 3.15A time lag fuses
200 - 240V: 2A time lag fuses
Model P-1020 100 - 120V: 5A time lag fuses
200 - 240V: 3.15A time lag fuses
Model P-1030 100 - 120V: 10A time lag fuses
200 - 240V: 5A time lag fuses
Warning: For continued protection against risk of fire, only replace with fuses of
the specified type and current rating.
(1) Turn the power switch off and unplug the power cable from the socket.
(2) Insert a standard driver into the fuse holder on the rear panel (Figure 3.4). Then
press and turn about 90° counterclockwise to remove the fuse.
Figure 3.4 Rear panel (P-1020)
(3) Insert the new fuse into the holder, insert the holder back into the fuse box, then
lock by turning 90° clockwise while holding the holder.
(4) Plug the power cable into the socket, turn the power switch on, then check
instrument operation.
Note: If a newly replaced fuse blows, contact your nearest Jasco distributor.