129
The preferred method to winterize your recreation vehicle is by using RV antifreeze in the
plumbing system.
This method utilizes a blowout plug, an air compressor and an air hose to remove excess
water out of the water lines.
1. Water heater power should be OFF (turn o both ELECTRIC and GAS switches).
2. Water heater bypass should be in position. Refer to the 2-Valve Water
Heater Bypass section.
3. The two water valves located in the basement compartment or next to the water pump
should be set to ; black valve should be pointing away from the clear plastic
hose. White valve should be pointing toward the pump. Refer to the 6 in 1 Utility
Center – 2 Valve System section.
4. Level the RV and drain the fresh water tank, water
heater and hot and cold water lines. Open all low
point drains and fresh water tank drain. Faucets
inside the RV need to be opened also to relieve
pressure and allow lines to drain. Refer to Drain-
ing the Fresh Water System section.
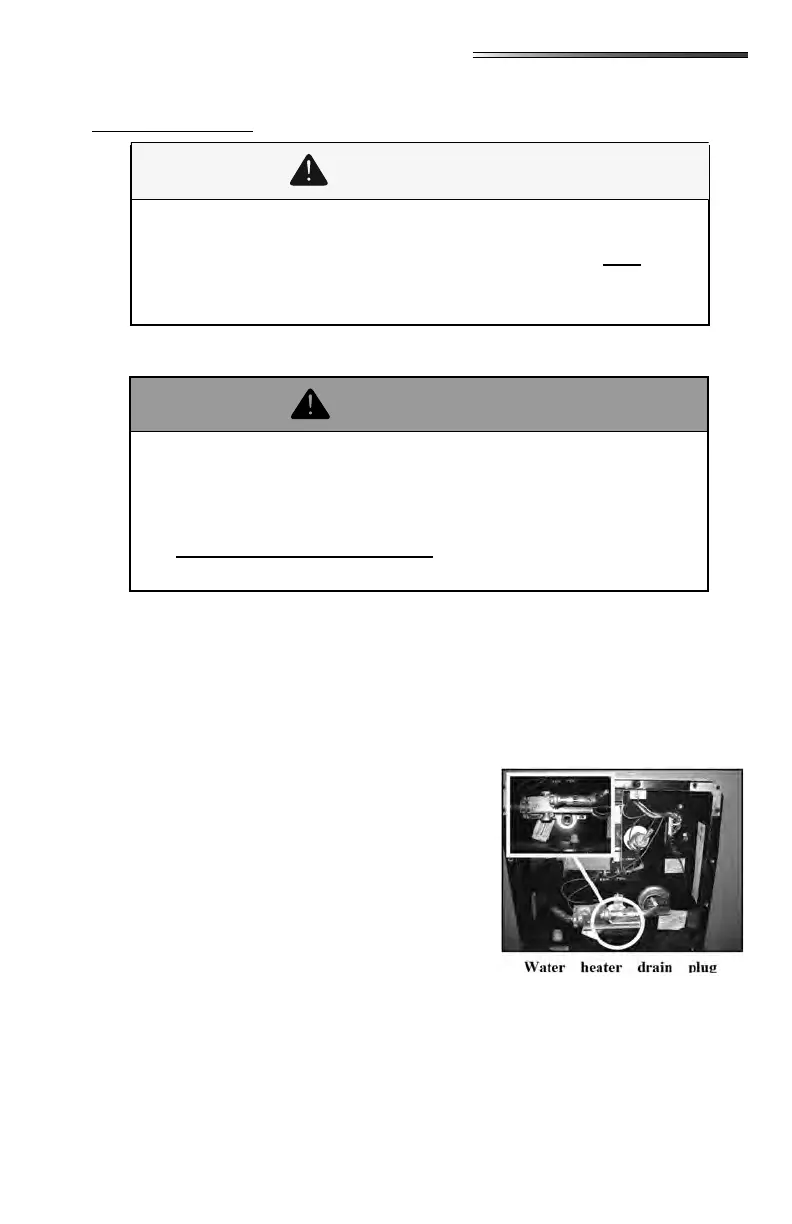
5. Remove the drain plug from the water heater (as
shown).
6. RV water lter should be removed for winterizing.
Refer to Water Purication System section. Your
RV may have one of two types of lters:
On full system canister water lters,
remove the canister, take out the lter, and reattach the empty canister.
Remove the cartridge lter, and replace it with a bypass tube
typically supplied with your RV.
If the recreation vehicle is going to be stored in a non-temperature controlled
environment with a risk of temperatures reaching 32°F (0°C) or lower, the air
pressure method is not adequate, winterizing with RV antifreeze be used
in the plumbing system. Repairs due to freezing are not covered under the
terms of the .
Never apply air pressure to the water system with any of the valves in
the closed position. Air pressure applied to a closed valve, faucet or low
point drain could potentially damage the seals and cause water leaks. If
you have questions, consult with your RV dealer. Using RV antifreeze is
the preferred method of winterization.




 To Next Page