141
Your RV may have one of two types of lters:
Remove the canister lid, take out the lter and then re-
attach the lid on the empty canister.
Remove the cartridge lter and replace it with a bypass hose
(supplied with your RV).
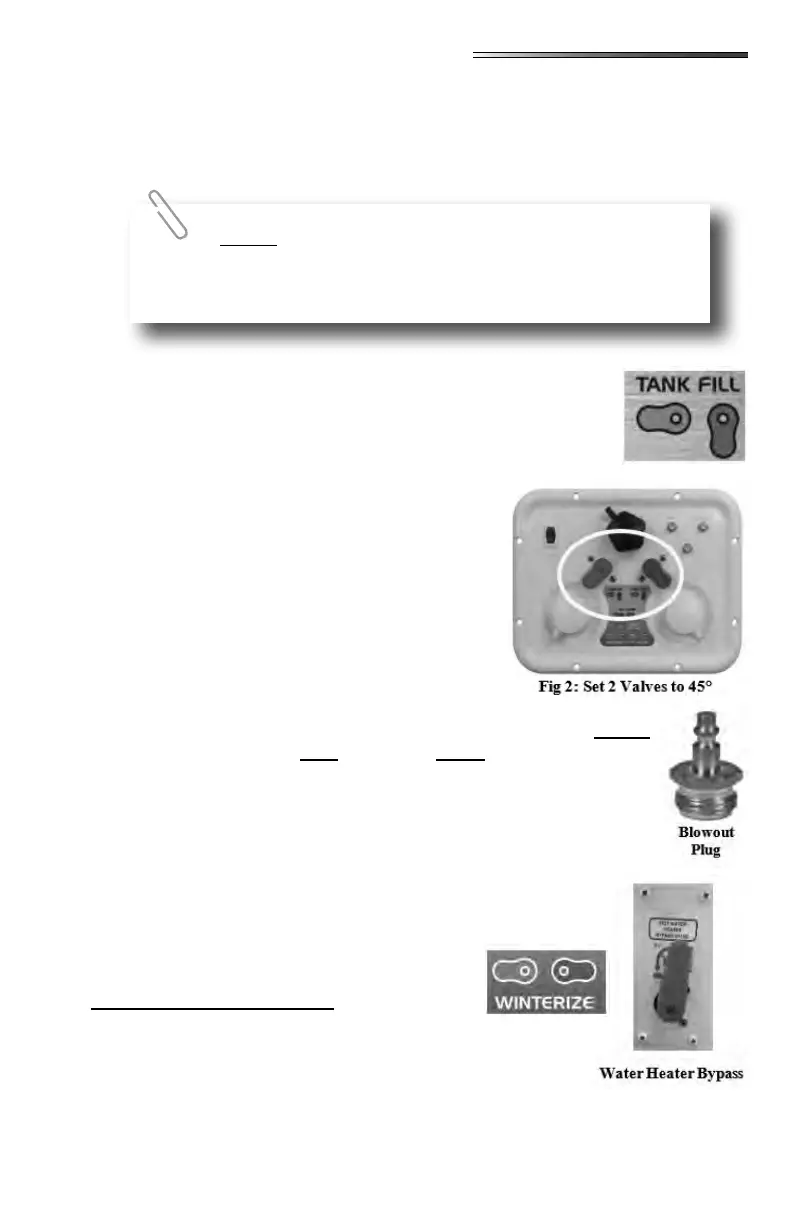
7. Turn the (color) valve handles to the TANK FILL position.
Green valve points left
Blue valve points down
8. Low point drains should be open to remove water from the lines.
9. Open all faucets in the RV. If there is an outside shower, attach the
shower hose to the shower, and open shower fau-
cets. If there is a sink at the outside kitchen, open
those faucets as well.
10. Run the water pump until pump is dry (approxi-
mately 15 to 20 seconds). Do not operate pump
longer than that without water, it can damage the
pump.
11. After water is drained from the lines, turn the Green
and Blue valves so they are at 45° ().
12. Attach a blowout plug to the City Water Inlet on the
utility center panel.
13. Attach the air hose to the blowout plug. Set the compressor to
14. Blow air into the utility center (30 PSI Max). Water lines should be clear
in 5 to 10 minutes.
15. Turn o air supply, remove air hose and blowout plug.
16. Close low point drains, replace the water heater drain plug.
17. Set the water heater bypass valve to the position. Red
lever points up as shown.
18. Set the colored valves to the positions.
Green valve points left
Blue valve points right
1. Black tank should be empty prior to winterizing.
2. Rinse the black tank prior to blowing it out with air.
3. Attach the 4” sewer hose to the dump connector under the RV.
4. Open the waste gate valve for the black tank (under the RV).
Filters should be replaced at the beginning of the camping
season or if they have been exposed to contaminated water, sanitizer
or antifreeze.