KX100
Section 2
5
Getting Started
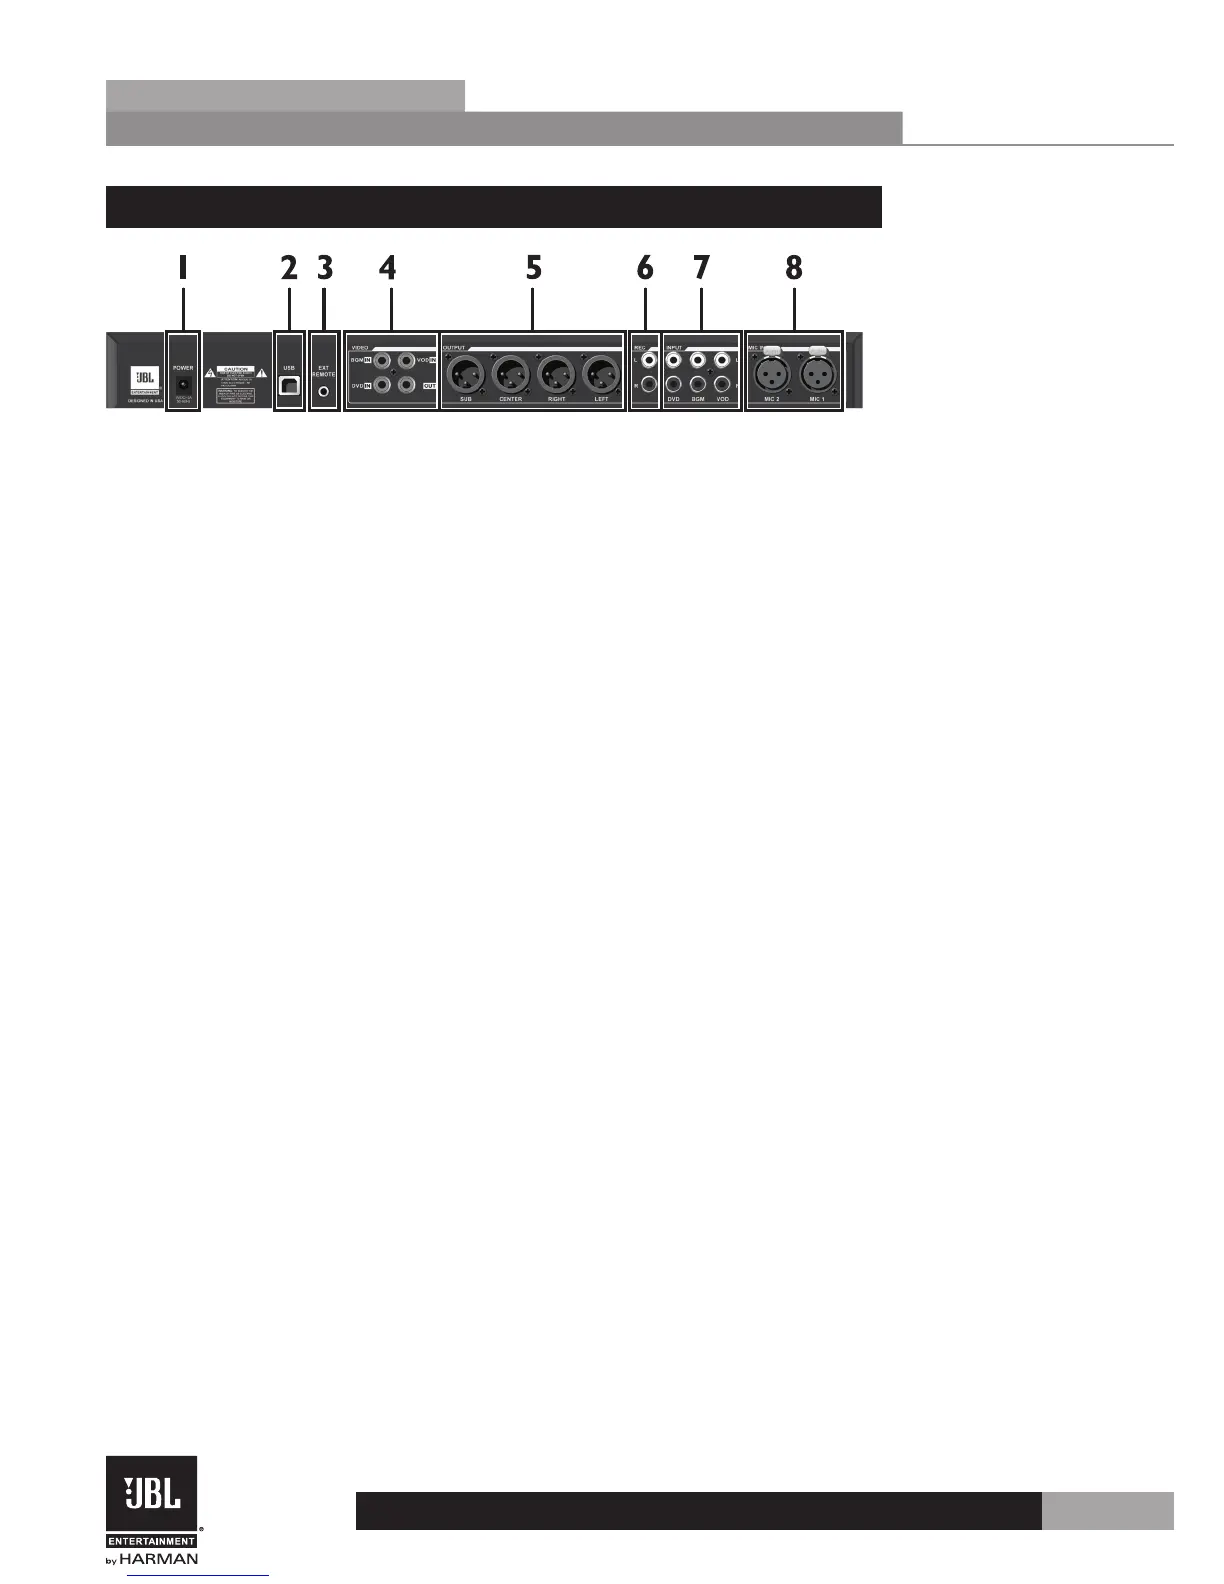
2.3 Rear Panel
1 . Power Jack
Connect the supplied power supply to this jack.
2 . USB Port
This port allows you to connect the KX100 to a Windows PC for control using the
KX100 Software GUI and for firmware updates.
3 . EXT Remote Jack
Use this jack for connecting a third party remote control.
4 . Video Jacks
These composite video connections allow you to connect up to 3 video sources and 1
video monitor, allowing the processor to perform not only audio switching, but also
video switching. Here’s a brief description of these connections:
• BGM IN – Use this input for connecting video accompanying a background music source
• DVD IN – Use this input for connecting video from a DVD player.
• VOD IN – Use this input for connecting video from a Video On Demand system.
• OUT – Connect this composite output to your video monitor.
5 . Audio Outputs
Connect these outputs to your amplifier(s) or powered speakers.
6 . REC Outputs
Connect these outputs to an external audio recorder for recording karaoke
performances.
7 . Line Inputs
Connect your line level audio sources to these RCA inputs. Here’s a breakdown of
these connections:
• DVD IN – Use this pair of inputs for connecting audio from a DVD player.
• BGM IN – Use this pair of inputs for connecting audio from a background music source.
• VOD IN – Use this pair of inputs for connecting audio from a Video On Demand system.
8 . Mic Inputs
Use these microphone inputs when connecting microphones via XLR connections or
from wireless microphone receivers.
Note: These microphone inputs are paralleled with the Mic 1 and Mic 2 inputs on
the front panel. Therefore, you should not use both Mic 1 inputs or Mic 2 inputs
simultaneously. Since the Mic 3 input is not paralleled to any other inputs, it is safe
to use it with any combination of the Mic 1 and Mic 2 inputs (front or rear).