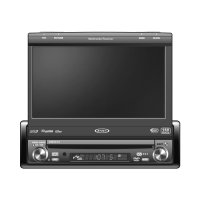
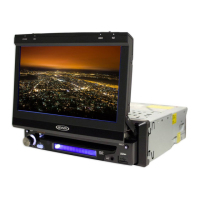
VM9313
@~
FAD-BAL
EQ IUser
":~mm
o~~~r~~
14
ill
lID
[]I]
.14-lill
~
EJEJEJ
EJ
BASS MID
THEB
SUB
IUser I
8.
••
Select
9.
Band
••
If additional steering wheel control buttons are available on
the vehicle, function
7 18 may be assigned the "Select"
feature. This feature
1function may not be available on some
vehicles.
Select Operation
If "Select" (function 7 or 8) is held down and function 4
is
pressed momentarily, Preset Up will be selected. If "Select"
(function 7 or 8) is held down and function 5 is pressed
momentarily, Preset Down will be selected.
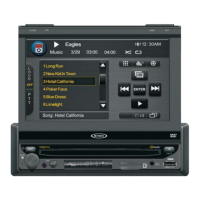
Audio
Control
Menu
The Audio Control feature allows you to easily adjust your
audio system to meet the acoustical characteristics
of
your
vehicle, which vary depending on the type
of
vehicle and its
measurements. Proper setting
of
the Fader and Balance
boosts the effects
of
the cabin equalizer.
Press the AUDIO button (5) on the front panel or touch the
EQ button on the left side
of
the TFT screen
to
display the
audio menu.
To
adjust an audio feature:
1.
Use the touchscreen
or
press the
(»1)/(1«)
buttons (14,
22) on the remote control to highlight the audio feature
to
be
adjusted.
2.
Touch the screen to select an option to adjust. Touch
the yellow box next to the "EO" label or press the
AUDIO control (5) repeatedly
to
view available preset
EO options.
3.
Touch the +1- buttons on the screen or press the
1«,
»1.
»,
or«
buttons (17, 19,
14,22)
on the remote
auxiliary device connected to the
AN
INPUT on the front
of
the radio.
You
cannot directly control external devices
connected to the
AN
INPUT.
Selecting a Source While Navigating
While navigating, other sources may be selected and listened
to such as AM-FM Tuner, CD, etc.
To
select a source, press
the
<!>
ISRC button (6) and then select a source from the
Front Source Menu. Navigation voice prompts will be heard
automatically, although the navigation map cannot be seen.
(The selected source audio will be muted until the navigation
voice prompt command is completed, after which the source
audio will resume.)
Volume
Adjustment
To
increase
or
decrease the volume level, turn the AUDIO
control (5) on the front panel or press the
VOL+I
VOL-
buttons (15, 16) on remote control. When the volume level
reaches "0" or "40", a beep sounds, indicating that the
adjustment limit has been reached. The volume ranges from
"0" to "40". The LCD
or
TFT screen displays the volume level
for 3 seconds.
Programmable Tum-On Volume
This feature allows the user to select a turn-on volume setting
regardless
of
the volume setting prior to turning the unit off.
To
program a specific turn-on volume level, turn the
AUDIO
control (5) to adjust the volume to the desired turn-on volume.
Press and hold the AUDIO button while the yellow speaker
icon and level indication is displayed on the screen. The unit
will beep to confirm your turn-on volume setting.
Steering
Wheel
Control
(SWC)
The VM9313 is compatible with the PAC (Pacific Accessory
Corporation) steering wheel control adapter SWI-PS. A
3.5mm female connector (labeled "SWC Interface") on the
back
of
the head unit allows connectivity to the PAC adapter.
Please refer to the instructions included with the PAC adapter
for detailed installation information.
SWC
Functions
The following controls are available for most vehicles:
1.
Vol Down
2.
Vol Up
3.
Mute
4. Seek Down
1Previous Track 1•• Preset Down
5.
Seek Up 1Next Track I •• Preset Up
6.
SRC (Source)
7.
••
Select
~
<DRlghtAudIO
Ir§
IZ>LoftAudlO
r:::~Ground
11r=~V1-
~
3.5mm Media Cable (Included)
OPERATING
INSTRUCTIONS
Power
On /
Off
Press the
<!>/SRC
button (6) on the unit (or the
<!>
button (4)
on
the remote control) to turn the unit on. The buttons on the
front
of
the unit light up and the current mode status appears
in
the LCD screen (15).
You
can also turn on the unit by
pressing the OPEN button (4) and opening the TFT screen.
Press
andhold the
<!>
button to power offthe unit.The monitor
is drawn back into the main compartment.
Audible
Beep
Confirmation
An audible beep tone confirms each function selection. The
Beep tone can be disabled through the Setup menu.
Mute
Press the AUDIO button (5) on the front panel
or
the MUTE
button (3) on the remote to mute the volume from the unit.
Press the button again to restore the volume. "MUTE" is
displayed on the LCD. Adjusting the volume or using any
of
the audio setup features cancels the mute function.
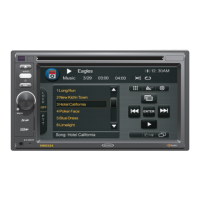
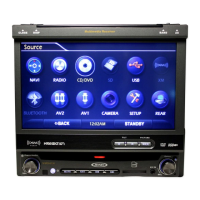
Playing
Source
Selection
Press the SRC button (6) on the front panel or the SRC
button (8) on the remote to change between available playing
sources. The playing mode is displayed on the TFT and LCD
screens.
Accessing
External Devices
External peripheral devices can be connected to this unit via
the rear RCA inputs or the
AN
INPUT connector (11) on the
front
of
the unit. Select "AUX-IN1" to access an auxiliary
device connected to the
AN
INPUT on the front panel. Select
"AUX IN2" mode to access a device connected to the rear
AUX
IN
connectors.
======J~
~
Connect the external device to the 3.5mm Media Cable and
then plug the cable into the
AN
INPUT connector (10) on the
front
ofthe
radio. Select "AUX IN1" mode to access an
8
 Loading...