26
3
4
5
Check your trial run
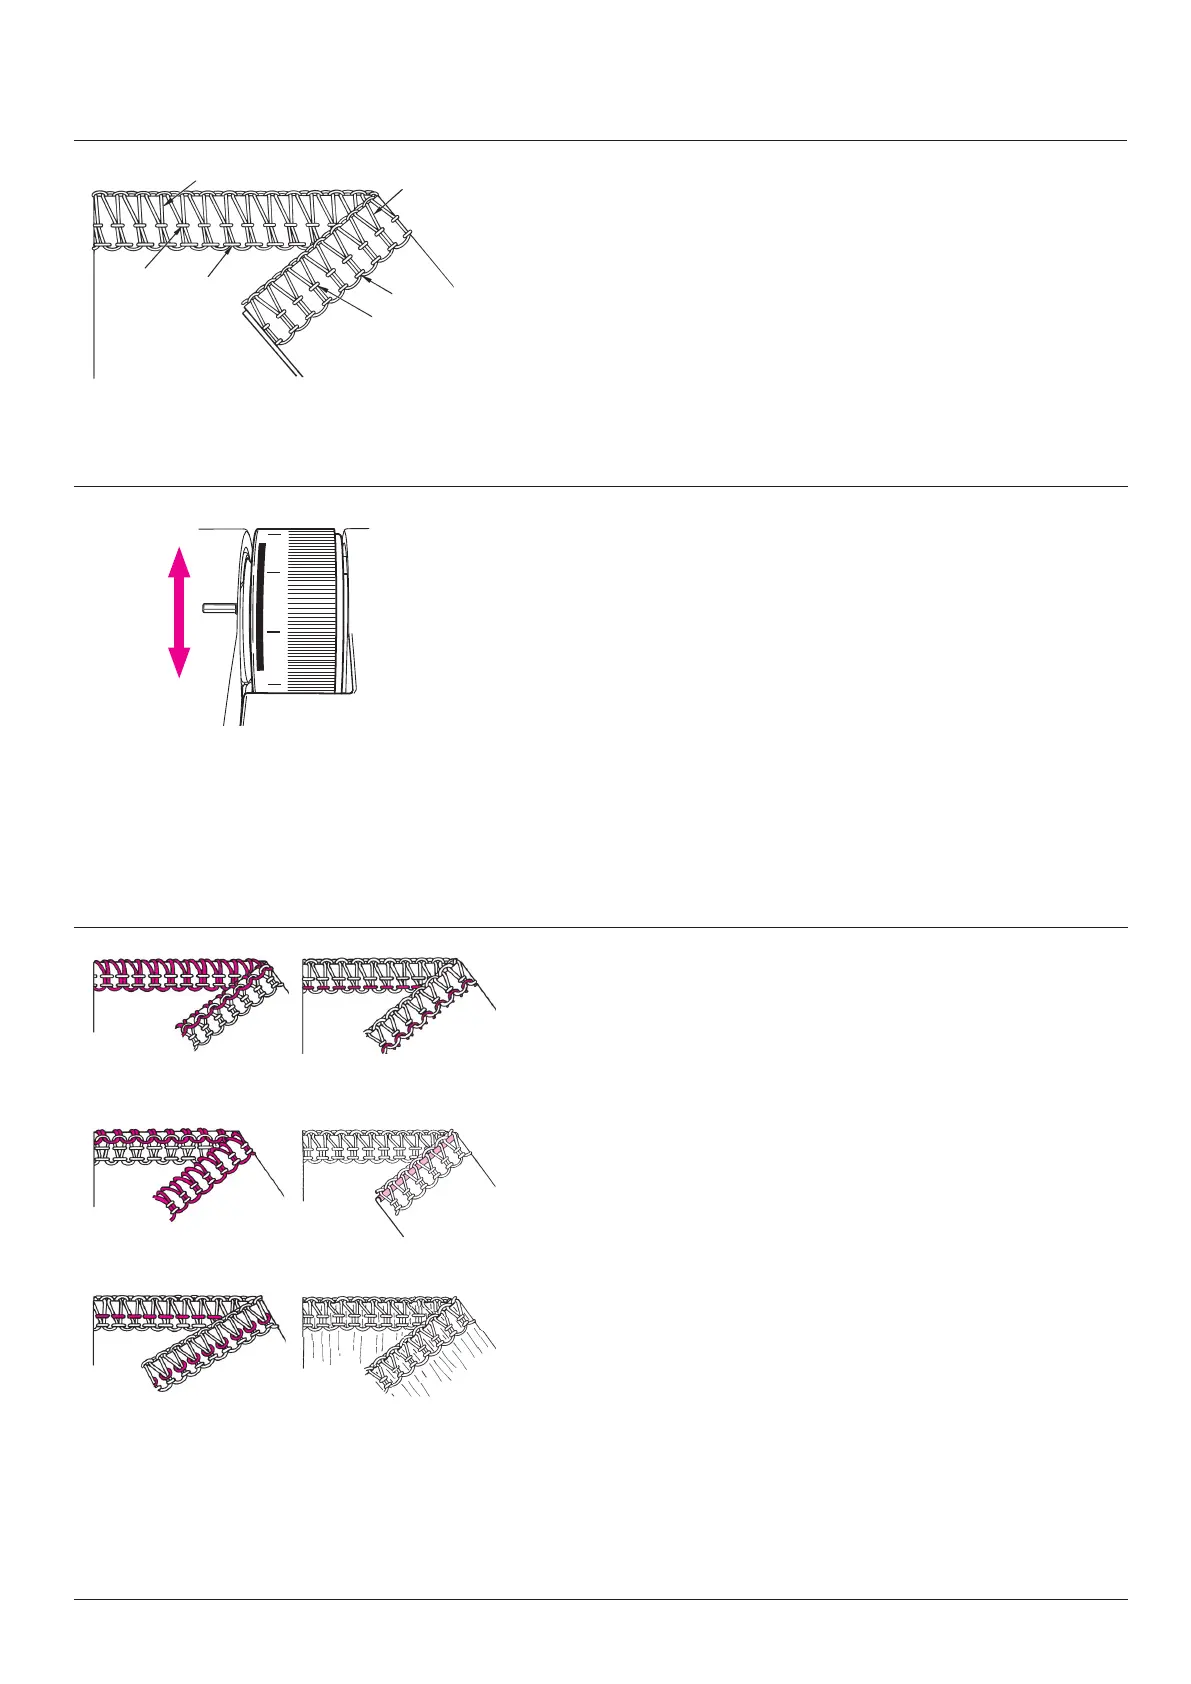
4/3 Thread OL
1. Upper looper thread (purple).
2. Lower looper thread (red).
3. Right-hand needle thread (green).
4. Left-hand needle thread (beige).
Perfect stitch formation is when both looper threads meet at the fabric
edge. The needle threads form straight stitches for a stretchy and dura-
ble seam.
Thread tension
Thread tension should be properly adjusted to suit the various types of
work.
The ideal tension setting for most fabrics and threads is between 3 and 5.
However this can vary quite considerably when special threads such as
lament, woolly nylon, buttonhole twist (cordonnet), pearl yarn or deco-
rative threads are used. Only use decorative threads in the looper. The
thread must move easily and without resistance through the looper eye.
Innitely variable adjustments can be made from 1 - 9.
Turn the dial downwards for less tension.
Turn the dial upwards for more tension.
1
2
4
3
4
3
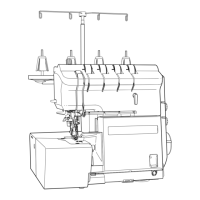
Thread tension
Adjusting the thread tension
Turn the tension dials by quarter or half number, then test sew again
and check the result.
• The loops are formed on the underside.
Tighten the upper looper thread tension, (purple) or loosen the lower
looper thread tension, red (A).
• The loops are formed on the upper side.
Tighten the lower looper thread tension, (red) or loosen the upper
looper thread tension, purple (B).
• The right-hand needle thread forms loops on the underside.
Tighten the right-hand needle thread tension, green (C).
• The left-hand needle thread forms loops on the underside.
Tighten the left-hand needle thread tension, beige (D).
• The edge of the fabric curls up, tension of both looper threads is
too tight:
Loosen upper and lower looper thread tensions, purple and red
(E).
• The fabric puckers during sewing:
Loosen the right- or left-hand needle thread tension, green or
beige (F).
A
B
C
D
E
F