30
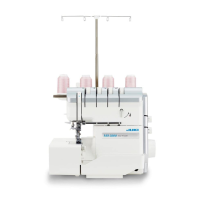
Cover stitch with three threads (atlock)
1. Deactivate the upper knife.
2. Use a decorative thread as the upper looper thread. (Filament
thread is best-suited as the needle thread and the lower looper
thread. However, spun thread can also be used.)
3. Adjust the tension regulating dial and stitch length adjustment
dial.
Adjust the dials so that the thread tension is slightly reduced.
Scale mark of
tension regulat-
ing dial
Thread tension of left or right needle 1 - 3
Thread tension of upper looper 1 - 5
Thread tension of lower looper 5 - 7
Stitch length adjustment dial 2 - 2.5
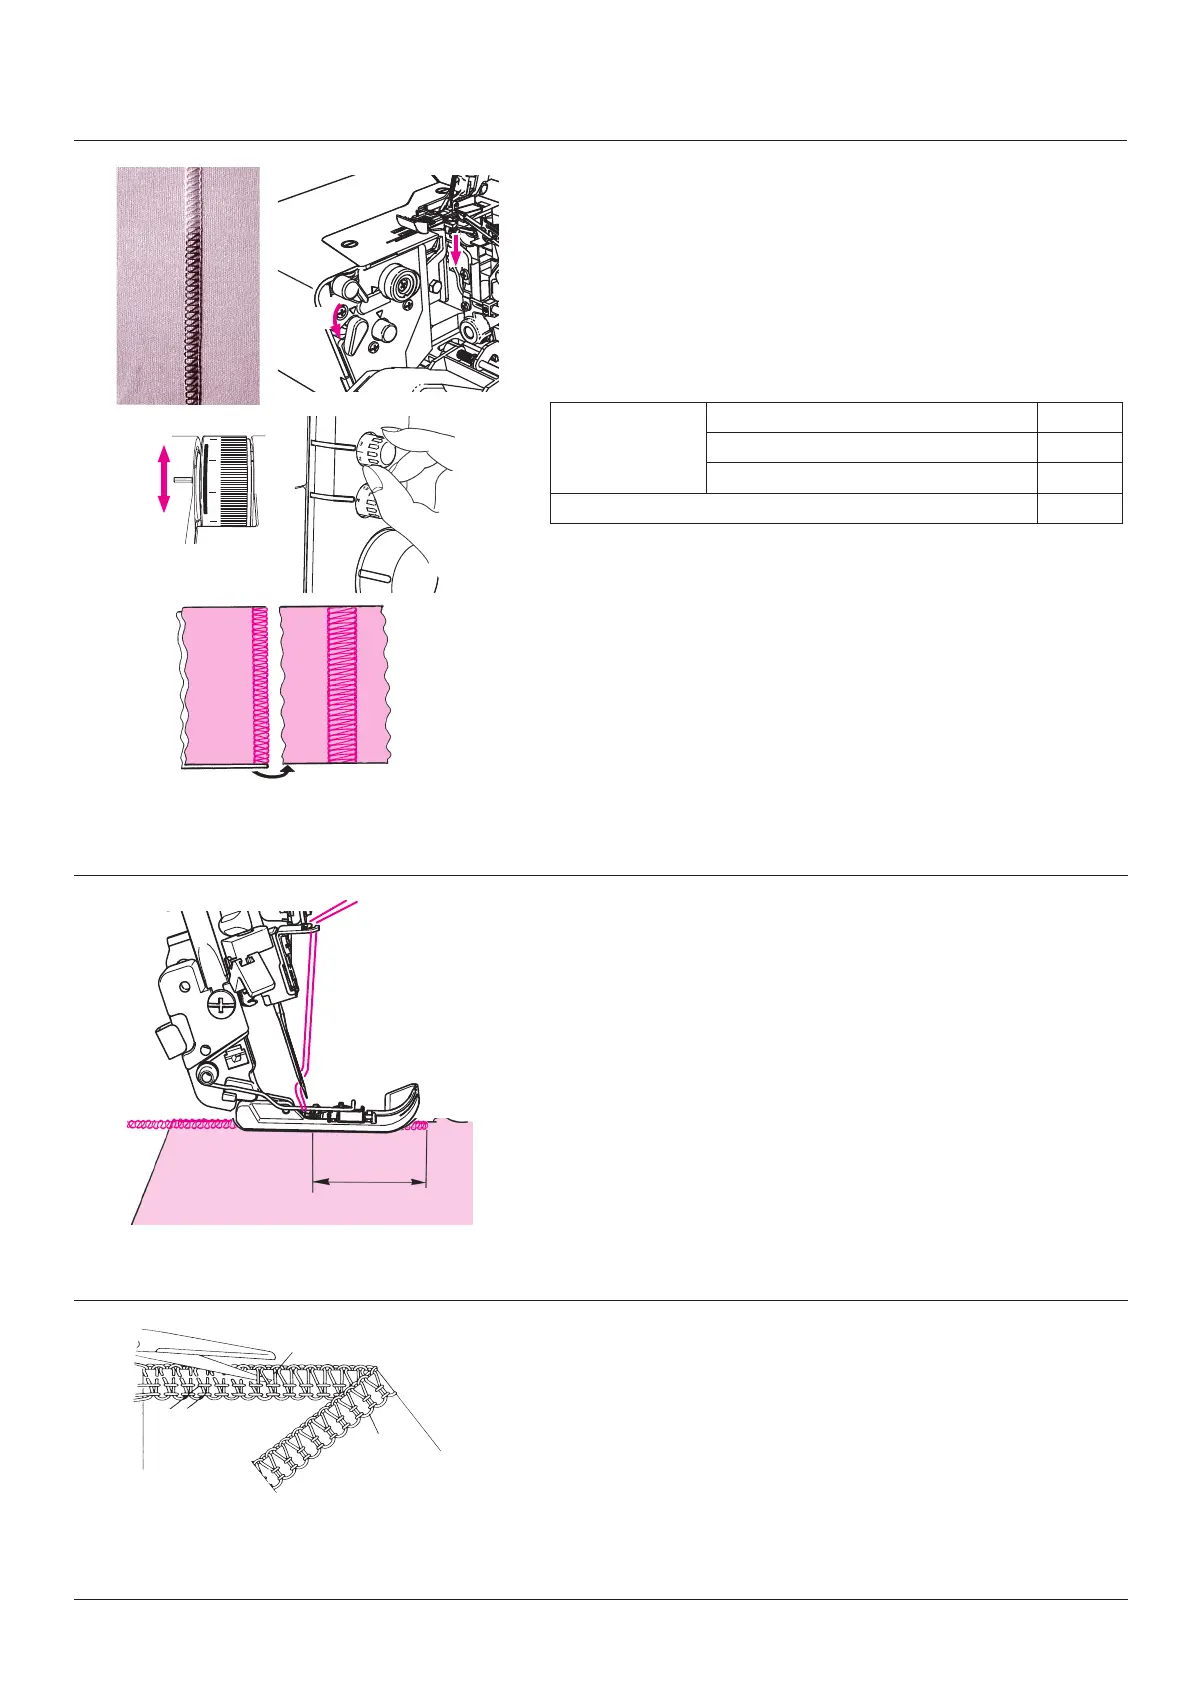
4. Use either the left needle or the right needle only.
In the case of the left needle: Wide cover stitches are sewn. (5 to
7.5 mm)
In the case of the right needle: Narrow cover stitches are sewn. (3
to 5.5 mm)
5. Fold the material in two. Carry out sewing with a preset overlock-
ing width.
6. After the completion of sewing, unfold the material.
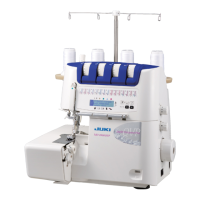
Thread breakage during sewing
Sew o immediately at an angle and remove the work. Re-thread.
If the upper or lower looper thread breaks during sewing, re-thread-
ing is necessary. Remove both the broken and unbroken looper
threads. Then, set the threading lever to the threading side to carry
out threading of the upper and lower loopers.
First thread the looper and then the needles.
Start sewing again about 2 - 3 cm in front of the break.
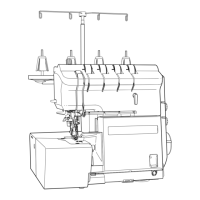
Unpicking seams
Using sharp scissors, cut the loops (C).
Pull the needle thread (D) and the stitches will come undone.
23
2-3 cm
Settings, practical sewing / Bedienen en praktisch naaien
Bedienen, Praktisches Nähen / Couture pratique
C
D
C
D
Thread breakage during sewing
Sew off immediately at an angle and remove the work. Re-thread.
If the lower looper thread has broken, cut off both needle threads at the needles and
remove surplus thread from below.
First thread the looper and then the needles.
Start sewing again about 2 - 3 cm in front of the break.
Draadbreuk tijdens het naaien
Naai direct in een hoek van de stofkant af en verwijder uw werkstuk. Rijg de machine
opnieuw in. Als de ondergrijper draad is gebroken, knip dan de draden af bij de naalden
en verwijder de overblijfselen van onder af. Rijg eerst de grijper in en dan de naalden.
Begin opnieuw te naaien op circa 2-3 cm voor de plek waar de draadbreuk ontstond.
Fadenreissen während des Nähens
Sofort im Winkel von der Soffkante wegnähen, Nähgut entfernen. Neu einfädeln. Ist der
untere Greiferfaden gerissen, beide Nadelfäden beim Nadelöhr abschneiden und
entfernen. Zuerst den Greifer einfädeln, anschliessend die Nadeln. Ca. 2-3cm vor der
Fadenriss-Stelle erneut mit Nähen beginnen.
Cassure du fil durant la couture
Atteindre aussitôt le bord du tissu en réalisant un angle aigu. Puis retirer l’ouvrage.
Recommencer l’enfilage. Si c’est le fil du boucleur inférieur qui est cassé, il faut alors
couper les deux fils d’aiguilles au niveau du chas, et les enlever. Enfiler d’abord le
boucleur, ensuite les fils d’aiguilles. Reprendre la couture environ 2 à 3 cm avant l’endroit
où a eu lieu la cassure.
Unpicking seams
Using sharp scissors, cut the loops (C).
Pull the needle thread (D) and the stitches
will come undone.
Zoom uithalen
Met een scherpe spitse schaar de
lussen knippen ( C). Trek aan de naald
draden en het stiksel komt los.
Stiche auftrennen:
Mit einer spitzen Schere die Schlingen
zerschneiden (C). An den Nadelfäden
ziehen (D), der Stich löst sich auf.
Découdre une couture
Avec un ciseau pointu, couper les boucles
(C). Tirer sur les fils d’aiguilles (D). Ainsi, la
couture se libère.
C
D
C
D
2-3 cm
20
设置和实际缝纫
缝纫中断线、缝口合拢
马上停止缝纫,取出面料。重新穿线。
如果下弯针断线,则需要剪断左、右机针线,并从下面拉掉余线。
先穿弯针线,再穿机针线。
在离接口处2-3cm重新开始缝纫。
缝口的拆法
用锋利的剪刀剪断线圈(C), 拉机
针线(D), 针脚就被拆开。
2-3 cm
Practical Sewing - Overlock
❸
3
4
5
❸
❶
2-3 cm