31
❹
❶
Securing thread ends at the beginning and end of sewing
Overlock stitches can unravel if the threads are not secured at the
beginning and end of sewing. Secure the thread ends.
Securing thread ends with the overlock machine
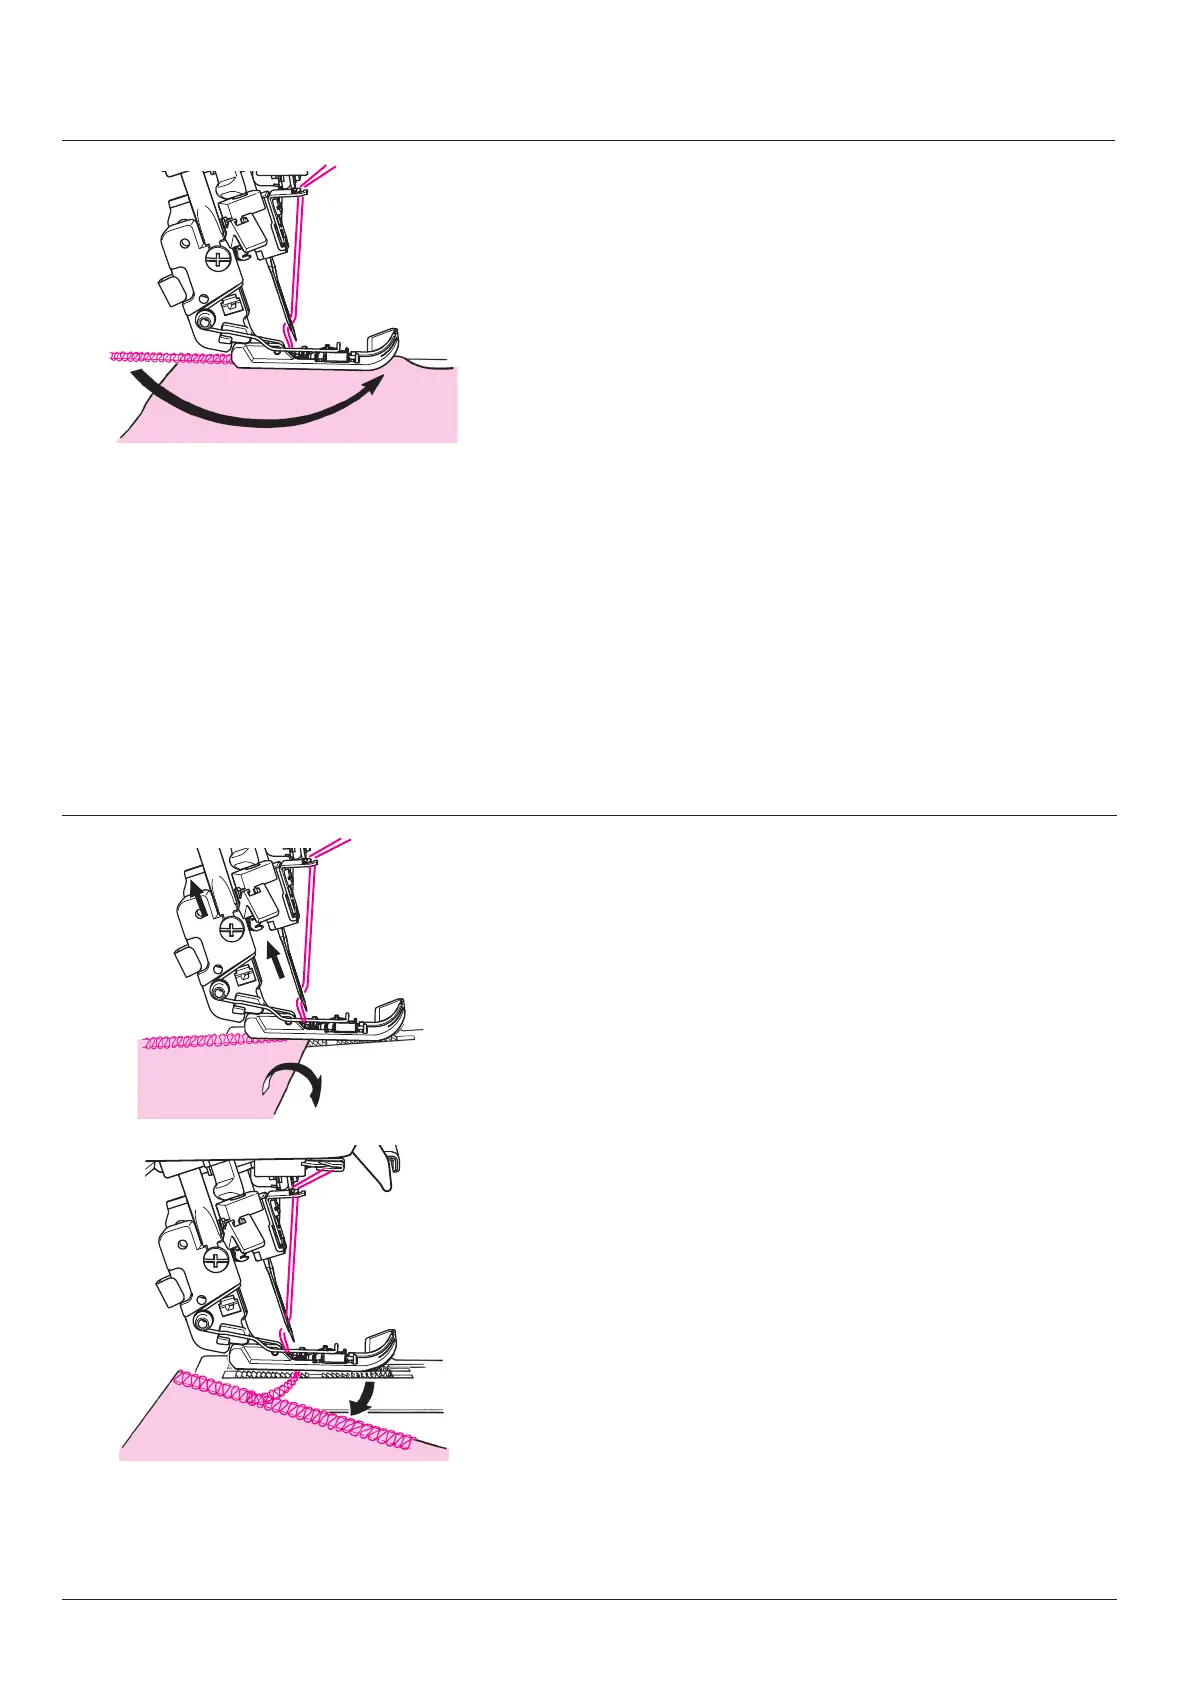
1) Securing thread ends at the beginning of sewing
1. Pull out chain-o thread produced at the beginning of sewing by
3 to 4 cm.
2. Sew the material by two or three stitches.
3. Lower the needle and raise the presser foot.
4. Draw out the chain-o thread toward you and place it between
the presser foot and the material from the left side.
5. Lower the presser foot and sew the chain-o thread on the mate-
rial.
* If you do not sew the chain-o thread on the material, produce a
longer chain-o thread at the beginning and end of sewing. Then,
make a knot of the chain-o thread or put the chain-o thread
under the seam with a wool needle.
* When stitches cross each other, chain-o thread is automatically
secured.
Practical Sewing - Overlock
2) Securing thread ends at the end of sewing
1. Stop the needle at the end of material.
2. Lift the needle.
3. Raise the presser foot.
4. Turn the material upside down. Lower the needle so that it enters
the outside edge of nished seam.
5. Lower the presser foot.
6. Carry out sewing to produce chain-o thread by 2 to 3 cm taking
care not to allow the nished seam to come in contact with the
upper knife. Remove the material.
7. Secure the chain-o thread.
❹
❷
❸
❻