11
Preparing the machine / Using the machine
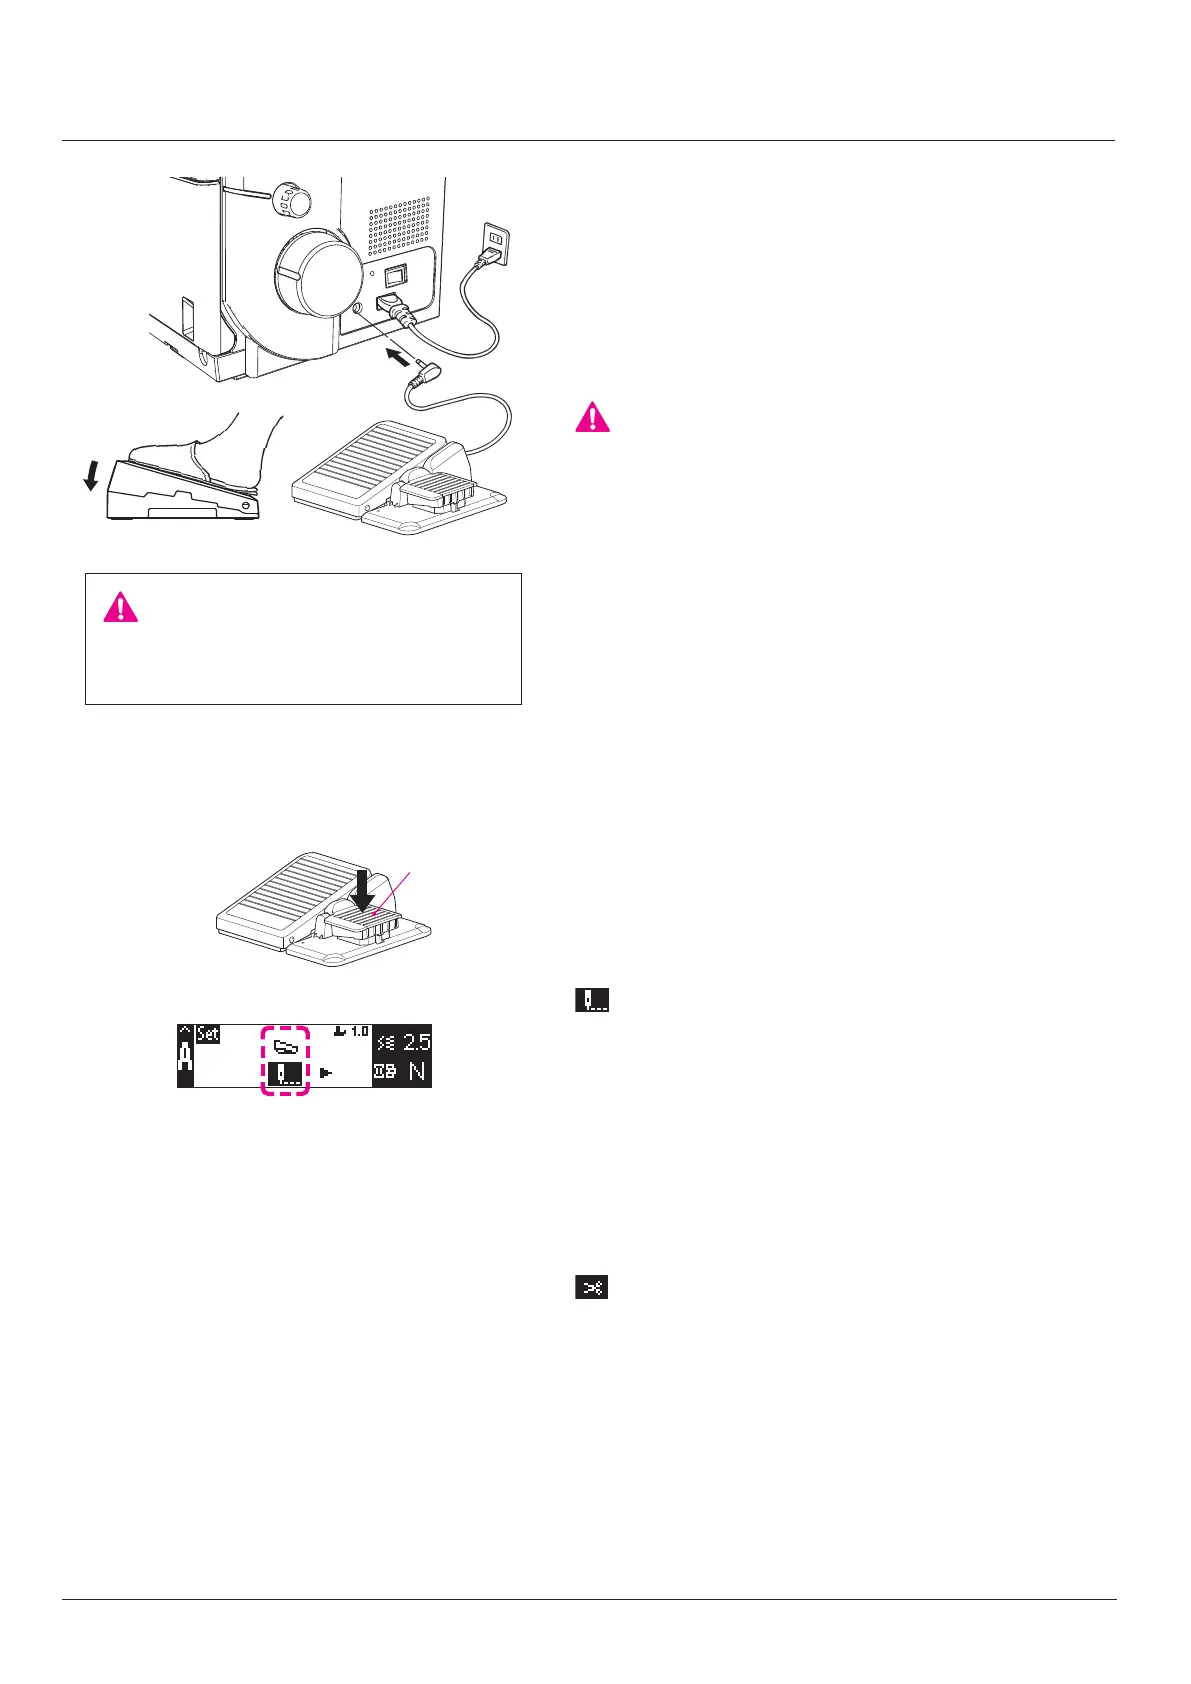
Attaching the foot control
1. Insert the power cord plug into the machine socket.
2. Insert the controller plug into the controller plug-in port.
3. Insert the power cord plug into the indoor electrical outlet.
The foot control regulates the sewing speed. The sewing
speed can be adjusted by increasing or decreasing the pres-
sure on the foot control.
“WARNING’’
This appliance has a polarized plug (one blade wider than
the other).
To reduce the risk of electric shock, this plug is intended to t
in a polarized main socket only one way.
If the plug does not t fully in the polarized main socket,
reverse the plug. If it still does not t, contact a qualied
electrician to install the proper polarized main socket. Do not
modify the plug in any way. (for USA, Canada only)
CAUTION:
Turn OFF the power switch before plugging or
unplugging.
2
1
3
• Half stitch
It is possible to sew half stitches by lightly depressing the
foot switch (A).
• Low-speed inching stitch
Press and hold down foot switch (A) to carry out sewing at
a low speed.
■
Setting the foot switch
In the initial setting, the foot switch has been set to "half
stitch/low-speed inching stitch".
It is possible to select "chain-o thread cutting" by changing
the setting. (Refer to page 9)
: Half stitch/low-speed inching stitch
: Chain-o thread cutting
It is possible to cut chain-o thread by depressing the foot
switch (A).
A