ENGLISH
94
for three minutes and then perform the walking test again. Repeat this until the movement is detected.
When you do the test, there must be no movement inside the detection area during the three-minute
waiting period.
Tip: The sensor should not be aimed at direct sunlight, and must not be placed beside equipment that
produces heat or cold (e.g. air conditioning, radiators, fans, ovens, stoves or heaters), as this can trigger
a false alarm. Also perform the walking test in areas that the sensor is not intended to cover, to check that
movements are not detected there.
Installing with screws
Hold the enclosed installation template against the wall where you want to install the sensor and
mark out the drill holes.
Drill the holes and insert the plugs.
Screw the mounting bracket on the mounting surface using the screws supplied.
Secure the motion sensor to the mounting bracket.
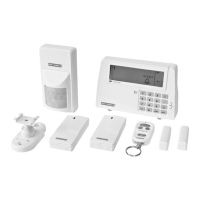
C. Introduction to the remote control
Using the remote control for the Red Shield wire-free home alarm, you can control the system’s Smart
Panel remotely from inside or outside the house. You can arm or disarm the system with the remote
control and, using the panic function, you can trigger the alarm immediately if required.
Starting the remote control
The remote control is supplied with a 12V alkaline battery. Start the remote control by unscrewing and
removing the back. Then carefully remove the transparent plastic insulation tab from the battery. Insert
the battery in the battery compartment if it has come loose. Ensure correct polarity (see the symbols in
the battery compartment). Replace the battery cover.
Activating the remote control for the Smart Panel
NOTE! Before the supplied remote control or additional remote controls can be used, they must be
activated (added to the system) as instructed below.
Buttons Description Note
1 (1234/4-
digit PIN
code)
+
You must go to standby
mode before you activate
a new remote control for
the Smart Panel.
* How to check you are in standby mode:
Key in the factory-set PIN code 1 2 3 4 or your new 4-
digit PIN code.
Press .
The following appears on the Smart Panel when in
standby mode.
(One beep indicates that you have entered a valid PIN
code. Three beeps indicate that you have entered an
incorrect code.)
2 (1234/4-
digit PIN
code)
+
Key in the factory-set PIN
code 1 2 3 4 or your new
4-digit PIN code followed
by ..
The following appears on the Smart Panel: