1. Ensure that the voltage across the DC power source cable leads is 0 V and that there
is no chance that the cable leads might become active during installation.
2. Attach an electrostatic discharge (ESD) grounding strap to your bare wrist, and connect
the strap to one of the ESD points on the chassis. For more information about ESD,
see the SRX3600 Services Gateway Hardware Guide.
3. For each power supply:
a. Remove the clear plastic cover protecting the terminal studs on the faceplate.
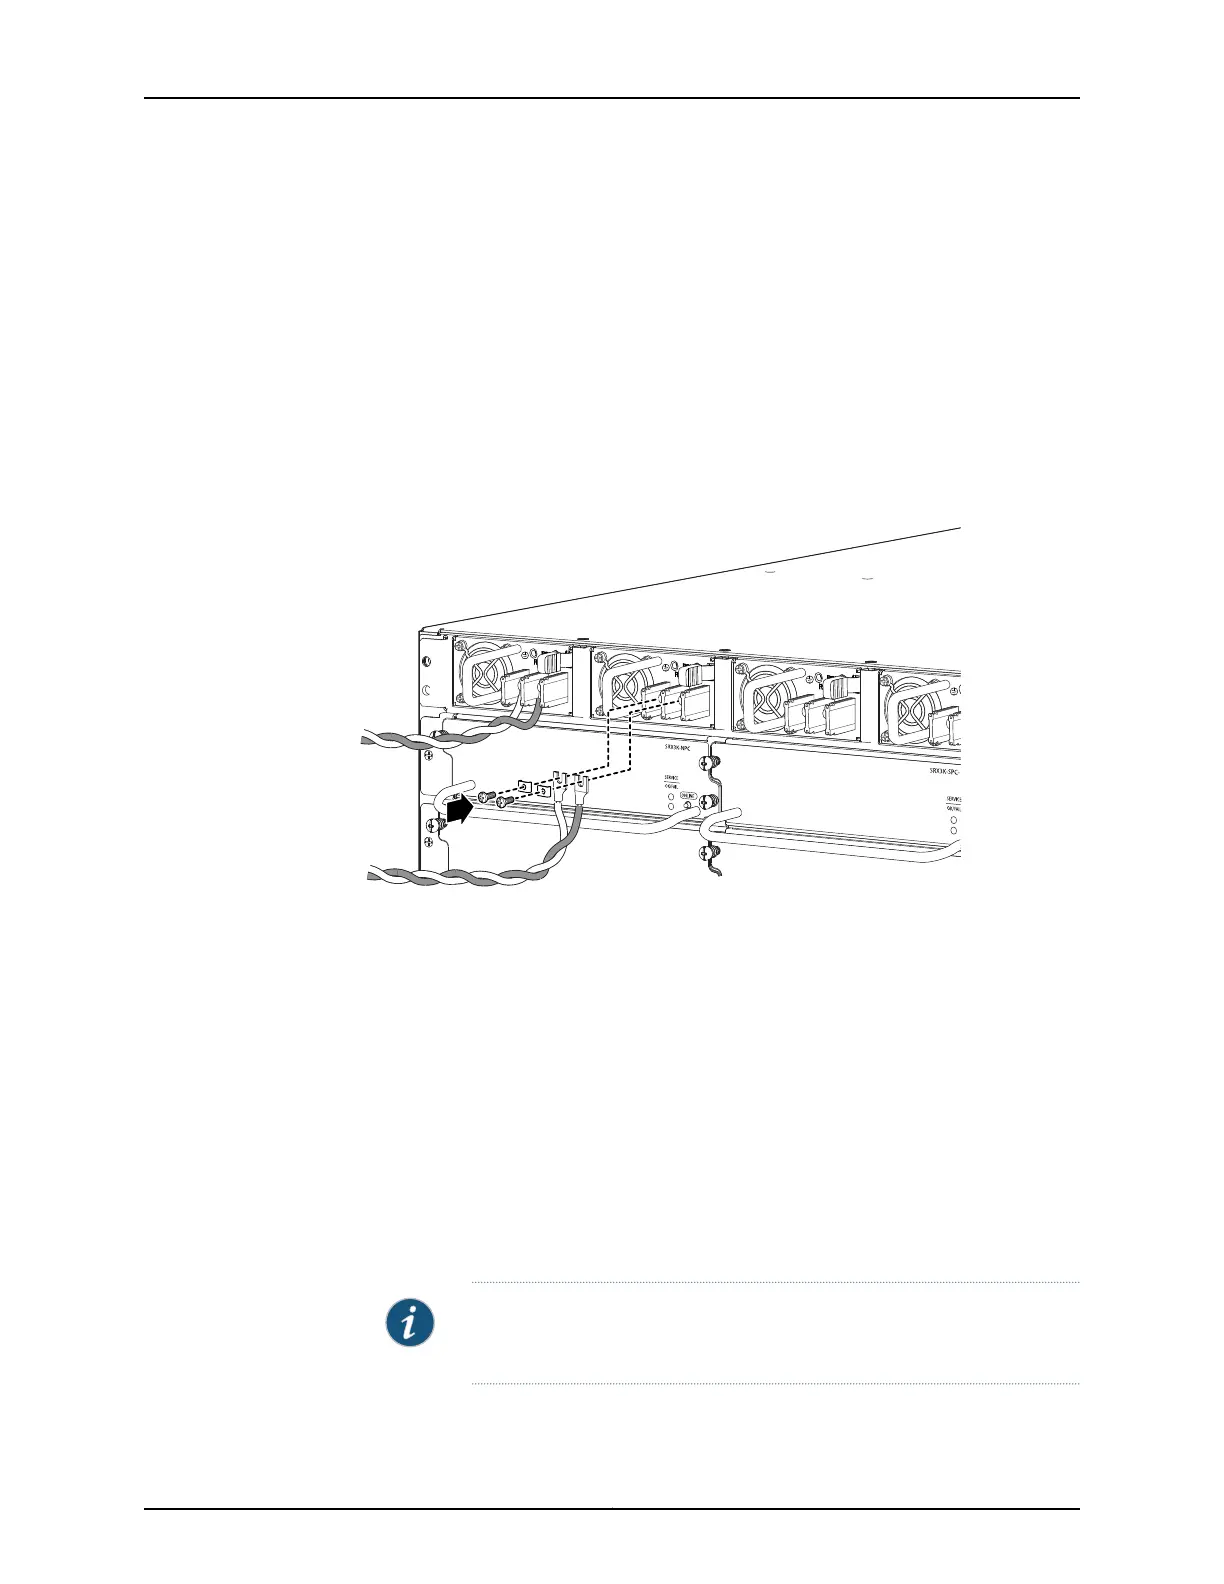
b. Attach the positive (+) DC source power cable lug to the RTN (return) terminal as
shown in Figure 16 on page 19.
Figure 16: Connect DC Power Cables
c. Secure the cable lug to the terminal on the power supply, first with the square
washer, and then with the screw. Apply between 23 lb-in. (2.6 Nm) and 25 lb-in.
(2.8 Nm) of torque.
d. Attach the negative (–) DC source power cable lug to the –48V (input) terminal.
e. Secure the cable lug to the terminal on the power supply, first with the square
washer, and then with the screw. Apply between 23 lb-in. (2.6 Nm) and 25 lb-in.
(2.8 Nm) of torque.
f. Replace the clear plastic cover over the terminal studs on the faceplate.
4. Disconnect the ESD grounding strap from the chassis, and connect it to an approved
site ESD grounding point. See the instructions for your site.
5. Connect each DC power cable to the appropriate external DC power source.
NOTE: For information about connecting to external DC power sources,
see the instructions for your site.
19Copyright © 2011, Juniper Networks, Inc.
Connect Power to a DC-Powered Services Gateway